Paragliding P3 and P4 skills: training roadmap and getting licensed
September 29, 2026 • 1 views
Share this post:
From P1–P2 student to independent P3 pilot and thermal-ready P4: skills to drill, pass criteria, exams, SIV and a realistic training roadmap at Mebayluon.
After the P1–P2 course, almost every student asks us the same question: when can I fly on my own? The honest answer is: when you reach P3. And the road from P2 to P3, then on to P4, is longer, harder and far more rewarding than those first seven days. This article is what the Mebayluon instructor team wants every student to know before starting that stage: what P3 and P4 mean in the different rating systems, which techniques to train, how to train them, how progress is measured, what the exams cover, and how long the path realistically takes.
We follow the IPPI framework the school uses, cross-checked against APPI, BHPA and the P1–P4 training standards. The numbers in this article – flights, hours, turn times, landing radii – come from those standards. Where systems disagree we give the range, so you can see that no single number is absolute. Numbers are minimums; the person who signs you off as ready is your instructor.
What are P3 and P4? Comparing rating systems
“P” is the common Vietnamese shorthand, taken from ParaPro – the training programme behind the IPPI scale that CIVL/FAI created so countries could compare their rating systems. Every federation and association writes its own syllabus, so two “level 3” pilots may not have trained exactly the same things. IPPI (SafePro 2026) (SafePro Para) calls level 3 Active Flying and level 4 Soaring; the older ParaPro put ridge soaring at level 3 and thermalling at level 4. The table below puts the names side by side.
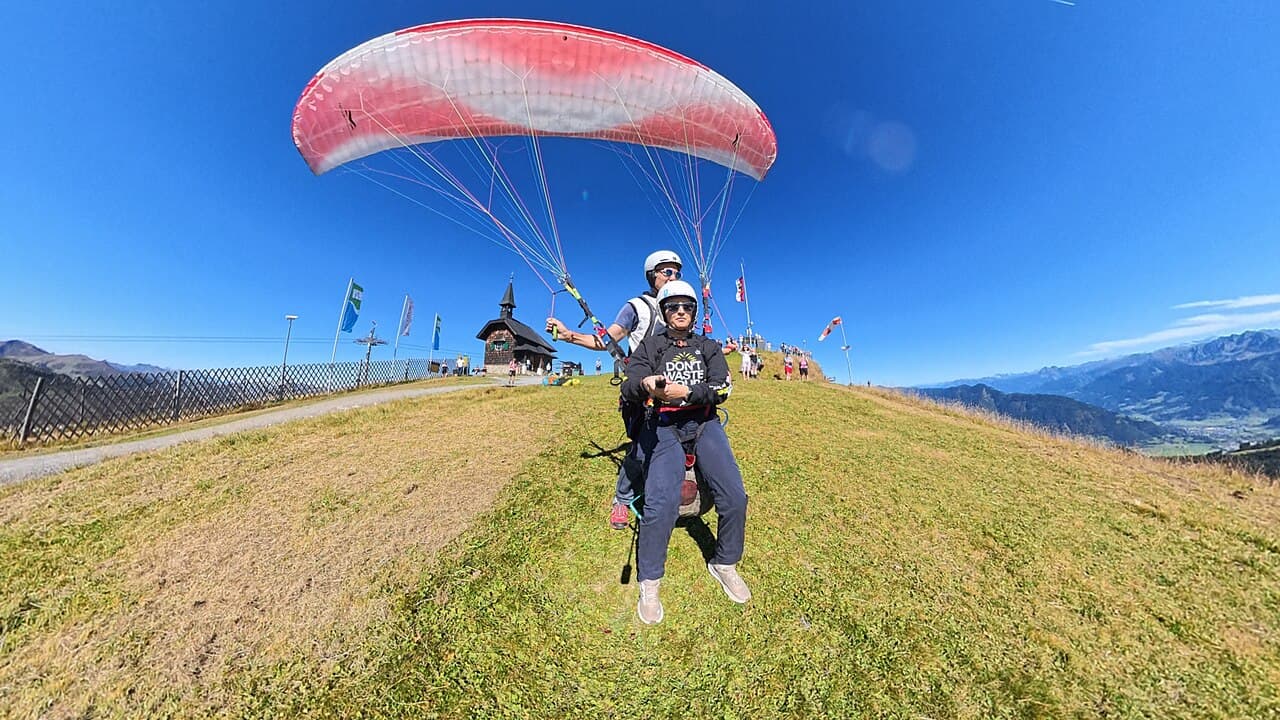
An instructor briefs the exercise at launch: at P3–P4 every flight has a specific goal
Level names across systems. The APPI / BHPA column is an estimate based on skill content, not an official conversion table.
The most important boundary in that table is not a name but the word student. A student flies only under direct instructor supervision, on a school glider and harness checked by the instructor. A pilot assesses conditions, decides whether to fly, and knows when to seek guidance. The systems disagree on where that line falls: old ParaPro says a level 3 pilot should be recognised as a pilot; SafePro 2020 keeps you a student through the first four levels. The most practical reading: P3 is when you start flying independently in mellow conditions at familiar sites; P4 is when you have the skills to use lift – thermalling, ridge soaring in stronger wind – and to prepare for your first cross-country flight.
Where you start after the P1–P2 course
Mebayluon’s P1–P2 course runs for 7 days on the standard IPPI syllabus, with 5–10 solo flights depending on the weather. It does not issue a licence: when it ends, you are still a student. That is not us being strict – 5–10 flights are simply not enough for someone to handle every situation at the landing field alone, even though in those seven days you learn the foundations: pre-flight checks, forward and reverse inflation, launching with a stop line, turning, drift correction, approach and landing.
After each flight the student is debriefed by the instructor and given the next exercise
To get a licence, our students train for about 1–2 more months to complete their skills – above all, landing safely on their own without the instructor talking them down on the radio – and then take the P3 exam directly. You do not need to sit P1 or P2 exams: organising an exam is costly, and at P1–P2 level it would not make you any safer. The standards give these reference experience milestones:
Milestone
Experience required
Source
Entry to the P23 course (basic soaring)
At least 30 solo flights, at least 10 hours, safe independent launch and landing
P2–P4 training standard
Old ParaPro level 3
60 flights, 10 hours, 5 sites (3 in the mountains), 2 hours in lift
ParaPro instructor manual
IPPI (SafePro 2026) level 4
25 flights at 3 sites, 15 hours including thermal flying
IPPI (SafePro 2026)
Entry to the P34 course (advanced soaring)
At least 100 solo flights, at least 30 hours
P2–P4 training standard
Reference experience milestones by standard (minimums, not targets)
Two things stand out in that table. First, the systems differ a lot – IPPI (SafePro 2026) asks for only 15 hours at level 4, while the P34 training standard asks for at least 100 flights and 30 hours just to enter the course. Second, hours are necessary but not sufficient. Someone with 60 straight glides from launch to landing is not necessarily better than someone with 30 flights that each had a clear training goal. Mebayluon follows IPPI, and we sign levels off on the skills you can demonstrate, not only on the numbers in your log.
What does reaching P3 mean in practice? The way we assess it, a P3 pilot can do the following without being prompted:
Read the wind at launch and landing, decide whether to fly – and have the nerve to decide not to.
Launch cleanly forward and reverse, with a clear abort decision point.
Keep the wing steady overhead in slightly active air using brakes and weight shift.
Fly smooth 360° turns both ways, use figure 8s to lose height, and use big ears and the speed bar at the right time.
Recognise a small asymmetric collapse and respond correctly without over-reacting.
Plan their own landing pattern and land on their feet within 15–20 m of the target.
Know the right-of-way rules and fly safely with other gliders around.
Keep a complete and honest logbook.
P3 techniques: what to train, how, and when you pass
Each technique below covers purpose, how to drill it, pass criteria and common mistakes. One rule applies to this whole stage: train only one new thing per flight, at a safe height, in smooth air, with an instructor following you on the radio. Collapse exercises are done only under instructor supervision, ideally over water on an SIV course.
1. Active flying: controlling pitch and roll
A paraglider is a pendulum: the pilot hangs roughly 7–8 m below the wing, and in moving air the whole system oscillates. Entering lift, the wing drops back, the angle of attack rises and you move towards a stall; when the wing pitches forward, the angle of attack falls and the risk of collapse rises. When one side of the wing meets different air from the other, the glider rolls and may yaw. Active flying means keeping the wing quiet overhead with small, well-timed corrections. APPI material states that at least 80% of incidents can be avoided by active flying.
Keep an even brake pressure of roughly 1–3 kg per side, hands at shoulder height. If pressure drops (wing surging, about to collapse), pull down until pressure returns; if it rises (wing dropping back), let up.
Wing behind you: no brake. Wing surging ahead: brake – quickly and firmly, then release smoothly as soon as the surge is stopped.
Look where you are going and at the horizon, not up at the wing: the horizon dropping means the wing is falling back, the horizon rising means it is surging forward.
Pitching drill: brake to slow the wing, release to let it surge, brake to stop the surge, repeat rhythmically, building amplitude as your instructor directs.
Roll drill: weight shift and one brake to turn about 90°, release, then the other side, building the rhythm; then practise damping the oscillation within one or two swings.
On the ground: keep the wing overhead with the brakes without looking up; ask a friend to tug one A-line so you learn to correct faster.
Pass when: you can induce pitch and roll under control and damp them within one or two swings, and fly through slightly active air without the wing shooting ahead of you. Common mistakes: braking too little and too late when the wing surges (the most common error according to Thermal Flying), holding the brakes low too long after stopping the surge, and fighting every small movement until you are rigid. See also Active flying part 1: pitch control and part 2: damping roll.
2. 360° turns and figure 8s
Continuous 360° turns are the basis of thermalling, of losing height and of every advanced manoeuvre later on. Figure 8s are used to lose height on the downwind side of the landing field without drifting off it. The correct sequence is Look – Lean – Turn: check the airspace and pick a point on the horizon, weight shift towards the turn, and only then pull the inside brake gradually, keeping contact on the outside brake to control speed and bank.
Step 1: slow 360s at a shallow bank, both directions, rolling out on the heading you chose.
Step 2: shorten the time per turn. The Vietnamese P23 standard trains 20 seconds, then 16, then 13 seconds per turn.
Step 3: link several turns – the Vietnamese P3 exam asks for 15 seconds per turn, at least 3 turns – entering and exiting on the same axis.
Step 4: figure 8s – two opposite turns linked in about 26 seconds, with every reversal made into the wind.
In wind, your circle drifts into an ellipse: always allow for drift so you are not pushed towards the hill or behind the field.
Pass when: you turn evenly both ways at about 16 seconds per 360 (P3 exit standard), without oscillation, rolling out on heading; figure 8s tidy in about 26 seconds. Common mistakes: pulling more inside brake while already flying slowly – an invitation to spin; turning on brake alone without weight shift; turning without looking first. If you get dizzy, move only your eyes to the inside wingtip, keep your head still, and tell your instructor.
3. Speed control and the speed bar
You need to know your glider at every hand position. Hands up is trim speed, which on modern wings is close to best glide; light brake around shoulder height is near minimum sink; brakes down to the hips is close to the stall – the wing sinks more, it does not “hang” longer. The rule: in headwind or sinking air, fly faster; in tailwind or lift, slow towards minimum sink – but never slower than that.
Fit and adjust the speed bar on the ground so it does not engage when the risers are loaded; hook it up before launch.
Practise pushing the bar in smooth air, high up and away from other gliders: one third, half, then full, with your hands still on the brakes.
Feel the pressure under your feet: a sudden drop in bar pressure means the leading edge is about to collapse – get off the bar immediately, then touch the brakes.
Do not pull brakes on full bar; do not use the bar in turbulence, near other gliders, or below roughly 100 m above the landing field.
Pass when: you actively choose your speed for the wind and sink, and use the bar to penetrate headwind and escape sink while keeping the wing stable. A reminder from Touching Cloudbase: the speed bar and big ears are a safety reserve; if you need them on every flight just to get back to the field, conditions are too strong for you. Read The polar curve to see why flying faster into a headwind takes you further.
4. Big ears, B-stall and rapid descent techniques
At minimum sink a paraglider descends at only a little over 1 m/s, while a strong thermal can lift you at 5 m/s or more. A P3 pilot must therefore master at least one rapid descent technique, and the first one is always big ears.
Keep the brake handles in your hands. Pull the outermost A-line (not the whole A-riser), one side at a time, until both tips are folded and stable.
Steer with weight shift. Do not make steep turns or spiral while holding big ears.
For more descent: stabilise the big ears first, then push the speed bar gradually. To exit, release the bar first, then the ears.
Release one side at a time and pump gently if a tip does not reopen by itself; do not pump both sides together, which risks a deep stall.
Vietnamese training standard: start big ears at least 200 m AGL and finish before 100 m. Never put in or release big ears close to the ground.
Technique
Typical sink rate
Forward speed
When to use
Main risk
Big ears
About 3–5 m/s, roughly double normal
Still flying forward, steer by weight shift
The standard P3 technique; leaving strong lift or cloud base
Deep stall if exited wrongly
Big ears + speed bar
More than big ears
Better penetration
When you must descend and move away from cloud or lift
Pushing the bar before pulling the ears
B-line stall
About 6–9 m/s
Almost zero
Only after instructed training, and if the wing allows it
Slow or uneven release can cause deep stall or spin; unsuitable for many modern wings
Steep 360s
Up to about 14 m/s
Negligible
Pilots already fluent in turning
G-load, dizziness
Spiral dive
Over 10 m/s, some sources quote 14–20 m/s
Negligible
P4 and above, learned on an SIV course
High G, blackout, spiral lock
Rapid descent techniques compared (figures differ between sources, so ranges are given)
Sources disagree on the B-line stall: APPI still teaches it as a descent technique; Security in Flight warns that it loads the wing heavily and may be unsafe on high aspect ratio gliders; Mastering Paragliding considers it outdated. Our view: read your glider manual first, and practise B-stalls only on an SIV course. Pass when: you put in and release big ears cleanly, hold your heading with weight shift, and combine them with the speed bar in the correct order.
5. Asymmetric and frontal collapses
The asymmetric collapse is the most common incident: part of the leading edge loses pressure and folds, and the glider tends to turn towards the collapsed side. A frontal collapse folds the whole leading edge at once, typically on speed bar or when you are spat out of a thermal while the wing is surging. At P3 the goal is not big collapses but to recognise early, respond enough, and not over-react.
Practise only under direct instructor supervision, starting at 200 m AGL or more and fully recovered before 100 m; ideally over water with a rescue boat on an SIV course.
P23 standard drill: pull one A-line to collapse about 20–30% of one side, hold your heading by weight shifting towards the open side and braking it lightly; if the collapsed side does not reopen, give it one firm pump.
Only then practise a small symmetric collapse (2–3 A-lines on both sides): no brake while the wing is behind you, a light touch of brake to stop the surge as it comes forward, then let the wing reinflate.
Collapse on speed bar: take your feet off the bar immediately, then deal with it.
Priorities: a safe heading away from terrain first – clearing the collapse second. Always keep an eye on height and the ground.
Pass when: you hold your heading through a 20–30% collapse without stabbing the opposite brake, and the collapsed side reopens without the glider entering a spin or spiral. Common mistakes: yanking the opposite brake, stalling that side and spinning; pumping wildly while the wing is still turning; staring at the collapse and forgetting your height. See also Collapse recovery and Active flying part 3.
6. Accuracy landing
Landing safely on your own is the skill that decides whether you can fly independently, and it is what we look at most closely before putting you forward for P3. Accuracy starts when you plan the landing pattern, not in the last few metres. Standards tighten the radius step by step: about 20 m at P3, 10 m at P4 and 5 m at P5.
An accuracy landing competition: pilots aim for the centre of the target – a core P3 skill
Arrive over the landing field with height to spare – at least about 100 m – and fly across it once to read wind direction and strength.
Lose height with wide 360s or figure 8s on the downwind side of the field, always keeping the field in view and never flying directly over the target.
Fly a U-approach in light wind: downwind leg, base leg, then a straight final into wind. In strong wind, drop the downwind leg, lose height with figure 8s on the upwind side, and keep the final short.
Judge by angle, not height: if the target rises in your view you will not reach it; if it sinks, you will overshoot.
Make the final long enough to stand up, and do not change direction in the last few seconds. Flare at about 1 m; the stronger the wind, the less you flare.
Practise in different wind directions and at different fields, and log your distance from the target after every landing.
Pass when: you plan your own pattern and land on your feet within 15–20 m of the target, consistently, across many flights and wind conditions. Common mistakes: turning final too low because the ground “rushes up”, steep turns close to the ground, flaring too early, using the speed bar near the ground. Details in Paragliding landing technique.
7. Reverse launches, stronger wind and crosswind
At P1–P2 you launch in light, steady wind. At P3 you need a reliable reverse launch in moderate wind and the ability to cope with wind slightly off the axis of the slope. Launch is still where mistakes happen most, so technique must always come with judgement.
The wing must be fully inflated and stable overhead before you commit to take-off
Reverse in moderate wind: inflate evenly with both hands, check the wing visually, stabilise it, turn in the direction you confirmed during your check, and only then commit to the run. If you cannot keep the wing stable for about 10 seconds, kill the wing and start again.
Stronger wind: one hand on both A-risers, the other on both rear risers, inflate quickly and be ready to pull the rear risers to kill the wing; always have a competent launch assistant.
Light crosswind: lay out and inflate into the wind, get yourself right under the centre of the wing, then run along the launch direction. Sources limit crosswind to roughly 30–45°, depending on skill and wind strength.
Gusty wind: watch the cycles and go in a lull. Never let anyone rush you off the hill.
Never launch with a tailwind at launch, however light.
Pass when: you launch cleanly in reverse and forward, abort at the right moment and never get dragged. The training standard forbids students below level 3 from cliff launches or crosswind launches without instruction. See Reverse launch technique and Pre-flight checks and launching.
8. Ground handling in wind
Ground handling does not stop after P1–P2. Days too windy to fly are perfect for kiting on flat ground: pilots who ground handle a lot launch more cleanly and handle collapses better, because their brake reflexes are trained without any height risk. Reference goals from the APPI logbook for the APPI Pilot level: keep the wing overhead for at least 30 seconds, slalom at 45°, build a wall, hold the trailing edge about 1 m off the ground for 5 seconds, walk uphill using A and rear risers. APPI limits flat-ground handling to about 15 km/h up to this level – stronger wind is for advanced pilots.
Ground handling and kiting practice – the foundation of every launch
9. First ridge soaring and right-of-way rules
Ridge soaring is the first time you stay up longer than a straight glide down. Wind blowing onto the slope – what we call wind onto the hill – is deflected upwards into ridge lift in front of the slope. When that lift is stronger than your sink rate, you fly along the ridge and hold your height. The training standard does not allow students below level 3 to fly in wind above 7 m/s or in turbulence, to top land, or to go back into lift they have just been blown out of.
Only go ridge soaring once you know the right-of-way rules, can fly minimum sink without touching the stall, turn 180° cleanly and can crab along the right line.
Pick a day with smooth, steady wind almost straight onto launch; late afternoon is often gentler.
Fly elongated figure 8s along the ridge, always turning away from the slope, never pointing the glider at the hill; lean slightly away from the hill so that if the wing collapses it turns out over the valley.
Near terrain fly at trim or best glide until you are well above the obstacles.
Never drift behind the crest while low: behind it is the lee side and rotor. If your groundspeed keeps falling as you fly into wind, the wind is picking up – move out in front and head for the landing field.
Always stay within gliding range of the landing field.
Right-of-way rules to know by heart before your first ridge soaring flight: head-on, both turn right; on a ridge, the pilot with the hill on their right has priority, and the pilot with the hill on their left gives way because the other has no room to turn right; two gliders converging at the same height – give way to the one on your right; landing gliders have priority, and the lowest has the highest priority; in a thermal, turn in the direction set by the first pilot in. Overtaking along a ridge is handled differently by different systems, and turning back is usually safer than overtaking. If the angle at which you see another glider does not change over time, you are on a collision course.
10. Judging conditions
This is the hardest skill to teach and the easiest to underestimate. At P1–P2 the instructor reads the wind for you; at P3 you do it yourself. We describe wind at launch like this:
Wind streamers at launch: read whether the wind is straight in, cross or behind before deciding to fly
Wind straight in: wind blowing straight onto launch – what you want. But check it is the real wind and not rotor: watch cloud movement, birds, streamers on the summit and the forecast wind aloft.
Crosswind: wind off the axis of launch. The further off it is, the weaker the ridge lift and the harder the launch; the steeper the slope, the faster lift dies when the wind turns oblique.
Tailwind at launch (over the back): do not launch. A thermal cycle can blow up the slope for a while even though the main wind is from behind – watch for longer.
Strong wind day (GIÓ XIẾT, our term): a mean wind – not gusts – above 6 m/s at launch level. For a P3 pilot that is a day for ground handling somewhere safe, not for flying.
Gusts: avoid conditions where gusts exceed roughly half the mean wind, or where the wind changes by more than about 8 km/h within 5 seconds.
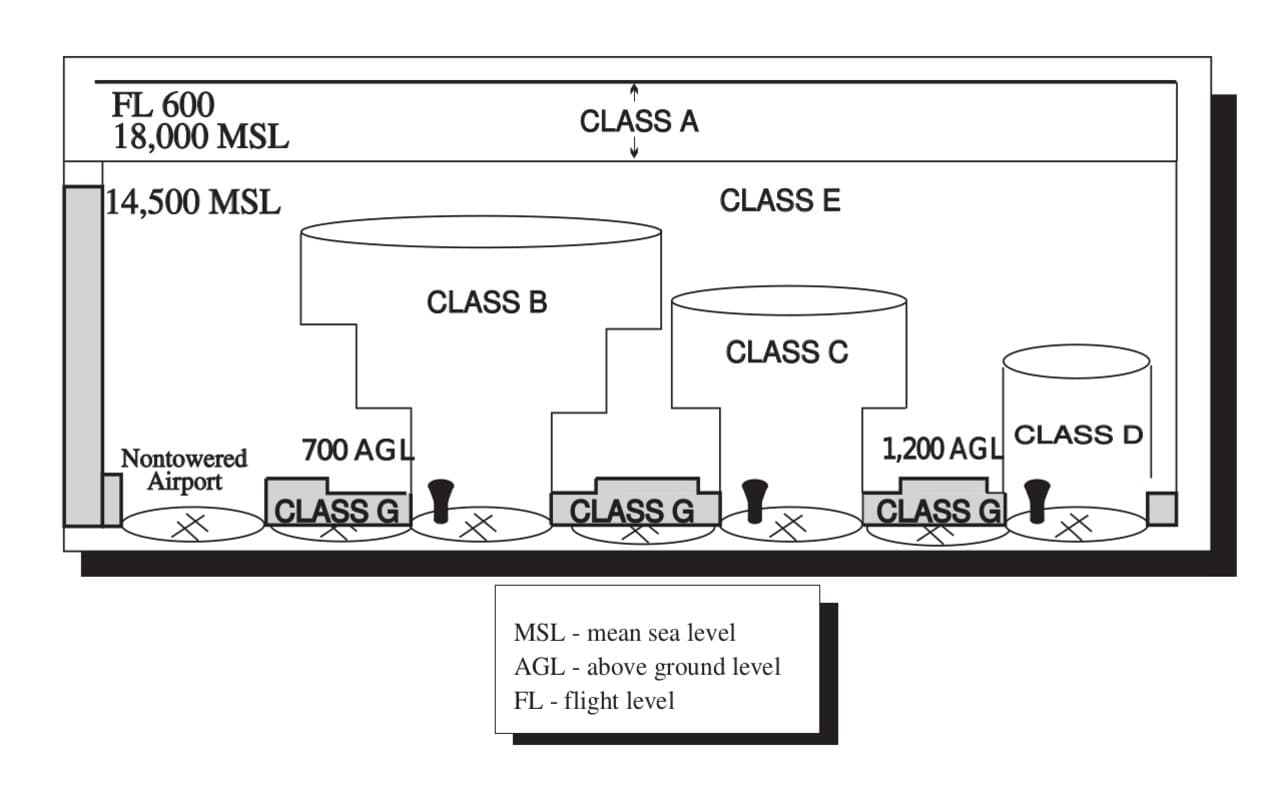
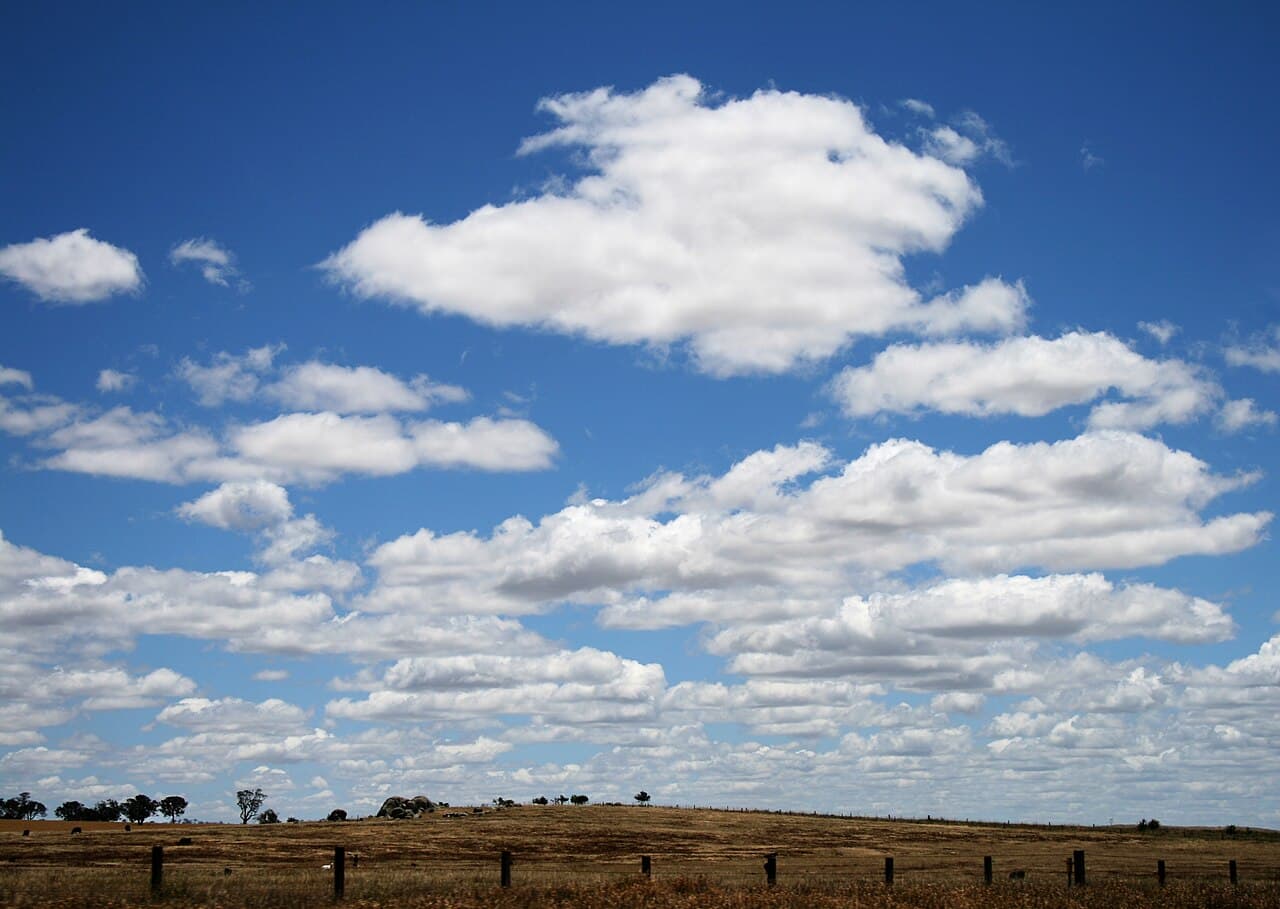
Thunderstorm warning signs to recognise from P3 on: cumulus growing fast vertically into towers with darkening bases; thunder – meaning the storm is already close enough to affect you; rain falling beneath the cloud base – the downdraft and gust front can arrive within minutes and spread tens of kilometres; unusually widespread smooth lift (around 1 m/s in humid air, around 2.5 m/s in dry air) – a sign of cloud suck or a developing storm. A cumulonimbus can form in just 10–20 minutes. If you see any of these, a low-hours pilot does not launch, or lands immediately. At the mountain sites of northern Vietnam in summer, clouds usually build from midday and storms tend to arrive in the afternoon, so flying early is the smart choice. Further reading: Cloud types pilots should know, What weather pilots should check and Flying Khau Pha pass — 3 wind scenarios.
P3 knowledge and exam
The P3 exam has a theory part and a practical part. Theory papers usually require at least 70% – under the BHPA (UK) standard, getting a collision-avoidance question wrong is a fail even if everything else is right; APPI sets the bar at 80%. IPPI (SafePro 2026) also requires a written exam on air law, regulations and codes of conduct before level 3 is completed. Topics you need to know:
A theory session: meteorology, aerodynamics, air law and incident handling
Meteorology: cloud types, synoptic charts, fronts, inversions, ridge lift and thermals, valley winds, the venturi effect, rotor, thunderstorms and signs of deteriorating weather.
Aerodynamics and flight mechanics: lift, drag, angle of attack, stall, glide ratio, wing loading, minimum sink and best glide, the polar curve, airspeed – wind – groundspeed calculations.
Air law and right of way: collision avoidance rules, ridge and thermal etiquette, airspace, incident reporting, site codes of conduct.
Equipment: EN A–D classes, weight range, daily checks, the speed bar, the reserve parachute (repacked regularly – sources give anything from 90–180 days to 6 months), certified helmets.
Emergencies: signs of an approaching stall, recovery from asymmetric and frontal collapses, spin, spiral dive, when to throw the reserve, emergency landings in trees, water and near power lines.
Basic first aid and human factors: fatigue, alcohol, stress, hypoxia at altitude, how to call for help after an accident.
The practical test checks exactly what you have trained: a pre-flight check with no missed steps, a clean launch, a flight plan suited to the conditions, timed 360s and figure 8s, big ears, pitch control within limits, the landing pattern and an accuracy landing. The examiner looks not only at whether you can do it but whether you do it safely, calmly and with judgement. There is a BHPA question we like to use when signing pilots off: if I knew this person was going to fly alone tomorrow at a site they have never seen, would I be comfortable?
Your logbook is the evidence of your experience when you are assessed. For every flight record: date, site, wind conditions, airtime, the exercise, what went well and what needs work. Apps such as XCTrack, XCSoar, Flyskyhy or LK8000 store tracklogs – keep them. During roughly your first 10 hours, many sites ask new pilots to fly with a coloured novice ribbon so others give them room.
P4 techniques: using lift
If P3 is mastering the wing in relatively smooth air, P4 is flying in air with energy in it: thermals, stronger ridge lift, real turbulence. The Vietnamese P4 exit standard includes steep 360s in about 10 seconds, thermalling, landing within 10 m of the target, overhead approaches and aircraft-style landing patterns, asymmetric collapse recovery, big ears combined with roll, wingovers, plus more than 50 hours and 20 thermal flights. The P34 training standard is explicit: P2 students must never fly advanced soaring conditions.
Thermalling: entry, centering, shifting the circle
Learn thermalling when thermals are gentle – late afternoon, or days with a moderate lapse rate – with an instructor alongside, and always keep your glide angle to the landing field in mind. Prerequisite: smooth 360s both ways at around 20–30° of bank, and still turning efficiently when the air is active.
Thermal entry: when you hit a thermal the wing usually drops back and then surges – ease off the brakes, then check the surge just enough. Fly straight for about 2–4 more seconds until you clearly feel lifted, then commit to the turn.
One wing lifted, you are tilted in the harness: turn towards the lifted side.
Centering: if lift weakens, tighten the circle or turn back towards where it was strongest; if it strengthens, widen; if it stays the same, hold. Do not fly figure 8s, and do not reverse direction without a reason.
Turn rhythm: Mastering Paragliding’s “4 seconds per 90°” rule gives about 16 seconds per circle – the tightest turn that does not noticeably increase sink. Circling too wide is the most common beginner mistake.
Shifting the circle: when one part of the circle is stronger, ease the inside brake for about 2 seconds (the circle moves about 20 m) while keeping your weight shift; close to the core ease for about 1 second, inside the core about half a second.
In wind the thermal leans and its core is displaced upwind: move your circle upwind, or you will fall out of the downwind side.
The outside brake controls speed and prevents collapses; a sudden drop in outside brake pressure warns of a collapse.
Leaving a thermal: only leave lift when you are sure of better lift. The edge of a thermal often has turbulent sink – fly actively through it and keep the wing overhead.
Thermalling in gaggles: pilots already circling have right of way; join from the side where you see their backs, turn the same way, be predictable and keep your distance. Never fly straight into the middle of a gaggle, and never join head-on against someone circling towards you – at a closing speed of around 65 km/h, 100 m disappears in about 5 seconds. If two pilots are circling in opposite directions, the lower one changes direction. Pass when: you climb steadily in gentle thermals, keep an even circle without losing the core each turn, and always know you can still glide back to the landing field. Continue with Thermal technique part 1, part 2, part 3 and the Atmosphere and thermals series.
Soaring in stronger conditions and advanced active flying
At P4 you will meet strong lift, gusts and real turbulence – the very things you were told to avoid at P3. The P34 standard’s principles: in strong turbulence keep a moderate speed, fly straight or with only gentle bank, no steep turns, no speed bar. The more active the air, the more distance you keep from terrain. On windy slopes do not launch right on the summit or crest but far enough below it, because you can be lifted and then carried over the back. Avoid venturi at passes, gullies and ridge crests. If the wind is pulling you towards the lee side, turn in the lift, and when it weakens, push upwind from the greatest height you can. More in Avoiding being blown over the back and Turbulence part 3: flying in turbulence.
Top landing
Top landing – landing on the summit near launch – is a P4-and-above skill. The training standard forbids it for students below level 3, the Vietnamese exit standards place it at P5, and BHPA requires at least 4 planned top landings before the Club Pilot rating. In our view it should be learned during P4, with an instructor, on a wide, gently rounded summit with no sharp edge.
Decide early, and do not count on being lifted as you approach the crest.
Less experienced pilots approach crosswind: let the wind carry you gradually back over the edge, then turn into wind once over the landing area; never go behind the crest while still too high.
Wait above the summit in the zone where there is wind but no lift, then glide in into wind; ease off the brakes and slow progressively without a hard flare.
If in doubt, fly through and try again, or go down to the bottom landing field. Ten or twenty approaches are better than one stall on the summit.
Once down, turn to face the wing and kill it immediately – rear risers, and move towards the wing.
Do not top land in strong wind, when strong thermals are coming up the slope, or when someone is preparing to launch.
Steep turns, spiral dives and wingovers
At P4 you work steep 360s down to about 10 seconds per turn (JHF material suggests practising at 12 seconds first), always with weight shift, never on brake alone. Spiral dives come after steep turns, and they must be learned systematically – on an SIV course or with an instructor – because in a spiral the load can reach 2–3 G, the sink rate exceeds 10 m/s, and some gliders can lock in.
Learn the exit before the entry: start with one or two steep turns and roll out, then build up.
Normal spiral exit: gradually release the inside brake, lean slightly to the outside, let the glider bleed off energy through one more turn before flying straight; check the surge as it comes out.
Spiral lock (hands up and the glider keeps turning): pull the outside brake slowly and increasingly firmly; if that does not work, pull both brakes to slow the glider. Do not throw your weight hard to the outside.
Spiral you cannot exit at around 200 m AGL or lower: throw the reserve immediately.
Wingovers: only with enough height and an instructor; build them in order – weight shift for rhythm, then inside brake, then outside brake to prevent collapses. Wingovers beyond about 45° should be practised over water. If the wing collapses, stop, and finish with a 360 to bleed off energy.
Big collapses and the reserve decision
P4 pilots fly in conditions where big collapses can happen, so you need a clear sequence already in your head. Security in Flight sums it up in five steps: stop the surge → hold a safe course, then correct → stop the rotation and slow the glider → stall to “reset” (only if trained on an SIV course) → throw the reserve. In every situation, watch the wing, the problem and your height. See also Active flying part 4: the spiral dive and its exit.
An instructor coaching a student through a reserve deployment on the SIV course
Throw the reserve when the wing cannot be recovered or when you are running out of height. If in doubt, throw it out. There is no minimum height at which to “try a bit longer” – coming down under a reserve is always better than under a wing out of control.
Procedure: look at the handle, grab it, pull the container out in the direction it was fitted, and throw hard into clear air.
Once the reserve is open: disable the main wing (pull the A-risers, C-risers or both brakes) so the two canopies do not fight each other; prepare for a parachute landing fall (PLF).
Practise deployment in a simulator every time the reserve is repacked, and join a reserve clinic when you can.
An important exception: if you forgot your leg straps and are hanging by your armpits, do not throw the reserve – the opening shock can pull you out of the harness.
Choosing a wing and understanding wing loading
At P1–P3 level, fly EN A gliders; some “low” EN B wings are also suitable – ask your instructor first. The P34 standard allows basic or higher-rated intermediate gliders but no competition wings. According to the EN 926 interpretation notes, EN B is a very wide class: low-B wings are close to A, while high-B wings are meant for licensed pilots with more than about 30 hours including at least 10 hours of thermalling, flying under roughly 50 hours a year. EN C is for pilots with a few hundred hours who have done SIV and fly regularly.
Only move up a class when you fly your current wing with ease, land it well and fly enough hours each year. Do not buy a high-performance wing to “grow into”.
The weight range is your total take-off weight: pilot, clothing, helmet, harness, reserve, instruments, water and the wing itself. Flying in the upper half of the range keeps the wing firmer and better at penetrating; both overloading and underloading reduce stability.
Higher wing loading makes the glider faster and sink slightly more, while the glide ratio stays almost the same.
The harness changes how the wing behaves too: a chest strap set too wide makes asymmetric collapses worse. Follow the manufacturer’s setting, typically about 42–46 cm between the carabiners.
As Mastering Paragliding puts it: an EN B flown on a good line beats an EN D flown on a bad one. Real performance comes from the pilot underneath.
Cross-country (XC) is the natural goal after P4, and the standards treat it as the next step: IPPI puts XC in additional rating 5B (at least 5 XC flights; flying along a single ridge does not count), and APPI awards its XC certificate after 3 flights of 20 km or more, recommending SIV first. Your job at P4 is to build the foundations:
Plan the route at home: direction, restricted areas and airspace, the height needed to cross stretches with no landing options, and alternate landing fields along the way. If you cannot answer these, you are not ready to go.
Start from a familiar site, on a route with plenty of big landing fields and a road home; build up in steps of 10, 20, 30 km.
Always have at least one landing field within glide. Stay as high as possible, do not drift behind a ridge while low, and never fly into the lee side.
A headwind cuts your glide over the ground very quickly; when unsure, fly a little faster – about a third of speed bar – rather than braking.
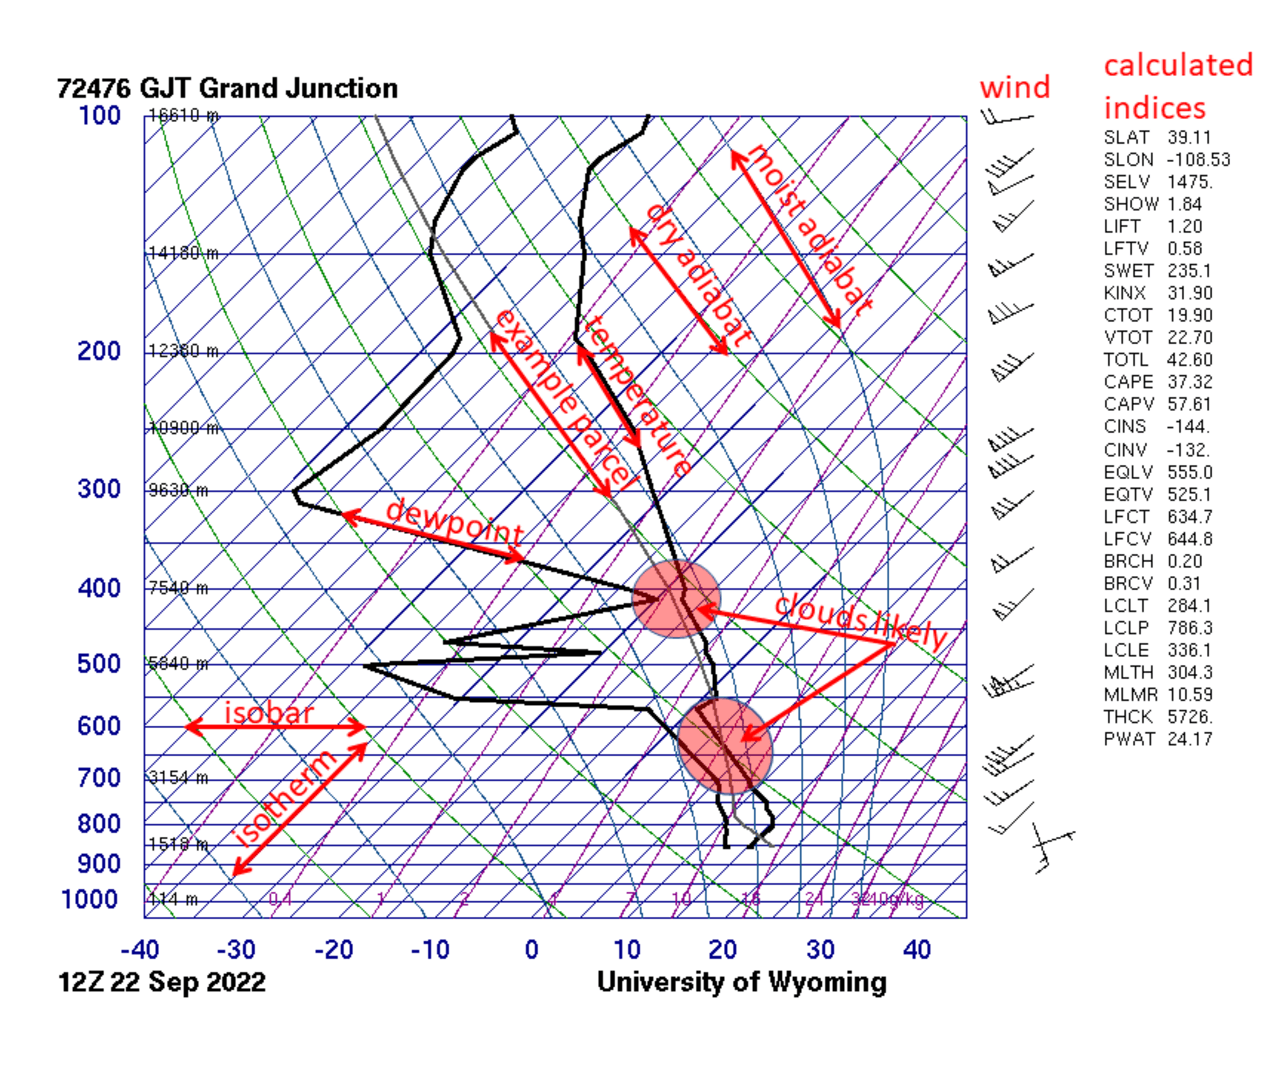
Weather: check wind at altitude, cloud base, thermal tops, and the risk of overdevelopment and thunderstorms. The Skew-T diagram is worth learning.
Retrieve: someone must always know where you are flying; carry a charged phone, radio, water and a first-aid kit, and agree in advance how you will stay in touch and be picked up.
The most common XC mistake is pushing on when you are already low.
From P4 a vario is practically essential: thermals, wave and convergence are invisible lift, and an audio vario keeps your eyes on the traffic instead of a screen. For XC, a GPS matters as much as the vario because it gives groundspeed, wind direction and strength, your position in an emergency, and tracklogs as evidence of experience. But do not let instruments replace feel: switching the vario off on a gentle thermal flight teaches you to sense lift through your body, your ears and brake pressure. And never lose a thermal because you were busy fiddling with an instrument.
Mindset and decision making
SafePro defines pilot competence through four elements: skill, knowledge, experience and attitude. The P3–P4 stage is when attitude is tested most. The literature warns of three traps: risk homeostasis – as you get better you compensate by taking more risk, so you end up no safer; intermediate syndrome – overconfidence after a few dozen hours; and Icarus syndrome – believing neither you nor your equipment has limits. Accidents cluster exactly when pilots move up a level.
Deciding to launch – and daring to decide not to – is the most important skill of a P3–P4 pilot
Always fly one step below your limits.
— Dennis Pagen, The Art of Paragliding
One new thing per flight: a new wing, a new site, a new exercise – never combine them.
Deciding not to fly is a good decision too. Do not let other people, appointments or travel costs push you off the hill.
After a long break, come back in mellow conditions, ideally with a day or two of training with an instructor.
After every flight ask yourself honestly: what did I do well, what was just luck, and what will I do differently next time?
SIV courses: why every P3–P4 pilot should do one
SIV (simulation d’incidents en vol) is an incident training course over water: the instructor guides you by radio while you deliberately create the situations you would normally avoid, at a safe height, with a life jacket and a rescue boat. IPPI recommends the basic SIV module and a reserve clinic from level 3; APPI’s prerequisite is independent launching and landing; Security in Flight suggests about 10 hours of flying after getting your licence as a sensible point to start. The biggest benefit is not any single manoeuvre, but that afterwards, in strong thermals, you no longer look up waiting for the wing to fold – your mind is free to observe and decide.
The SIV course at Nui Coc lake: students are winch-towed by speedboat and released at about 600–800 m over the water
The flying area over Nui Coc lake, with a speedboat and rescue boat standing by
Descent techniques: big ears, big ears with speed bar, B-stall if the wing allows it.
Large pitch and roll movements, and damping them.
Asymmetric collapses: holding course, collapses on speed bar, collapses while surging; frontal collapses.
At advanced level: full stall, back-flying, early spin recognition; depending on the programme, a real reserve deployment into the water.
Repetition is the key – doing something once is not mastering it – and do not chain manoeuvres together until your instructor says so. Nerves before SIV are normal, but if you are genuinely afraid and not ready, wait. Mebayluon runs SIV courses; read about our second SIV course at Nui Coc lake to get a feel for how one works.
The roadmap from P2 to P4
The table below is the typical path we use to guide students. Times and flight counts are for reference only: weather, how often you fly and how fast you progress vary a great deal from person to person.
Phase
Goal
Typical time / experience
Key drills
Sign-off
0. P1–P2 course
Foundations: checks, launch, turns, landing with an instructor
7 days, 5–10 solo flights
Ground handling, launching with a stop line, U-approach
Course completed, still a student
1. Consolidation after P2
Launch and land safely on your own
About 1–2 months training with the school; reference around 30 flights, 10 hours
Accuracy landing, reverse launch, reading wind, basic active flying
Instructor confirms you are ready for P3 skills
2. P3 skills and exam
Independent flying in mellow conditions
Reference around 30–60 flights at several sites, 10–15 hours (varies by standard)
360s in 16 s, figure 8 in 26 s, big ears, supervised 20–30% collapses, landing within about 20 m, gentle ridge soaring
IPPI 4: from 25 flights, 15 hours including thermal flying
Centering, steep 360s in about 10 s, landing within 10 m, top landing, basic wingovers
P4 assessment
5. XC preparation
First cross-country flight
After P4, with SIV done and solid thermal skills
Route planning, alternate landing fields, steps of 10–20–30 km
XC certificate (depending on system)
Typical roadmap (times and flight counts are indicative only and depend on weather and the individual)
Safety: personal minimums and days not to fly
Every pilot should have a written set of personal minimums and stick to them even when others are flying. This is our suggested starting point for a newly qualified P3 pilot:
The reserve is always checked carefully before flying
Do not fly with thunderstorms in sight, when you hear thunder, when cumulus is overdeveloping, or when storms are forecast and the sky is hazy or overcast – a storm can be hiding in it.
Do not fly on strong wind days (mean wind above 6 m/s at launch level), with a tailwind at launch, or when gusts are strong compared with the mean wind.
Do not fly ahead of an approaching cold front: the gust front can arrive 1–2 hours before it.
Do not fly tired, ill, stressed, after drinking alcohol or after taking drowsy medication.
Do not fly alone in the early stages; someone must always know where you are flying, and you always carry a radio and phone.
Do not fly unchecked equipment: daily checks of wing, lines, risers, carabiners, harness and reserve; the full G-V-M-Đ-D-A-H pre-flight check (Wind, Wing, Helmet, Harness, Brakes, All clear, Turn direction) before every launch, restarted from the top if interrupted; reserve repacked on time; wing inspected at regular intervals.
Do not fly beyond your recognised level, and do not change too many things at once.
Remember the line from the student handbook: the question is not how long it takes to learn to fly, but never stopping learning. If you still have doubts about the safety of the sport, Is paragliding safe? talks frankly about the real risks.
Deciding to land a little too early is always better than a little too late.
— Cross-country flying (Bay đường trường)
Training for P3 and P4 with Mebayluon
Our path is simple: after the 7-day P1–P2 course you train for about 1–2 more months with an instructor to complete your skills – above all, landing safely on your own – and then take the P3 exam directly, with no P1 or P2 exams. After P3 we stay with you through the experience-building stage, the SIV course and the P4 skills at the school’s sites: Khau Pha pass – Mu Cang Chai (launch at 1,268 m AMSL), Doi Bu and Vien Nam near Hanoi, Sa Pa, and Quan Ba – Ha Giang.
A student receives a certificate after a course at Mebayluon
If you want to progress faster or fix a specific skill – landing, reverse launching, thermalling – we offer one-to-one coaching with an instructor. For deeper reading, the books behind this article all have Vietnamese editions: Mastering Paragliding (Làm chủ Dù lượn), Thermal Flying (Bay Thermal), Understanding the Sky (Thấu hiểu Bầu trời) and a cross-country guide (Bay đường trường). Call our hotline 0964 073 555 or leave us a message and we will help you plan the path that fits you.