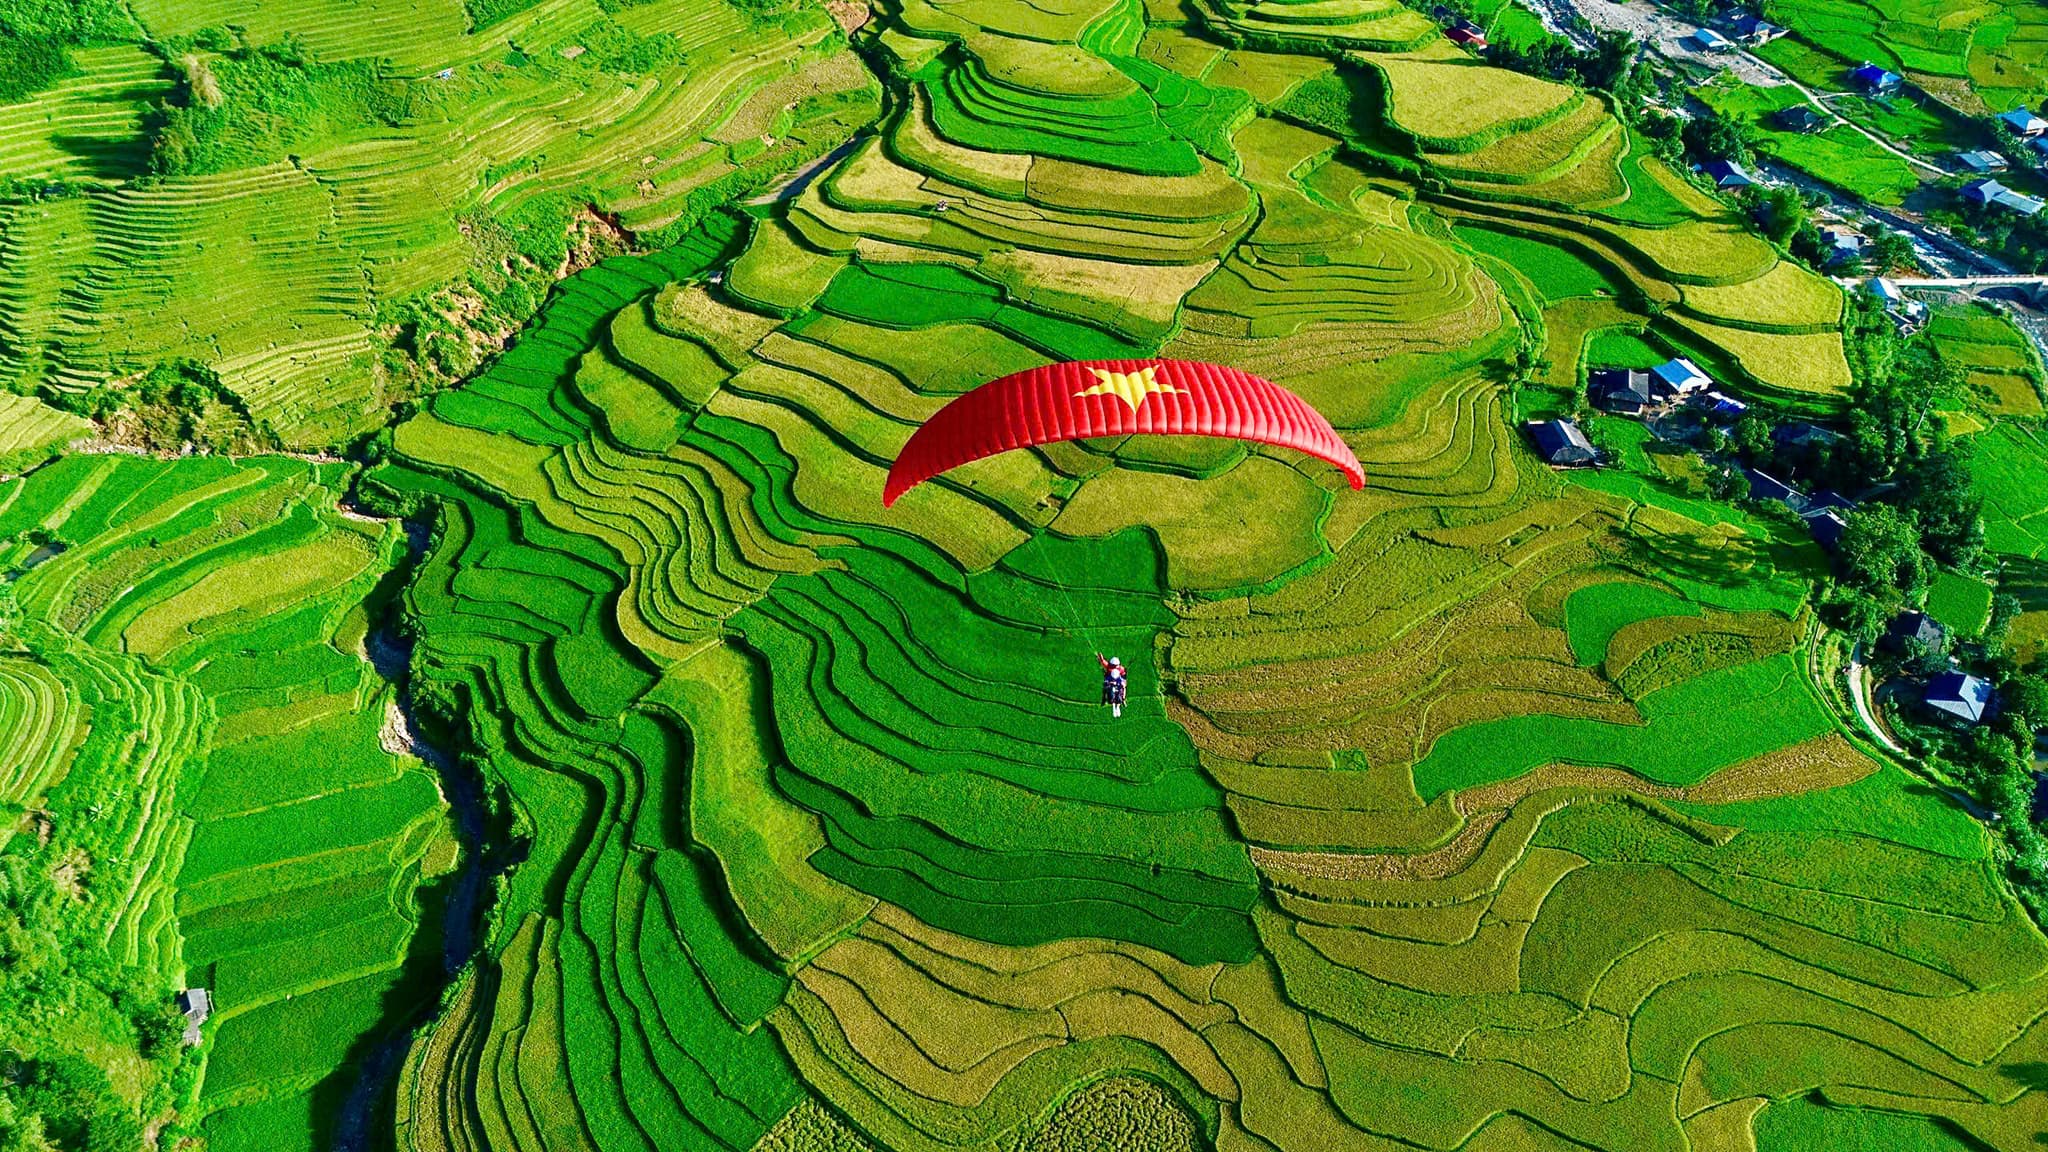
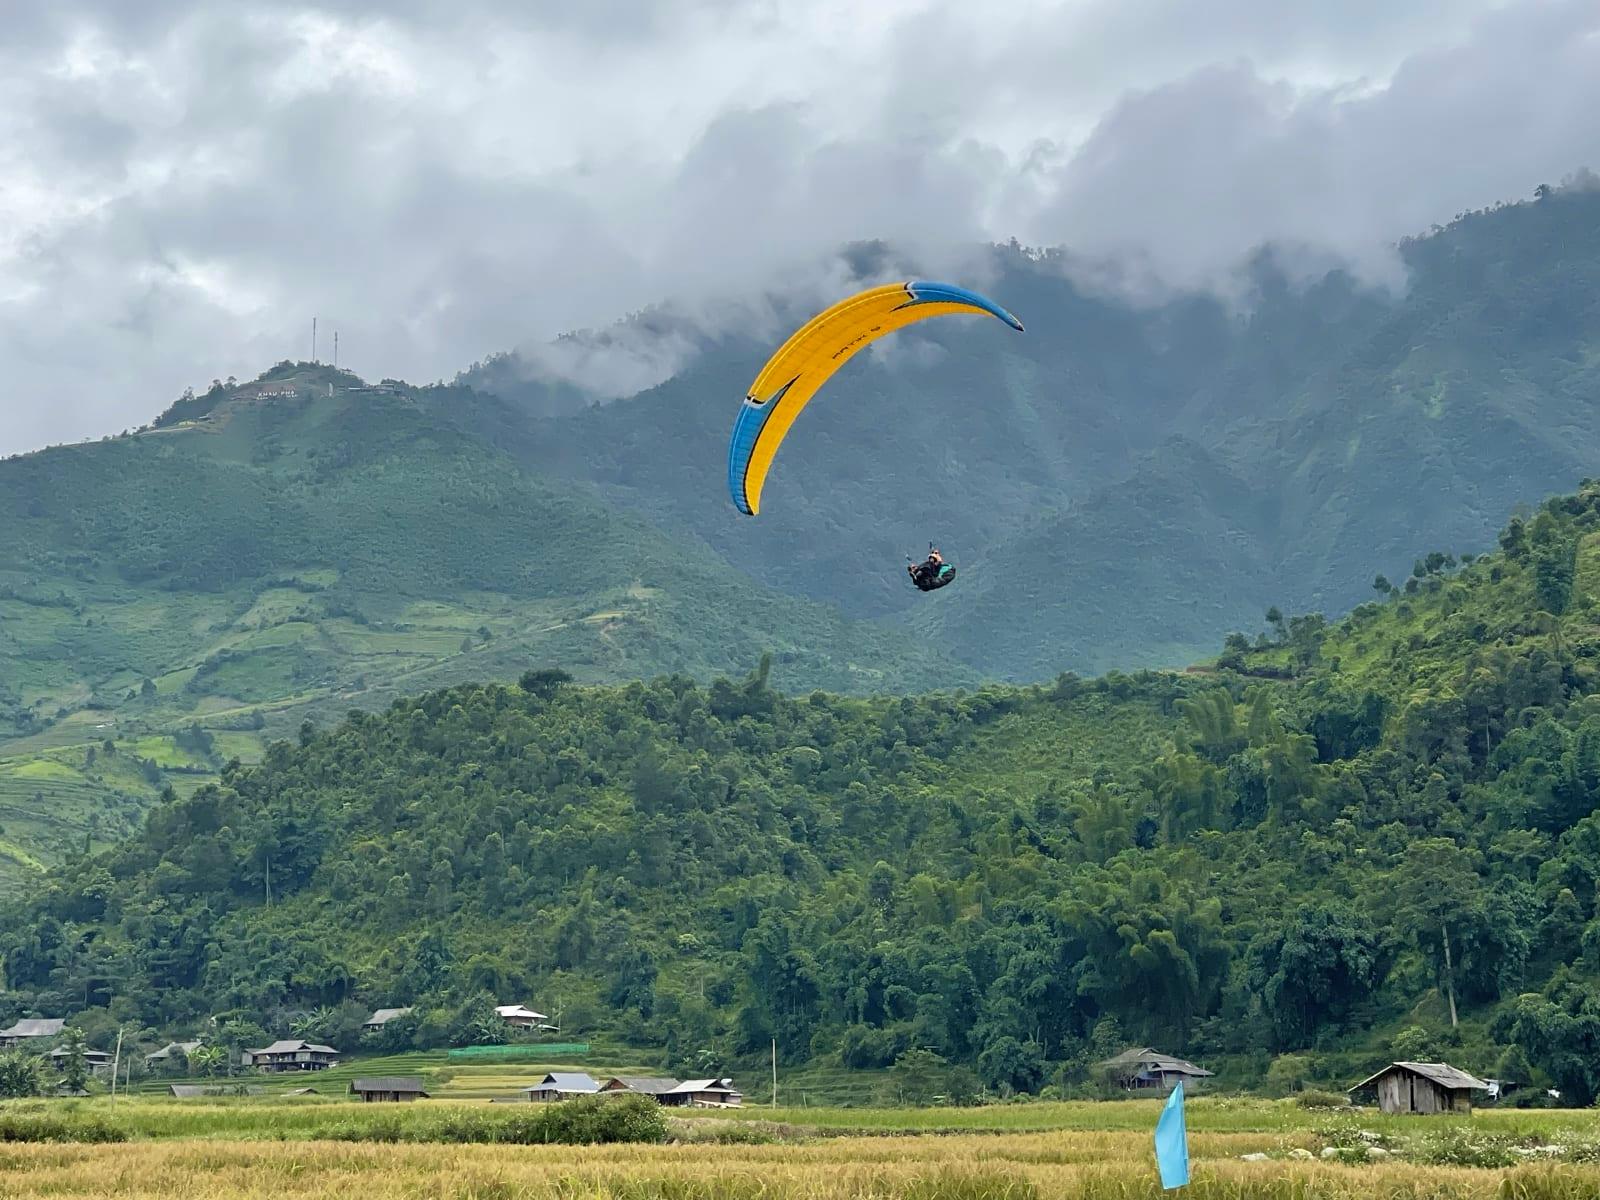
This article covers the theory a paragliding student needs at P2–P3 level: speed and active flying, in-flight exercises (pitching, rolling, 360s, big ears), launching in stronger wind, the daily wind cycle and cloud types, ridge soaring, a first taste of thermals, precision landing, incidents and the reserve. The content follows Mebayluon's P2–P3 training standard, built on the IPPI and APPI syllabi and adapted to flying conditions at Khau Pha. At the end there are 30 multiple-choice questions to test yourself; the answers stay hidden until you tap them.
This is the follow-up to Paragliding theory for P1–P2. Anything already covered there (basic terms, collision avoidance rules, the 7-step pre-flight check, hazardous attitudes) is only repeated here when needed.
1. What P2–P3 means and what you can do afterwards
After P1–P2 you can already fly on your own from launch to the landing field, but the instructor still picks the wind for you and calls every turn over the radio. P2–P3 is the transition stage: you learn to read the wind yourself, plan your own flights, actively keep the wing overhead and work out your own landing circuit for each day's wind. The instructor still follows you closely on the radio, but gradually steps back into a supervising role.
- Mebayluon's P2–P3 course at Khau Pha: a 6-day program plus 1 spare day for weather. Main content: forward and reverse inflation; launching in stronger wind and in a slight crosswind; active flying; pitching, rolling, 360s, big ears; ridge soaring; the U-shaped landing circuit and precision landing.
- Goals by the end of this stage: about 50 solo flights; confident launches and landings in a range of wind conditions; landing within 20 m of the target; planning every flight yourself; ridge soaring in steady wind; recognizing and using light thermals.
- The course teaches skills; it does not issue a certificate. After the course you keep flying until the skills become habits; once your instructor judges you ready, you register and go straight to the P3 exam. The P3–P4 path is covered in P3–P4 flying skills.
- Not part of this course: spiral dives, full stalls, large induced collapses. Those belong to an SIV course, practiced over water with a rescue boat. This article only mentions them so you can tell them apart.
2. New terms for P2–P3
The terms below are new compared with the P1–P2 article. Instructors will use them over the radio during the exercises. The Vietnamese term is listed too, since you will hear it often at our sites.
| Term | Vietnamese | Meaning |
|---|---|---|
| Minimum sink | Tốc độ tụt tối thiểu | The brake setting at which the wing sinks most slowly; used to stay up longer in lift |
| Best glide | Tốc độ lượn tốt nhất | The speed at which the wing covers the most distance for each meter of height in still air; on a school wing it is almost hands up |
| Polar curve | Đường cong cực | A graph showing how many m/s the wing sinks at each airspeed |
| Speed bar | Thanh tăng tốc | Foot bar under the seat that pulls the front risers down; the wing flies faster but frontal collapses become more likely |
| Active flying | Bay chủ động | Constant use of brakes and weight shift to keep the wing pressurized and overhead |
| Surge, dive | Cú bổ | The wing shooting forward ahead of the pilot |
| Dampening | Triệt tiêu lắc | Braking or releasing at the right moment to damp out pitching and rolling |
| Pitching | Pitching | Exercise in which you create pitch movement and then damp it out |
| Slalom (in the air) | Slalom trên không | A rhythmic chain of linked left and right turns, like a skier weaving round poles |
| 360° turn | Vòng quay 360 | Turning a full circle and flying out on the original heading; measured in seconds per turn |
| G-force, load factor | Lực G | The force pressing on you and the wing in a turn; the steeper the bank, the higher the G-force |
| Big ears | Big ears | Pulling the outermost A lines to fold in both wing tips; the sink rate goes up while the wing keeps flying forward |
| Stop line | Vạch dừng (vạch stop) | The last point on the launch run where you can still abort |
| Ridge soaring | Bay cà vách | Flying along a mountainside in ridge lift to hold or gain height |
| Ridge lift, lift band | Dòng nâng mặt núi, dải nâng | Air pushed up the windward slope by wind onto the slope; the lift zone sits in front of and above the slope |
| Drift correction, crabbing | Bù dạt | Pointing the nose of the wing slightly into the wind so your track over the ground goes where you want |
| Thermal | Thermal | A column or bubble of warm air rising from ground heated by the sun |
| Variometer (vario) | Vario | Instrument that beeps when you climb and buzzes when you sink |
| Glide path judgement | Ước lượng đường lượn | Seeing which point stays still in your field of view: that is where the wing will arrive |
| Deep (parachutal) stall | Deep stall (stall dù) | The wing stays open overhead but doesn't fly forward and drops almost vertically |
| Cravat | Cravat | A wing tip collapses and gets caught in the lines |
| SIV course | Khoá SIV | Course in handling incidents over water, with a rescue boat |
| Intermediate syndrome | Hội chứng bậc trung | Confidence growing faster than experience after a few dozen smooth flights |
3. Speed and active flying
The speed range of the wing
Each brake position gives a different airspeed and a different sink rate. At P2–P3 you need to know the settings you use every day and when to use each one. The figures in the table are for an EN A school wing and are only a guide; your wing may differ by a few km/h.
| Setting | Hands, feet | Airspeed | Sink rate | Use it when |
|---|---|---|---|---|
| Accelerated | Hands up, speed bar pushed | About 42–46 km/h | 1.5 m/s or more | Flying into wind, getting out of sink; only with the instructor's OK |
| Trim | Hands up | About 36 km/h | About 1.1–1.2 m/s | Normal flight; on a school wing this is also close to best glide |
| Minimum sink | Light brake, about 1/4 (hands at eye level) | About 30–32 km/h | About 1.0 m/s | Staying up longer in lift: ridge soaring, light thermals |
| Slow flight, near stall | Brake at 3/4 (hands at hip level) or deeper | Below about 25 km/h | Shoots up | Never fly here; full brake only for the landing flare |
The polar curve is just the table above drawn as a line: airspeed on the horizontal axis, sink rate on the vertical axis. You don't need to calculate anything; just remember two points: minimum sink for staying up longest, and best glide for going farthest.
Choose your speed to suit the air: in still air, fly hands up. In a headwind or sinking air, fly faster (fully hands up, plus a little speed bar if you are high enough and allowed) to get out of it quickly. In lift or with a tailwind, slow down to minimum sink. Braking while a headwind is holding you back only costs you more height without getting you any farther.
Speed bar: get to know it, don't overuse it
Pushing the speed bar pulls the A risers (and part of the B risers) down; the leading edge drops, the angle of attack gets smaller and the wing flies faster. The price is that the wing is more prone to frontal collapses, and when it does collapse, it collapses harder. At P2–P3 you only get familiar with it: push and release smoothly and feel the wing change speed.
- Before flying: adjust the speed bar line on the simulator so that a fully straightened leg reaches exactly the end of its travel, with both sides even; check that the speed bar is correctly connected to the risers.
- Only push it when: you are higher than about 200 m above the ground, away from the slope, in smooth air, flying straight, and the instructor allows it.
- Don't push it when: you have just launched, you are flying close to the slope or ridge soaring low, you are turning or circling in a thermal, you are in the landing circuit, or the air is rough.
- Don't use the brakes while on the speed bar. If you need to brake or turn sharply, release the bar first. If the wing shudders or the leading edge goes soft while you are on the bar, take your foot off immediately, smoothly, without jerking.
⚠️ Warning: a collapse on speed bar is usually much more violent and faster than one at hands up. At the first sign of turbulence, release the bar first, then deal with it.
Active flying
A paraglider is like a pendulum about 7–8 m long: the wing above, you below. In turbulence, the wing and the pilot get pushed out of step: the wing drops back, shoots forward or tips to one side. Active flying means reacting early with brakes and weight shift so the wing always stays pressurized and overhead, before it has a chance to collapse. Most collapses can be avoided by flying actively.
- Keep steady pressure on the brakes, about 1/4 brake, enough to feel the wing through your hands. Don't hold your hands fixed in one spot: keep the feeling of tension in your hands and let them move up and down with it.
- Wing drops back (usually as you fly into lift): raise your hands so the wing regains speed. Braking at this moment can easily stall the wing.
- Wing shoots forward (usually as you leave lift and fly into sink): brake firmly on both sides just as the wing passes over your head, then release as soon as it stops.
- One brake suddenly goes very light: that side of the wing is losing pressure. Pull that side down until you feel tension again, then let it back up.
- Keep your eyes on the horizon, rather than constantly looking up at the wing. The horizon moving up and down tells you the wing is pitching; the horizon tilting tells you it is rolling.
- Don't overdo it. A small, early, short input beats a deep, late pull. Pulling too deep or holding it too long can also stall the wing.
4. In-flight exercises
All the exercises below are done only at a safe height (set by the instructor, usually starting above 200 m above the ground and finished before 100 m), away from the slope, over a safe area (an open valley, the landing field within gliding range), in smooth air, and with an instructor guiding you by radio. Before each exercise, look around to make sure the airspace is clear.
⚠️ Warning: don't practice these exercises without an instructor, don't practice near the slope, and don't practice above or below another wing. If the wing reacts strangely, stop the exercise, put your hands up, fly straight and tell the instructor.
4.1. Pitching: creating and damping pitch movement
Pitch is the wing diving ahead of you or dropping back behind your head. The pitching exercise shows you how the wing pitches and teaches you when to brake to stop a surge. It is exactly the move you make every time you fly out of lift.
The exercise is done in at least two cycles, each with a bigger amplitude, then you stop the wing firmly so it flies on without swinging:
- 1. Slow the wing down: pull both brakes evenly down to shoulder level (about 50%). The wing slows down and drops back slightly.
- 2. Release suddenly: raise both hands at once; the wing pitches gently forward.
- 3. Increase the amplitude: wait until the wing has dropped almost all the way back, then pull both brakes so it drops back further.
- 4. Release suddenly again: the wing pitches strongly forward, with a bigger amplitude than the first cycle.
- 5. Stop the wing: when the wing is about 15° past overhead, brake both sides quickly and firmly, hold for about 1 second until the wing settles, then put your hands up and fly on.
Goal: a clear pitching rhythm, good amplitude, an immediate stop, and the wing flying on without swinging. Build up the amplitude gradually as the instructor tells you; go gently the first time.
⚠️ Warning: over-braking (too deep, held too long) causes a stall. Braking too early, before the wing has passed overhead, also causes a stall: only brake to stop the wing once it has passed overhead. Braking too late leaves the wing rocking back and forth, and the pitching is not damped. Remember: wing behind you, hands up; wing past your head, brake.
4.2. Rolling and slalom
Roll is you and the wing swinging from side to side like a pendulum; yaw is the wing rotating around its vertical axis and changing heading. This exercise gets you used to the feeling of banking, teaches you clean coordinated turns and shows you how to damp out unwanted roll.
- Creating roll: shift your weight and pull the brake gently to the left, then to the right, in an even rhythm, so the wing tips from side to side more and more. Keep the amplitude moderate, as the instructor tells you.
- Damping: sit upright in the harness again and apply light brake on the high side just as the wing starts to tip toward the other side. After a few cycles the wing flies straight.
- Slalom in the air: a chain of linked left and right turns, each changing heading by about 45–90°, like a skier weaving round poles. Every turn follows the same order: look – weight shift – brake; keep the outside brake under tension to control the rate of turn. The goal is clean, smooth changes of direction without extra swinging.
You will use this coordinated turning straight away when flying figure 8s on the ridge and when adjusting your landing circuit. The ground slalom you practiced at P1–P2 (following the wing along a zigzag path) trains exactly the same feeling.
4.3. 360° turns
A 360 is a turn through a full circle, flying out on the original heading. It is the foundation of thermal flying later on, and a controlled way to lose height.
- Look before you turn: check the whole side you are turning toward, behind and below. All the way round, look ahead in the direction you are turning.
- Entry: shift your weight to the turning side and gradually pull the inside brake; keep light tension on the outside brake. Build it up gradually, never jerk.
- Rate of turn: a turn of about 16 seconds is a normal 360; a turn of about 12 seconds is a steep one. Practice even 16-second turns first, both left and right, and only tighten to 12 seconds when the instructor allows. The faster the turn, the steeper the bank.
- G-force and sink rate rise with bank angle: at 30° of bank you weigh about 15% more; at 45° about 1.4 times as much; at 60° twice as much (2G). A slow turn costs about 30–40 m of height, a fast one 50 m or more.
- G-force also makes the wing stall at a higher speed. In a turn, the inner half of the wing flies slower than the outer half, so don't pull the inside brake deep when you are flying slowly: the inner wing can stall first and throw the wing into a spin. If the inside brake suddenly goes soft and mushy, raise your hand immediately.
- Exit: complete a full closed circle and, back on the original heading, gradually release the inside brake, sit upright again, apply light brake to stop the surge, then fly straight. The sharper the exit, the more the wing shoots forward.
- Keep track of where you are: continuous turning easily makes you dizzy and disoriented. In practice, only fly the number of turns the instructor gives you; after each turn, find the landing field and check your height again.
⚠️ Warning: the steeper and longer you turn, the more the wing tends to nose down into a spiral dive. Spirals are not part of the P2–P3 program: keep a moderate bank angle and exit the turn as soon as you feel speed or G-force rising fast or hear the wind roaring.
4.4. Big ears
Big ears means folding in both wing tips to make the wing smaller: the sink rate rises to about 2–3 m/s while the wing keeps flying forward and stays stable. It is the first and safest descent technique you learn, used when you need to come down quickly: a cloud building overhead, lift stronger than you can handle, or arriving over the landing field far too high.
- Preparation: higher than 200 m above the ground, away from the slope and other wings, in smooth air. Find the outermost A line (many wings have a separate, color-marked A riser for big ears).
- Brakes: keep the brake handles in your hands or stow them exactly as the instructor showed you, so the brakes don't get pulled when you reach up for the A lines.
- Pull: grab the outermost A line high up and pull it down firmly, one side at a time (or both sides evenly), until the wing tip folds in, then hold it there. Only pull the outermost A line: pulling the whole A riser will collapse the leading edge.
- Steer with weight shift: while you hold big ears, you can hardly use the brakes. Turn by shifting your weight left or right, then back to the middle.
- Adding speed bar: if the instructor allows, push the speed bar slowly, and only once big ears are stable; the sink rate rises to about 3–4 m/s. Big ears slow the wing down a little, and the speed bar gives that speed back. Order: big ears first, speed bar second.
- Reopening: in reverse order: release the speed bar first, then let go of the outer A lines. EN A wings usually reopen on their own; if a tip stays folded, give one long pull on the brake on that side. Don't brake deep on both sides at once: the wing is flying slowly and can easily go into a deep stall. Have it fully reopened above 100 m above the ground.
⚠️ Warning: big ears make the wing fly slower and closer to the stall than normal. Don't brake deep while holding big ears, and have them fully reopened before you join the landing circuit.
Big ears are not a B-stall or a spiral. A B-stall (pulling the B risers, the wing drops almost vertically) and a spiral dive (a steep nose-down turn, sinking at 10–20 m/s with very high G-force) bring you down much faster but carry high risk: deep stalls, spins, a spiral that locks itself in. They are only taught on an SIV course over water. At P2–P3, big ears are the only fast descent technique you use.
5. Launching: forward launch, reverse launch, stronger wind
At P1–P2 you only had to master one way of inflating the wing. At P2–P3 you practice both and learn to choose according to the wind: a forward launch in light wind, a reverse launch in moderate wind or stronger. A launch is now an active sequence: 7-step pre-flight check → inflate → keep the wing overhead → check the wing and decide before the stop line → launch run.
Reverse launch
- Choose a turning direction and stick to the same one every time: if the wind lifts you early, your body still turns the right way out of habit. Once clipped in, turn to face the wing in that direction; the two risers cross in front of you.
- Holding the lines: hold the brakes and A risers exactly the way the instructor taught you; check once more that the risers and brakes are crossed the right way.
- Inflate: step back and lean on the A risers to bring the wing up. When it is nearly overhead, let go of the As and catch it gently with the brakes so it doesn't overshoot.
- Correct drift: if the wing drifts to one side, step to that side to get yourself back under the center of the wing; apply light brake on the high side if needed.
- Check before you turn: only when the wing is standing still overhead, evenly inflated, with no tangled lines, do you turn round in the direction you chose, look down the launch run and run.
Stronger wind
- In moderate wind or stronger, use a reverse launch: you can see the wing the whole time it comes up, and you are less likely to be dragged.
- In fairly strong wind: don't lay the wing out in a wide, tight arc; bunch it up and raise it low, a section at a time (building a wall), to control the pull. As the wing comes up, take a step toward it to reduce the pull.
- An assistant holds your harness at carabiner level, pulling down and back, never pushing you forward.
- In strong wind the wing may lift you early: check the wing and turn round within a few seconds; don't stand there hesitating.
- The wind limit for P2–P3 students is set by the instructor each day. In strong wind (mean wind over 6 m/s at launch level), nobody flies.
Slight crosswind
When the wind is slightly off the axis of the launch, lay out and inflate the wing straight into the actual wind, not along the launch axis; only once the wing is stable overhead do you gradually turn your run back onto the launch path. In a clear crosswind, wind that keeps changing direction, or a tailwind, don't launch.
The stop line and aborting a launch
- Before you inflate, decide where your stop line is: the last point on the launch run where you can still stop safely.
- If, before the stop line, the wing is off to one side, the lines are tangled, one side has collapsed, or the wind changes: abort immediately. Past the stop line, commit and keep running; don't stop halfway at the edge of the slope.
- Aborting in strong wind or on a slope: don't pull both brakes all the way down while the wing is overhead, because it can lift you up and slam you down. Pull the rear risers, or pull one brake all the way and step toward the wing to kill it.
⚠️ Warning: turning back into the hill right after leaving the ground is a common launch accident. Once airborne, fly straight out away from the slope before turning, and turn exactly the way you decided at the turn direction step of the 7-step check.
6. Meteorology for P2–P3
6.1. The daily wind cycle in the valley
In the mountains, on top of the general wind over the whole region, the sun creates local winds that change with the time of day:
| Time of day | What happens | For P2–P3 students |
|---|---|---|
| Early morning | Cold night air still pooled on the valley floor, sometimes with mist; light wind, smooth air | Good for wing control exercises: pitching, rolling, big ears |
| Late morning | Sunlit slopes warm up and air rises along them (daytime upslope wind); the first light thermals | Good for launch practice; ridge soaring when the wind blows steadily onto the slope |
| Midday to early afternoon | Strongest sun; strong, punchy thermals; the valley breeze blows along the valley and keeps strengthening; the wind at the landing field picks up too | Usually a break, or flying only when the instructor judges conditions suitable; always ask for the landing field wind |
| Late afternoon | The sun softens and the air gradually smooths out, sometimes with wide, smooth lift | Good for gentle ridge soaring and precision landing practice |
| Evening | Slopes cool and cold air drains downhill (night-time katabatic wind); the launch can turn into a tailwind | Don't push for a "last flight" once the wind at launch has died down and started to reverse |
At Khau Pha: the launch, near the top of the pass (1,268 m), looks down over the Lim Mong – Tu Le valley; the Clubhouse landing field is at about 736 m. The best launch winds are east and northeast. Wind from the south round to the west is a tailwind or blows against the slope: once it picks up, nobody flies. North, east and west winds, when strong, funnel through the gap at the pass and suddenly speed up right at the edge of launch. Around midday, the wind at the landing field can be completely different from the wind at launch.
Before every flying day, practice reading the hourly wind forecast at different heights yourself on the flying weather page, then compare it with what you see on site: the windsock, clouds, smoke, leaves.
6.2. Telling clouds apart
Clouds show you what the atmosphere is doing, often earlier than the windsock does. P2–P3 students need to recognize the clouds below and know what each one signals.
| Cloud | How to recognize it | What it means for a pilot |
|---|---|---|
| Cumulus (Cu) | Separate white puffs with flat bases and rounded tops | Thermals around, a good flying day; the strongest thermals are just below cloud base. Never fly into cloud |
| Towering cumulus (Cu congestus) | Cumulus growing quickly into tall towers, with cauliflower-like tops and darkening bases | Strongly unstable air that can turn into a thunderstorm within an hour; strong suction under the cloud. Get ready to land |
| Cumulonimbus (Cb) | Huge cloud mass with a black base and a top spreading out like an anvil; rain, thunder, lightning | Don't fly. The gust front arrives ahead of the rain, sometimes several kilometers ahead. If you are flying, land immediately |
| Stratus (St) | Flat, low gray layer covering the whole sky, sometimes draped over the slopes | Stable air, few thermals; dangerous when it covers the launch or your route, because you lose visibility |
| Cirrus (Ci) | Thin, very high white streaks, like feathers | The weather may change within the next 1–2 days; when cirrus thickens and blocks the sun, thermals weaken |
| Lenticular cloud | Lens-shaped cloud with smooth edges, staying still over or behind the mountains even though the wind is blowing | Strong wind aloft, with wave lift and rotor lower down. Don't fly |
| Cap cloud | Cloud sitting on a mountain top like a hat, not drifting with the wind | Moist air is being pushed up over the summit; the cloud base can gradually lower and cover the launch. A cap cloud growing quickly is a sign of unstable air |
Tip: watch the clouds throughout the session, not just at one moment. Small, scattered cumulus growing slowly means a good day. Cumulus building thick and fast with dark bases before midday can mean thunderstorms in the afternoon: fly early, land early.
⚠️ Warning: under a large cumulus or towering cumulus, the lift can be stronger than big ears can cope with. If the cloud overhead is building quickly, move out from under it early; don't wait.
6.3. Terrain traps: a quick recap
- Venturi effect: wind squeezing through a gap, a pass, or right over a ridge speeds up. At Khau Pha, north, east and west winds, when strong, funnel through the gap at the pass and speed up right at the edge of launch.
- Strong wind (gió xiết): mean wind (not gusts) over 6 m/s at launch level. The wing can then barely make headway, and with the venturi effect the wind can be much stronger still: nobody flies.
- Lee side: behind a mountain or hilltop relative to the wind. When the wind is strong enough for ridge soaring, there is already rotor just behind the top.
- Rotor: tumbling air on the downwind side of obstacles and behind mountains, extending about 10 times the height of the obstacle, further in strong wind; it has strong downdrafts and can easily collapse the wing.
- False launch wind: when the real wind blows from behind the mountain, the bottom of the rotor can blow back up the launch, making the windsock look like wind straight up the launch. Always compare the windsock with the direction the clouds are drifting, the treetops on the ridge, and the forecast wind aloft.
⚠️ Warning: if, while ridge soaring, the wing is making very slow progress as you rise level with the top, the wind is getting stronger. Fly out in front, away from the slope, toward the valley at once; don't let yourself get blown over the top into the lee.
7. Ridge soaring and flying rules
When the wind onto the slope blows steadily against a mountainside, the air is pushed up, creating ridge lift. If the air rises faster than your wing sinks (about 1 m/s), you can hold or gain height flying along the slope. That is ridge soaring.
- The lift band sits in front of and above the windward slope; the best lift is usually level with or slightly above the crest, on the upwind side. Close to the slope, especially near spurs and gullies, the air is turbulent and the lift is weak. Behind the top is the lee.
- Conditions for students: steady wind, roughly perpendicular to the slope, not gusty, no stronger than the instructor allows; an open slope with a landing field within gliding range.
- Figure 8s along the slope: fly along the slope for a stretch, and at the end of each stretch always turn out toward the valley (into the wind); never turn to face the mountain. Turn toward the mountain and the wind pushes the wing toward the slope, leaving you no room to get out.
- Drift correction: the wind pushes you toward the slope, so point the nose of the wing slightly out toward the valley to keep your track parallel to the slope.
- Keep your distance from the slope: when one side of the wing collapses, the wing turns toward the collapsed side. If the side closer to the hill collapses, the wing turns into the hill, so keep enough distance to be able to hold your heading, and sit slightly weighted toward the valley. The stronger the wind and the rougher the slope, the farther out you must fly.
- Always keep a way back to the landing field: before you start ridge soaring, know exactly the minimum height at which you leave the slope for the landing field. When you get down to it, or the wind changes or the lift weakens, leave the slope for the field as planned.
Flying rules: avoiding each other in the air
Flying rules apply everywhere in the air, not just when ridge soaring. Know the five rules below by heart before you share the sky with other wings:
| Situation | Rule |
|---|---|
| Two wings head-on | Both turn right to avoid each other. |
| Head-on along a ridge | If the mountain is on your right, you have priority and hold your course; the other wing must give way by turning right, out toward the valley. |
| Converging flight paths | Give way to the wing on your right: turn right and pass behind it. |
| Circling in a thermal | Turn in the same direction as the wings already in the thermal; join from the outside of the circle and never cut across in front of others. |
| Landing | Give way to the lower wing: the lower wing lands first; the higher wing loses height on the outside and waits its turn. |
- Flying in the same direction but faster: when ridge soaring, turn back early instead of overtaking. If you really must overtake, give a very wide, predictable berth.
- Look before you turn, especially before every turn-back and before entering a thermal. If the airspace is crowded, move away; don't try to squeeze in.
- Not sure whether the other pilot has seen you? Give way first, and turn early and clearly so the other pilot can predict where you are going.
Priority rules when ridge soaring
- Head-on along the ridge: the pilot with the mountain on their right has priority. The pilot with the mountain on their left gives way by turning right, out toward the valley, because the other pilot can't turn right into the mountain.
- Thermals near the slope: ridge rules still take priority; don't circle a 360 across the path of someone flying along the slope.
8. A first taste of thermals
A thermal is a column or bubble of warm air rising from ground that the sun heats more than its surroundings: rock faces, dry fields, rooftops, sunny slopes. Thermals drift with the wind, lean downwind, and are usually surrounded by sink. At P2–P3 you only get familiar with light thermals in smooth air; real thermal flying is part of P3–P4.
- Signs: the wing gets lifted and the vario beeps; the wing drops back slightly as you enter; one wing tip gets lifted. On the ground: the wind changes direction, goes calm and then gusts; birds circling; a small new cumulus forming above.
- Entry: when you touch the edge of a thermal and the wing drops back, raise your hands and fly straight for another 2–3 seconds to get well inside before turning. If one wing tip is lifted, the thermal is on that side: turn toward that wing tip.
- In the thermal: even 360s, moderate bank, speed close to minimum sink. Close to the slope, don't circle yet: fly figure 8s, with every turn out toward the valley.
- Exit: when the lift weakens, when you reach the height the instructor set, or when you are drifting far from the landing field toward the lee: come out of the turn, fly straight, and be ready to stop the surge as you leave the thermal into sink.
- Other wings in the thermal: turn in the same direction as whoever got there first. If two pilots are turning in opposite directions, the lower one switches to match the one above. Join the thermal from the outside of the circle; never cut across in front of others.
- Keep track of where you are: after a few turns, look back at the landing field and check your height. Thermals drift with the wind and can carry you behind the mountain very quickly.
⚠️ Warning: in the harsh midday sun, mountain thermals are strong, narrow and broken: sudden climbs and drops, and collapses come easily. P2–P3 students don't fly at that time without the instructor's OK; if the air is rougher than you can handle, land.
9. Precision landing
The goal at P2–P3 is to land within 20 m of the target consistently, in a range of wind conditions, using a landing circuit you work out yourself. Precision landing isn't about scoring points: it is the skill that lets you land in small fields, unfamiliar fields and alternative landing fields.
The U-shaped landing circuit
- Height loss area: arrive over the field with height to spare and lose it with figure 8s beside the field, with every turn facing the field; never turn your back on it. Keep your eyes on the landing target.
- Downwind leg → base leg → final. Final is flown straight, into the wind, and long enough for the wing to settle (at the Clubhouse field in a north wind, final is about 60 m long, never shorter than 50 m).
- Choose your turn points according to the wind: in strong wind the wing makes slow progress on final, so the base leg must be closer to the field and you must not fly far downwind, or you won't make it back. In light wind, final gets longer and it is easy to overshoot the target.
- Adjust your height on the downwind and base legs, not on final: too high, extend the downwind leg; too low, turn in early and cut it short.
How to fly the circuit for each wind direction at the Clubhouse field is covered on day 5 of the P1–P2 roadmap.
Sight picture: reading your glide with your eyes
The human eye is very bad at judging height in meters but very good at noticing angles. On base and final, look at the landing target:
- The target stays still in your field of view: you are gliding right onto it.
- The target slowly sinks (more and more ground shows beyond it): you are too high and will overshoot.
- The target slowly rises (creeping up toward the horizon): you are too low and will land short.
Read it early and you can correct on the downwind and base legs. On final you can only correct very slightly: if you are short, put your hands up; braking to "stretch" the glide only makes the wing sink more steeply, especially into wind. Touching down a few meters off target is better than a sharp turn down low.
Wind gradient and wind shadow
In the last dozen or so meters, the wind weakens as you get close to the ground (wind gradient) and drops off sharply just behind tree lines and buildings (wind shadow). As the wing passes from stronger wind into weaker wind it loses some airspeed; if you are flying slowly or turning at that moment, the wing can stall a few meters above the ground.
- Keep enough speed on final: hands up or very light brake, and flare only at about 1 m.
- When it is windy, don't choose an approach that passes close behind tree lines or the pilots' house.
- Below about 10 m: no sharp turns, no zigzagging.
- In strong wind: flare gently, just enough; once down, turn to face the wing and kill it immediately so you don't get dragged.
⚠️ Warning: never try to brake to "lift" the wing over a tree line or power lines in front of the field. If you can see you won't clear them, switch to an open field ahead while you are still high.
10. Incidents and the reserve
EN A wings rarely have incidents in smooth air. But at P2–P3 you fly more, higher and closer to the slope, so you need to know in advance how to recognize and handle them. The actions are rehearsed on the simulator; never induce incidents yourself outside the exercises the instructor gives you.
| Situation | How to recognize it | What to do |
|---|---|---|
| Asymmetric collapse | One brake suddenly goes very light, then that side of the wing folds; the wing turns toward the collapsed side | 1. If you are on the speed bar, release it immediately. 2. Hold your heading first: shift your weight toward the side still flying and apply just enough light brake on that side to fly straight or away from the slope; don't brake too deep, or the flying side can stall. 3. Once your heading is under control, if the collapsed side hasn't reopened on its own, give one long, firm pull on the brake on the collapsed side, then let it back up |
| Frontal collapse | The whole leading edge folds under at once; the wing dips slightly, then drops back | Release the speed bar if you are on it; don't brake while the wing is behind you. EN A wings usually reopen quickly and then shoot forward: apply light brake to stop that surge |
| Imminent stall | The wind noise drops sharply, the brakes go soft and mushy, the wing drops back | Raise both hands evenly and smoothly; be ready to stop the surge as the wing regains speed |
| Incipient spin | You pull one side deep while flying slowly: that brake goes very light and the wing turns fast toward that side | Raise both hands immediately, then stop the surge |
| Deep (parachutal) stall | The wing stays open but doesn't fly forward: no wind in your face, the wing drops almost vertically, the brakes are soft. Most common on old or wet wings, or when braking deep while reopening big ears | Raise your hands fully. If that doesn't work, push the A risers gently forward (or push the speed bar gently) to get the wing flying again. If you are already close to the ground, do nothing more and hold your PLF position |
| Cravat | A wing tip collapses and gets caught in the lines; the wing tends to turn toward that side | Hold your heading with weight shift and brake on the good side; pull the stabilo line on the caught side to clear it. If you can't hold your heading and you are low: throw the reserve |
When to throw the reserve
- The main wing isn't flying and won't recover: a collision with another wing, a tangle you can't clear, autorotation or a spiral out of control, a cravat that stops you holding your heading.
- Low means throw early. The closer you are to the ground, the less time you have to wait for the main wing to recover. If you are low and in doubt, throw.
- Sequence: look – grab – pull – throw into open air, then disable the main wing (pull the rear risers in evenly or gather in the brake lines) so it doesn't fight the reserve.
- A reserve comes down at about 5 m/s, like jumping from about 1.5 m: feet together, knees slightly bent, and do a PLF.
⚠️ Warning: throwing the reserve too late is the most dangerous mistake. Decide within seconds; don't keep trying to sort out a wing that isn't flying while the ground is coming up.
11. Psychology, the logbook and your first 50 flights
After a few dozen smooth flights, launching and landing start to feel easy. This is the most dangerous time: confidence grows faster than experience (intermediate syndrome). You can fly in easy conditions but have never met really bad air, so you don't yet know what you are missing.
- Try only one new thing per flight: at a new site, fly in smooth conditions on a familiar wing; when learning a new technique, do it at a familiar site with an instructor.
- Keep a safety margin: set your own limits for wind and time of day lower than what you think you can handle. As skills or equipment improve, people tend to push themselves into harder conditions (risk homeostasis), and the risk doesn't go down at all.
- Don't fly just because others are flying. A good pilot flying smoothly overhead doesn't mean those conditions suit you.
- Know when to give up a flight: postpone your launch, stay on the ground, land early when the air is rougher than you can handle. At our school, that is always the right decision.
Your logbook and building up to 50 flights
Fill in your logbook after every flight: date, site, time, wind at launch and at the landing field, flight time, exercises done, distance from touchdown to the target, what went well, what to fix. The logbook is the evidence of your experience when you register for the P3 exam, and it helps your instructor see what you need to practice.
- Work your way up to about 50 solo flights, spread over many sessions and many kinds of wind: 50 flights spread out are better than 50 crammed into a few identical days.
- Give every flight a small goal: landing within 20 m, one even 16-second 360, two figure-8 passes on the ridge…
- After each session, grade yourself: was your plan right, and where did you still need the instructor to remind you?
Self-assessment before every flight
| Question | If the answer is "no" |
|---|---|
| Is the wind at launch and at the landing field within my limits? | Don't launch |
| Do I have a flight plan, an alternative landing field, a height for leaving the slope? | Make a plan before going up to launch |
| Am I fit, alert, not rushed, not being pushed by anyone? | Wait or take a break |
| Do I understand today's sky: clouds, thermals, the afternoon wind? | Ask the instructor, observe some more |
| Am I ready to land at once if conditions get worse? | Better not fly yet |
12. 30 multiple-choice review questions
Each question has only one correct answer. Choose yours first, then tap Show answer to check. Get 24 or more right and you have a solid grasp of P2–P3 theory.
Question 1. To fly at minimum sink, where do you put your hands?
- A. Fully hands up with the speed bar pushed
- B. Light brake on both sides, about 1/4 (hands at eye level)
- C. Both brakes pulled down to hip level
- D. Pulling the outermost A lines (big ears)
Show answer
Answer: B. Light brake on both sides, about 1/4 (hands at eye level). Light brake at about 1/4 makes the wing sink most slowly, about 1 m/s. With your hands at hip level you are already close to the stall.
Question 2. On your way back to the landing field you meet a strong headwind. What speed should you choose?
- A. Brake to minimum sink to lose less height
- B. Brake deep to slow the wing down and stay up longer
- C. Pull big ears to come down faster
- D. Fly faster: fully hands up, plus a little speed bar if you are high enough and allowed
Show answer
Answer: D. Fly faster: fully hands up, plus a little speed bar if you are high enough and allowed. A headwind makes the trip to the field take longer. Flying faster lets you cover more distance over the ground; braking now only costs you height without getting you any farther.
Question 3. When you push the speed bar, what happens to the wing?
- A. The angle of attack gets smaller; the wing flies faster but is more prone to frontal collapses
- B. The angle of attack increases; the wing slows down and becomes more stable
- C. The wing flies faster and is harder to collapse
- D. The sink rate drops and the wing always glides farther
Show answer
Answer: A. The angle of attack gets smaller; the wing flies faster but is more prone to frontal collapses. The speed bar pulls the front risers down and lowers the leading edge. The wing is faster but more prone to frontal collapses, and when it collapses, it collapses harder.
Question 4. When may a P2–P3 student try the speed bar?
- A. Right after leaving launch, to get away from the slope faster
- B. On final, when you see you are about to land short
- C. Flying straight, higher than about 200 m above the ground, away from the slope, in smooth air, with the instructor's OK
- D. While circling in a thermal near the slope
Show answer
Answer: C. Flying straight, higher than about 200 m above the ground, away from the slope, in smooth air, with the instructor's OK. Don't push it just after launch, near the slope, while turning or circling in a thermal, in the landing circuit, or in rough air.
Question 5. On the speed bar, you feel the wing shudder and the leading edge go soft. What do you do first?
- A. Take your foot off the speed bar immediately, smoothly, without jerking
- B. Pull both brakes down hard
- C. Push the bar further to get through the turbulence
- D. Pull big ears to stabilize the wing
Show answer
Answer: A. Take your foot off the speed bar immediately, smoothly, without jerking. Release the bar first, then deal with it. Braking while on the speed bar distorts the wing's profile and can lead to a violent collapse.
Question 6. As you fly out of lift, the wing shoots forward ahead of you. What does active flying mean here?
- A. Raise your hands fully so the wing speeds up
- B. Shift your weight hard to one side
- C. Brake firmly on both sides at the right moment, then release as the wing stops
- D. Push the speed bar
Show answer
Answer: C. Brake firmly on both sides at the right moment, then release as the wing stops. Wing in front, brake; wing behind, hands up. Braking at the right moment keeps the pressure inside the wing and prevents a frontal collapse.
Question 7. In rough air, the right brake suddenly goes very light. What does it mean and what do you do?
- A. The wing is flying faster; leave it alone
- B. The right half of the wing is losing pressure: pull the right brake down until you feel tension again, then let it back up
- C. Raise both hands fully
- D. Pull the left brake to turn out of the rough air
Show answer
Answer: B. The right half of the wing is losing pressure: pull the right brake down until you feel tension again, then let it back up. A brake going very light is a sign that side is about to collapse. React early, just enough, then let it back up.
Question 8. Where are in-flight exercises (pitching, rolling, big ears) done?
- A. At any height, as long as the air is smooth
- B. Close to the slope, so ridge lift keeps you up
- C. Right over the landing field at about 50 m, so the instructor can see you easily
- D. At a safe height (usually starting above 200 m and finished before 100 m above the ground), away from the slope, with an instructor on the radio
Show answer
Answer: D. At a safe height (usually starting above 200 m and finished before 100 m above the ground), away from the slope, with an instructor on the radio. Height is your safety margin for correcting mistakes. The exercise must be finished before you get low, so you still have height for the landing circuit.
Question 9. In the pitching exercise, when do you brake to stop the surge?
- A. When the wing is about 15° past overhead: brake both sides quickly and firmly and hold for about 1 second
- B. While the wing is behind you
- C. The moment you have just raised your hands
- D. Don't brake; let the wing stop by itself
Show answer
Answer: A. When the wing is about 15° past overhead: brake both sides quickly and firmly and hold for about 1 second. Braking too early, before the wing has passed overhead, can stall the wing. Braking too late leaves the wing rocking and the pitching is not damped.
Question 10. The wing is rolling from side to side. What is the right way to damp it?
- A. Brake deep on both sides and hold for a long time
- B. Lean in time with the roll to make it bigger
- C. Let go of both brakes
- D. Sit upright in the harness and apply light brake on the high side, in rhythm
Show answer
Answer: D. Sit upright in the harness and apply light brake on the high side, in rhythm. Light brake on the high side slows the banking movement. After a few small cycles the wing flies straight.
Question 11. In a 360 at 60° of bank, roughly what G-force acts on you and the wing?
- A. The same as when flying straight
- B. About twice your weight (2G)
- C. About half as much
- D. About 1.15 times your weight
Show answer
Answer: B. About twice your weight (2G). At 30° of bank about 1.15G, at 45° about 1.4G, at 60° about 2G. The higher the G-force, the higher the sink rate and the higher the speed at which the wing stalls.
Question 12. Why shouldn't you pull the inside brake deep during a slow turn?
- A. Because the wing would fly too fast
- B. Because the wing would exit the turn on its own
- C. The inner half of the wing flies slower than the outer half, so it can stall first and throw the wing into a spin
- D. Because the brake line could easily snap
Show answer
Answer: C. The inner half of the wing flies slower than the outer half, so it can stall first and throw the wing into a spin. In a turn, the inner wing flies a smaller circle, so it is slower. If the inside brake goes soft and mushy, raise your hand immediately.
Question 13. To do big ears, which lines do you pull?
- A. The whole A riser on both sides
- B. The B risers on both sides
- C. Both brakes down to hip level
- D. The outermost A line on each side
Show answer
Answer: D. The outermost A line on each side. Pulling the whole A riser collapses the leading edge; pulling the B risers is a B-stall, an SIV course exercise.
Question 14. When combining big ears with the speed bar, what is the correct order?
- A. Pull big ears, then push the speed bar; to reopen, release the speed bar first, then let go of big ears
- B. Push the speed bar, then pull big ears; to reopen, let go of big ears first
- C. Push the speed bar and pull big ears at the same time; reopen both at once
- D. Pull big ears, then push the speed bar; to reopen, let go of big ears first, then release the speed bar
Show answer
Answer: A. Pull big ears, then push the speed bar; to reopen, release the speed bar first, then let go of big ears. Big ears first, speed bar second; reopen in reverse order, finishing above 100 m above the ground.
Question 15. The wind at launch is moderate or stronger. Which inflation should you choose?
- A. A forward launch, running as fast as you can
- B. A forward launch with someone pushing you forward from behind
- C. A reverse launch (facing the wing)
- D. Holding both brakes partly pulled while inflating
Show answer
Answer: C. A reverse launch (facing the wing). A reverse launch lets you see the wing the whole time it comes up and correct it in time, and you are less likely to be dragged.
Question 16. You need to abort a launch in strong wind with the wing overhead. What is the right way?
- A. Pull both brakes all the way down quickly
- B. Pull the rear risers, or pull one brake all the way and step toward the wing
- C. Let go of everything and run upwind
- D. Sit down and keep the brakes where they are
Show answer
Answer: B. Pull the rear risers, or pull one brake all the way and step toward the wing. Pulling both brakes all the way with the wing overhead in strong wind can lift you up and slam you into the ground.
Question 17. The wind is slightly off the axis of the launch (a slight crosswind). How do you lay out and inflate the wing?
- A. Lay out and inflate straight into the actual wind; once the wing is stable overhead, gradually turn your run back onto the launch path
- B. Lay out along the launch axis and ignore the wind direction
- C. Inflate and run straight along the launch axis even though the wing is still off to one side
- D. Wait for a tailwind before launching
Show answer
Answer: A. Lay out and inflate straight into the actual wind; once the wing is stable overhead, gradually turn your run back onto the launch path. Inflating into the actual wind brings the wing up evenly. In a clear crosswind, wind that keeps changing direction, or a tailwind, don't launch.
Question 18. In a mountain valley, what usually happens from midday to early afternoon on a sunny day?
- A. The air is at its smoothest, best for exercises
- B. The night-time katabatic wind flows back in
- C. The wind dies completely at both launch and landing
- D. The sun is at its strongest, thermals are strong and punchy, and the valley breeze keeps strengthening, at the landing field too
Show answer
Answer: D. The sun is at its strongest, thermals are strong and punchy, and the valley breeze keeps strengthening, at the landing field too. Wing control exercises are done in the early morning or late afternoon when the air is smooth. At midday, fly only when the instructor judges conditions suitable.
Question 19. Cumulus clouds are growing quickly into tall towers with cauliflower-like tops and darkening bases. What does it mean?
- A. A great flying day; climb up close to cloud base
- B. Stable air with no more thermals
- C. Strongly unstable air that can turn into a thunderstorm: get ready to land
- D. Morning fog is on its way
Show answer
Answer: C. Strongly unstable air that can turn into a thunderstorm: get ready to land. These are towering cumulus (Cu congestus). There is strong suction under them, and they can turn into a thunderstorm within an hour.
Question 20. You see lens-shaped clouds with smooth edges, standing still behind the mountain range. What does it mean?
- A. A good thermal day with smooth lift
- B. Strong wind aloft, with wave lift and rotor lower down: don't fly
- C. Light drizzle on the way, still flyable
- D. Completely calm at every level
Show answer
Answer: B. Strong wind aloft, with wave lift and rotor lower down: don't fly. Lenticular clouds stay still even though the wind is blowing, because they form at the crest of an air wave behind the mountains. Lower down there is rotor.
Question 21. In the morning the sky has lots of thin white streaks very high up, like feathers. What cloud is it and what does it signal?
- A. Cumulonimbus: thunder within a few minutes
- B. Cumulus: thermals are about to get very strong
- C. Stratus: strong wind is about to hit the launch
- D. Cirrus: the weather may change within the next 1–2 days
Show answer
Answer: D. Cirrus: the weather may change within the next 1–2 days. Cirrus is very high and often signals an approaching weather system. When cirrus thickens and blocks the sun, thermals weaken.
Question 22. Ridge soaring in figure 8s, which way do you turn at the end of each stretch?
- A. Always out toward the valley (into the wind), never to face the mountain
- B. Toward the mountain, for a tighter turn
- C. Either way, as long as it is quick
- D. Don't turn; fly straight over the top
Show answer
Answer: A. Always out toward the valley (into the wind), never to face the mountain. Turn toward the mountain and the wind pushes the wing toward the slope, leaving you no room to get out.
Question 23. Two wings are flying head-on along the same ridge. Who has priority?
- A. The pilot with the mountain on their left; the other turns left into the mountain
- B. The higher pilot
- C. The pilot with the mountain on their right; the pilot with the mountain on their left turns right, out toward the valley
- D. The faster pilot
Show answer
Answer: C. The pilot with the mountain on their right; the pilot with the mountain on their left turns right, out toward the valley. The pilot with the mountain on their right can't turn right because the mountain is in the way, so the other pilot must give way.
Question 24. While ridge soaring, the half of the wing closer to the hill collapses. What does the wing tend to do?
- A. Turn out toward the valley on its own
- B. Turn toward the collapsed side, which means into the hill: hold your heading at once with weight shift and light brake on the side still flying
- C. Keep flying straight as before
- D. Get lifted up faster
Show answer
Answer: B. Turn toward the collapsed side, which means into the hill: hold your heading at once with weight shift and light brake on the side still flying. A wing always turns toward the collapsed side. That is why, when ridge soaring, you keep your distance from the slope and sit slightly weighted toward the valley.
Question 25. You arrive at a thermal where another wing is already circling to the left. What do you do?
- A. Join from the outside of the circle and turn left, the same way as the pilot who got there first
- B. Turn right so you can see each other better
- C. Fly straight through the core of the thermal
- D. Turn either way if you are higher than the other pilot
Show answer
Answer: A. Join from the outside of the circle and turn left, the same way as the pilot who got there first. Everyone in the same thermal turns in the same direction. If two pilots are turning opposite ways, the lower one switches to match the one above.
Question 26. On base leg, you see the landing target slowly sinking in your field of view. What does it mean?
- A. You are too low and will land short
- B. You are gliding right onto the target
- C. The wind has just turned into a tailwind
- D. You are too high and will overshoot the target
Show answer
Answer: D. You are too high and will overshoot the target. Target still: on track; target sinking: too high; target rising: too low. Correct on the downwind and base legs.
Question 27. Why must you keep enough speed on final rather than flying slowly?
- A. To touch down quickly so the next pilot can land
- B. Wind gradient and wind shadow near the ground cost the wing some airspeed, and if you are flying slowly you can easily stall a few meters up
- C. Because flying slowly makes the wing glide too far
- D. You don't need to; the slower you fly, the safer it is
Show answer
Answer: B. Wind gradient and wind shadow near the ground cost the wing some airspeed, and if you are flying slowly you can easily stall a few meters up. Stay hands up or on very light brake until about 1 m, then flare; below about 10 m, no sharp turns.
Question 28. The wing is still open overhead but isn't flying forward: no wind in your face, soft brakes, dropping almost vertically. What is it, and what do you do if you are still high?
- A. A frontal collapse: pull both brakes all the way
- B. A spiral dive: throw the reserve immediately
- C. A deep stall: raise your hands fully; if that doesn't work, push the A risers gently forward or push the speed bar gently
- D. Normal flight in lift: change nothing
Show answer
Answer: C. A deep stall: raise your hands fully; if that doesn't work, push the A risers gently forward or push the speed bar gently. Deep stalls are most common on old or wet wings, or when braking deep while reopening big ears. If you are already close to the ground, do nothing more and hold your PLF position.
Question 29. After a collision with another wing, your main wing is tangled and not flying, and you are fairly low. What do you do?
- A. Try a few more times to clear the tangle before deciding
- B. Pull big ears to come down faster
- C. Call the instructor on the radio and wait for an answer
- D. Throw the reserve at once: look – grab – pull – throw, then disable the main wing and get ready for a PLF
Show answer
Answer: D. Throw the reserve at once: look – grab – pull – throw, then disable the main wing and get ready for a PLF. Low means throw early: the closer you are to the ground, the less time you have. Disable the main wing so it doesn't fight the reserve.
Question 30. After about 30 smooth flights, flying feels "easy now" and you want to try flying at midday in strong wind. What is this called and what should you do?
- A. Intermediate syndrome, where confidence grows faster than experience: keep a safety margin and try only one new thing per flight
- B. A sign you are ready for the P3 exam, so go ahead and try
- C. Just switch to a high-performance wing and you'll be safe
- D. It's normal; just fly when others are flying
Show answer
Answer: A. Intermediate syndrome, where confidence grows faster than experience: keep a safety margin and try only one new thing per flight. Your first 20–100 flights are when complacency is most likely. If conditions are beyond you, stay on the ground.
What's next
Once you complete P2–P3 and have built up enough flights, you take the P3 exam and move on to P4: thermal flying in stronger conditions, handling collapses, advanced precision landing. That path is covered in P3–P4 flying skills. To go back over the basics, re-read paragliding theory for P1–P2; levels P1–P5 are explained in paragliding for beginners.