A reserve is the one piece of flying equipment you cannot test before each flight. It sits in its container for months, and when it is needed it has to leave the container, stretch its lines and open within seconds. Whether it can do that was largely decided on the ground, by two jobs: packing and installation.
This article gathers what books and manufacturers' manuals say about those two jobs, for paragliding (PG), foot-launch powered paragliding (PPG) and trikes. The sources are the Powered Paragliding Bible (Jeff Goin, 7th edition), Security in Flight (Jocky Sanderson), The Art of Paragliding (Dennis Pagen), Touching Cloudbase, the APPI pilot manual, reserve manuals from Advance, Ozone, Supair, Gin, Independence, High Adventure and Apco, trike manuals from Fresh Breeze and Parajet, and DHV safety notices. The sources disagree in places, and the article says where. Where something is our own reasoning, that is stated too.
It does not replace a reserve-packing course, the manuals of the reserve, harness, motor and trike you actually use, or an instructor. It helps you understand what you are looking at, ask the right questions, and notice when an installation looks wrong.
1. What a reserve can and cannot do
A reserve is for the cases where the main wing no longer flies and cannot be fixed in time: a mid-air collision, a structural failure, riser twists with locked brakes that wind into a spiral, a cravat that will not clear, or simply running out of height before the wing recovers. Sanderson puts it briefly: if in doubt, throw it, and there is no minimum altitude for "one more try", because coming down under a reserve always beats coming down under a wing that is out of control.
But a reserve is not magic. Keep these limits in mind:
- It needs time and height to open. The APPI manual gives the opening time of current reserves as about one second; Jeff Goin sets the goal of having the reserve out of its container within three seconds. Add the time you need to recognise the problem and decide. A few dozen metres above the ground, most of that time is gone.
- You still land hard. The sink rate under a reserve is around 5–6 m/s according to the APPI manual, like jumping off a 1.8 m wall; Touching Cloudbase compares 5.4 m/s to stepping off a 1.5 m ledge. That is why you need a parachute landing fall (PLF), and why reserve size matters so much (section 2).
- Round and square reserves cannot be steered. You come down wherever the wind takes you: trees, roofs, power lines, water. In strong wind the reserve will also drag you after touchdown.
- The main wing is still attached. Left flying, it can dive and pull against the reserve (a downplane); Sanderson measured sink rates above 14 m/s in that case. Disabling the main wing is part of deploying a reserve.
- A badly installed reserve can be worse than none. Reserves have come out in normal flight, and have stayed stuck in the container when needed. With a paramotor there is also the propeller.
"Installing it wrong may be worse than not having it at all."
— Jeff Goin, Powered Paragliding Bible 7, p. 132
The throwing sequence and how to disable the main wing are covered in two other articles and are not repeated here: Paragliding P3 and P4 skills for free flight, and Paramotor (PPG) basics for deploying with a motor on your back. This article deals with what comes before: choosing, packing and installing the reserve so that it comes out when you pull.
2. Reserve types and how to choose a size
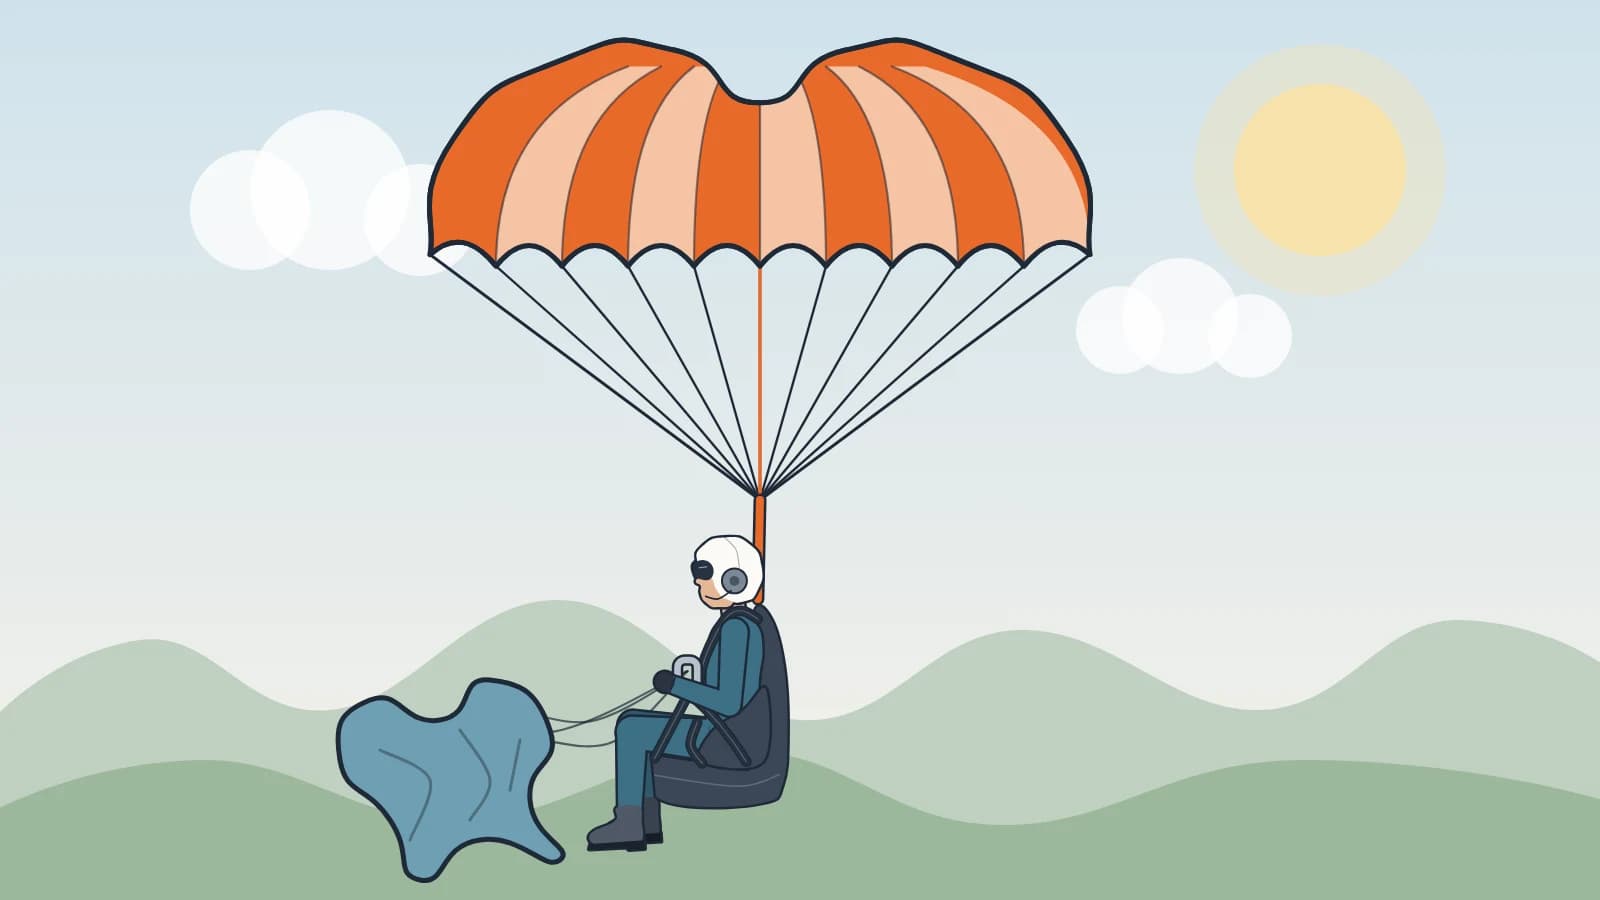
- Round, pulled-down apex (PDA). The most common type, the simplest and cheapest, and the easiest to pack. The centre line pulling the apex down makes it open quickly and sink more slowly than a plain round of the same area; the APPI manual notes that in exchange it is less stable and tends to swing. Not steerable.
- Square, or cruciform. Cross Country magazine describes this type as more stable, swinging less, slightly more expensive, and inclined to track in one direction because it develops a little drive. Still not steerable. It packs differently from a round.
- Steerable Rogallo. A delta wing with steering lines. According to the PPG Bible it descends vertically at first; once the steering lines are released it glides about 2 metres forward for every metre down, enough to avoid power lines or water. It sinks more slowly: High Adventure quotes 3.7 m/s at 100 kg for the Beamer 3 in the EN/LTF tests. In return it costs more, is much harder to pack, its left and right risers must not be swapped, and the maker itself warns that it can fly against the main wing. Touching Cloudbase adds that as long as the main wing is attached and flying, you cannot steer the reserve.
- Lightweight versions. Most of these types come in a light version for hike-and-fly and for front containers. The Ozone Angel SQ, for example, starts at about 0.9 kg in its smallest size. Thinner cloth and lines are one more reason to respect repack intervals and service life.
- Ballistic systems use a rocket or compressed air to extract the canopy and are meant for trikes and ultralights. See section 6.
One thing applies to every type: paraglider reserves open very fast at low speed, while skydiving canopies open slowly and in stages at high speed. Neither can stand in for the other, in either direction.
What EN 12491 certifies
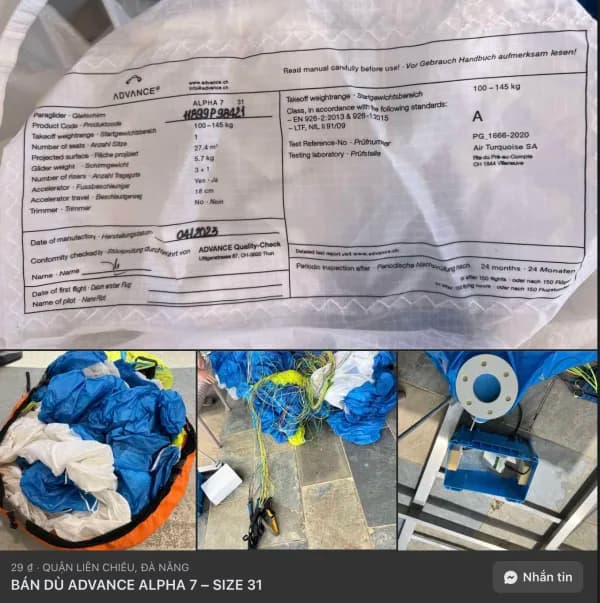
EN 12491 is the European standard for paragliding emergency parachutes; LTF is the German set of requirements (the test report calls it NfL). We do not have the text of the standard, which is sold; the figures below come from a test report by the Air Turquoise test house and from Supair's manuals:
- Sink rate at maximum load: no more than 5.5 m/s under EN for a non-steerable reserve (or a steerable one with locked controls); no more than 6.8 m/s under LTF. Supair compares 5.5 m/s to a jump from 1.8 m.
- Opening time: the Air Turquoise report gives a limit of 4 seconds up to 140 kg and 5 seconds above under the current EN, from release in straight flight at about 10 m/s. Supair's manuals say "under 5 seconds". These are test limits, not typical opening times.
- Strength: the canopy is opened in a test at 40 m/s; the label states it is not suitable above 32 m/s (115 km/h).
- Stability: observed visually during the test; according to Supair this is a subjective assessment, with no figure attached.
Certification says nothing about whether that reserve will come out of your harness container, and it does not account for a main wing pulling against it. Supair reports two real deployments of the same reserve model: one pilot who had disabled the wing touched down at 5.2 m/s, the other, who had not, at 9 m/s.
Choosing a size: maximum load and sink rate
Every reserve has a maximum load, and the published sink rate is the rate at exactly that load. Your load is everything hanging under the reserve: body, clothing, helmet, harness, main wing, reserve, water, instruments; for a paramotor, add the motor and fuel. Choose a size whose maximum load is above your total. The closer you are to the limit, the closer you fall to 5.5 m/s; with margin you come down more slowly. Two examples to picture the relation: Gin quotes the Yeti Cross 32 at 4.8 m/s at its 104 kg maximum, and Ozone quotes the Angel SQ at about 5.4 m/s at the maximum load of each size.
Should you go as big as possible to be safe? The APPI manual points the other way: an oversized reserve opens more slowly. Jeff Goin covers the opposite error: professionals call an undersized reserve a "meat saver", meaning you survive but do not walk away. Between the two, stay inside the maker's load range and keep a reasonable margin.
3. Packing a reserve: principles, not a recipe
A reserve sits in its container compressed, damp at times, and cycling through heat and cold. Over time the thin cloth sticks together and takes a set along its folds, and the rubber bands holding the lines perish. The APPI manual says stuck cloth can slow the opening considerably or even prevent it. A periodic repack exists to air, inspect and rebuild the pack from scratch. Jocky Sanderson reports that about one reserve in ten he sees at repacks shows potential for a malfunction, often something as simple as the bridle attachment.
A wrong pack may not open. What follows describes what packing consists of and why, so that you understand what the packer is doing and can check it. It is not a sequence to follow. The sequence belongs to that reserve model, in that size, in the maker's manual.
What a repack consists of
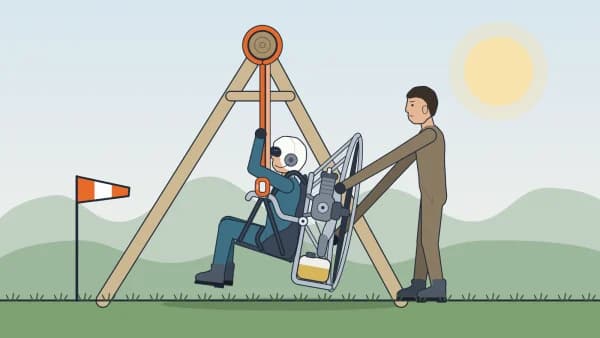
- A practice throw before opening it. Repack day is the best chance to hang the harness in a simulator, sit in it and actually pull the reserve. You find out at once whether your hand reaches, how hard the pull is, and whether the inner bag leaves the container.
- Airing. The canopy is opened and hung so the cloth releases its creases and moisture. Gin specifies hanging by the apex for 6 to 24 hours in a cool, dry room; Ozone says overnight; High Adventure says 24 hours at 60–65% humidity. No sun, no heat source.
- Inspection. Cloth (tears, stains, mould, stiffness, stickiness), seams, each line, the centre line, the bridle and its stitching, maillons, the inner bag, closing loops, handle and pins.
- Flaking the gores. The canopy is tensioned on a long table, the lines cleared so none cross, and each gore laid neatly to one side or the other with the skirt aligned. This decides whether air enters the canopy evenly on opening.
- Folding into the inner bag. The stack is narrowed to the width of the bag and S-folded into the inner bag (also called the deployment bag or pod).
- Stowing the lines. The lines are laid in figure-of-eight bundles held by rubber bands. The bands must be new at every pack and of the type the maker specifies. A final bundle of line passes through a loop to lock the inner bag: once the lines are fully stretched that bundle pulls free and only then does the bag open. That order guarantees lines taut first, cloth out second.
- Counting tools, logging. Everything used for packing (clamps, shot bags, temporary ties, line separator) is counted back out. Advance warns in a harness manual that a packing aid left inside can block the release. The date and the packer's name go into the reserve's logbook.
- Reinstalling and testing. See section 4. A correct pack wrongly installed is worth nothing.
Why it has to be that reserve's own manual
- Squares pack differently from rounds. A Rogallo packs like a wing: lines in three groups, brakes pre-set so that it opens in a braked state.
- The number of gores and folds, the stack width and the rubber band size are set by the maker for each size. Independence even lists the permitted rubber band dimensions.
- The inner bag is part of the reserve. High Adventure writes that any other inner container may give different results, including failures. Independence says changing the bag voids type approval, unless it is a harness maker's handle-and-bag system whose volume range covers the reserve. Advance, for its harness, requires the harness's own original handle and attached inner container. The two statements do not conflict, but they mean you must read both manuals.
Who packs
Every maker we read recommends a trained packer; none of them forbids owners from packing. Jeff Goin writes that you can do it yourself if you are certain of the procedure and have the parts, that a repacking clinic beats videos, and that steerable reserves may warrant a professional. Our advice: never pack a reserve model alone the first time. If you pack it yourself, have an experienced packer check it before the container is closed.
How often to repack
| Source | Repack interval | Service life and inspection |
|---|---|---|
| Advance (Companion SQR) | At least every 12 months; 6 months recommended if tightly compressed | Full inspection at 4 and 8 years; 10 years, extendable once by two years |
| Ozone (Angel SQ) | Every 6 months, preferably by a professional | Decommissioned after 10 years even if never thrown |
| Supair (Shine, Fluid Light) | Every 6 months | 10 years maximum; professional inspection after that |
| Gin (original Yeti Cross) | The same manual gives both: 12 months in the data table, at least every 6 months in the care section | Replace after 10 years |
| Independence (Evo Cross) | 12 months | Inspection every 24 months; 10 years, plus 2 with yearly inspection |
| High Adventure (Beamer 3) | Every 6 months | Inspection every 24 months; 12 years, extended to 14 with inspections every 12 months |
| Books: APPI, The Art of Paragliding | 6 months | APPI: should be under 10 years old |
| Books: Touching Cloudbase, PPG Bible | At least yearly (Touching Cloudbase); annually or every two years depending on storage (PPG Bible) | Touching Cloudbase: 10 years |
In a hot, humid climate like Vietnam's, and especially for a reserve that lives on a motor or in a car boot, we think it sensible to take the shorter of the intervals your maker allows. That is our opinion, drawn from the fact that every maker treats moisture and heat as the reserve's worst enemies; none of them writes specifically about Vietnam.
When to repack early
- Wet or damp. Advance: if the reserve gets damp or meets sand or water, consider a repack or shorten the interval. High Adventure: wet, damp or overheated means air it at once and repack. APPI manual: after a water landing, spread it out to dry for at least 72 hours, because the lines dry slowest.
- Salt water. Advance writes that if salt water is not rinsed off within 36 hours the reserve must be declared non-airworthy.
- Compression. Sitting on the harness, loading luggage on top of it, a container that is too tight. The Art of Paragliding says not to sit on your reserve.
- After a real deployment. A reserve that has opened in anger must be inspected as its maker prescribes before it is repacked; Advance requires a factory inspection after an opening at or near 32 m/s or above, or after 4 deployments.
4. Installing a reserve in a paragliding harness: what to watch
The chain from your hand to the canopy has seven links: handle, pins, the lanyard from handle to inner bag, the inner bag, the lines, the bridle, and its connection to the harness. Every installation error is one link not doing its job. Take them in order.
Does the reserve fit the container
Each harness container has a volume range published by its maker (Advance, for example, gives litres for each harness size), and a packed reserve has a volume. The two must match. Too tight and it will not come out: in a spiral, G-forces push you into the seat and squeeze the container further, so a set-up that extracts in a hang test indoors can still jam in the air; Gin issued specific advice on this for larger-volume reserves from other brands fitted to Gin harnesses. Too loose fails as well: a 2025 DHV safety notice on one harness model describes reserves moving in the container, twisting with the connecting line or opening.
Handle, lanyard and inner bag
- Use the right handle and inner bag. A harness with a built-in container usually comes with its own handle, sometimes with its own inner bag. Which bag may be used with which reserve is decided by the harness manual and the reserve manual together (see section 3). Do not combine parts because they "seem to fit".
- The lanyard from handle to inner bag must be just long enough. Gin writes: long enough that the pins are certain to be out before the strap tightens on the bag, but not so long that there is excessive slack. Too short and you pull the bag while the container is still locked. Too long is dangerous in another way: after a fatal accident, the DHV ran tests in 2021 and found long straps can wrap around the reserve lines and keep the inner bag shut; they give 30 cm or less as the state of the art. The DHV also notes that small pilots have more extraction problems.
- Pins and closing loops. The container must close with pins; Touching Cloudbase regards Velcro-only closures as inadequate, and The Art of Paragliding reports four accidental deployments from containers without pins. Pins fully through their loops, not bent, not trapped under a flap. Replace frayed or stretched loops. Where Velcro is used, Gin asks for it to be separated and re-attached regularly so that it does not bed in.
Connecting the bridle to the harness
- To both shoulder loops, symmetrically, as high as possible. The APPI manual and Sanderson agree: hanging from the highest point on the shoulders keeps you upright, feet first and ready to roll. Hung from the main carabiners you risk being forced into a sitting position. But connect at the shoulders only if the harness has loops reinforced for it; the Flybubble technical pages warn that on a harness without them you must use the main hang points instead.
- Connectors: each maker has its size. Ozone: one 7 mm maillon when joining a short bridle to the harness bridle, or two 6 mm stainless maillons when a Y-bridle goes straight to the shoulder points. Supair: two 6 mm square maillons for a Y, one 7 mm square maillon for a single connection. Gin: an 8 mm square stainless maillon, and a connector rated at least 9 times the maximum load. Advance: a maillon of at least 2,400 daN. Flybubble suggests going up 1 mm for tandem and paramotor use. Take the figure from your own manual.
- Tighten moderately and stop the webbing sliding. Sanderson: finger tight, then a quarter turn. Ozone: finger tight, then half a turn with pliers, and do not overtighten. Then fix the webbing in the maillon with a rubber ring or neoprene tape, so it cannot slide to the side and load the maillon across its width (Advance, Supair, Sanderson).
- Fabric to fabric: the sources disagree. Sanderson is firmly against it: the opening shock creates enough friction to burn through a nylon-to-nylon join. APPI does not accept knots in the harness-to-reserve connection. Yet Supair's manual illustrates a loop-to-loop connection, and several makers sell soft links. Our reading: join fabric to fabric only in the exact way the reserve and harness manuals allow, with that exact webbing; never improvise.
- Steerable reserves: left to left, right to right. The Beamer's two risers are marked L and R and must go to the matching sides.
Bridle routing and length
The bridle lies in a covered channel up the side of the harness, from the container to the shoulders, and when the reserve opens it must peel out of that channel without catching on anything. Check three things. First: it does not cross the speed-system line, a leg strap or a pocket cord; with an under-seat container, APPI requires the speed-system lines to return to the seat by themselves when not in use. Second: the harness bridle and the reserve bridle were not twisted together during installation. Third: the total length lets the canopy open above and clear of you; Ozone says never to attach the reserve's Y-bridle to a harness's existing bridles.
Front containers need separate attention because their bridle is short and takes a different path. APPI requires a front-mounted reserve still to be attached at the shoulders, and recommends only light reserves in this position. Apco instructs connecting both ends of the front container's V-bridle to the shoulder attachment points with two maillons. Many clip-on front containers go straight to the two main carabiners instead, which is convenient but leaves you hanging in a seated position. A steerable reserve in a front container needs riser extensions, according to its maker.
Container positions: gains and losses
- Front. The handle is in plain view, either hand can pull it, and it is easy to get a swing into the throw. In return: getting in and out of the harness is fiddlier.
- Under the seat. Out of the way, and it adds a layer of padding. But the handle is not naturally in view and only one hand can pull it. APPI recommends this position and the back, yet does not accept the closed style of under-seat pocket: there have been accidents where the reserve was trapped when the seat board snapped.
- Side. Handle in view, reserve easy to fit and remove, a good swing for the throw. Only one hand can pull it. APPI does not accept side pockets.
- Back. The tidiest. The handle is out of view, one hand only, and the longer strap from handle to bag gives less swing; this is also the long-strap layout the DHV warns about above.
The pros and cons above follow the table in the APPI manual. Add Sanderson's reminder: pull the inner bag out in the direction it was put in. Pulling against that direction, across your thighs, is the surest way to jam it, and panicking pilots have torn the handle off.
The compatibility check: hang up and really pull
Every new combination of a reserve and a harness must pass this check. In Germany it is a binding order issued through the DHV; its content is worth applying anywhere:
- A competent person compares the two manuals: volume, inner bag and handle, and whether they are approved together.
- The handle and its strap cannot snag the reserve lines.
- The pilot, in full flying kit, hangs in a simulator in flight position, pulls the reserve and extracts the inner bag completely. The handle must be easy to reach, the force low (Ozone and High Adventure give a limit of 7 kg), and the bag must be throwable in one continuous movement.
- The result is recorded in writing. If arm length or strength puts the result in doubt, that pilot repeats the test in person; nobody does it on their behalf.
Supair treats the hang test as mandatory and asks for an extraction test every six months. Pulling it out indoors is not the end of the story: the DHV measured, in a spiral sinking at about 8 m/s, roughly 2.6–2.8 seconds from the start of the pull to a load-bearing canopy, almost a full turn of the spiral.
The pre-flight pin check, and a note on tandems
Before putting the harness on, every flight: see that the reserve pins are fully through their loops and the handle is seated with nothing lying across it. A loose pin is how reserves fall out in flight or during inflation. The APPI manual puts this in the first step of the pre-flight check.
Tandems. A tandem reserve is its own category, sized for two people. It connects to the spreader bars, at the main attachment on top of each bar, and not to the pilot's shoulder loops; Supair and Apco say so in their manuals, and Sanderson gives the reason in section 6.
5. Installing a reserve on a foot-launch paramotor
Everything in section 4 still applies. A paramotor adds four things that make the problem harder: a frame, cage and spinning propeller behind you; one hand always busy with the throttle; several dozen kilos more load; and a rigid engine right behind your spine when you touch down. What follows is based on the Powered Paragliding Bible (pp. 23, 52–53, 132–134, 279) and on manufacturers' manuals; where a point comes from a manufacturer, it says so.
Where the container goes
- Side mount. Only one hand can reach it, so it must go on the side that does not hold the throttle. The book adds a point: the reserve's weight on one side slightly offsets the torque roll, and for clutch machines it suggests the right side. Torque direction depends on which way your propeller turns, so check on your own machine and do not apply that sentence blindly.
- Front mount. The handle is right in front of your eyes, either hand can reach it, and the clip-on containers install quickly, with bridles going straight to the carabiners. In return it is in the way when getting in and out and has to be unclipped on one side each time. It also adds mass in front of the hang points, so repeat the hang check; see Paramotor hang check.
- Under the seat. Tidy and out of the way, but the pull is slightly awkward and the handle is not naturally in view. The book notes that a built-in under-seat container can push the seat away from the frame and make launching a little harder.
- Overhead. Nothing in the way for launch and landing, but the handle is hard to find while you are being thrown around; the book says this position takes a lot of practice to reach quickly.
According to the book, under-seat and overhead mounts are best only when the machine was built for them. Whatever the position, the bottom of the container must be secured so it does not flop outward with the handle, and your arm must have enough travel to pull the inner bag fully out and throw it towards clear air.
"Never require pulling a reserve with the throttle hand—the throttle will prevent full extension."
— Jeff Goin, Powered Paragliding Bible 7, p. 132
The book also reports an observation worth remembering: under stress people reach near the hip and pull up and back, not outward. The handle should sit near the hip and the container should open along that pull. Do not worry about your dominant hand: with rehearsal either hand works.
Where the bridle attaches
- Use the harness's reserve loops first, if it has them. The book's reason: they are designed to distribute the opening shock.
- The main carabiners work, but are second best. If the carabiner itself is what fails, the reserve goes with it. If you connect this way, use steel carabiners.
- Fabric to metal. The book says bridle attachments should be fabric to metal (a maillon) unless you have learned when and how a webbing-to-webbing connection is safe.
- Do not improvise an attachment to the frame, cage or swing arms. This is our own reasoning, not a sentence from a specific source: those tubes are sized for thrust and engine weight, nobody guarantees they take an opening shock, and an attachment away from your body decides how you will hang. Attach to the frame only where the manual of that machine names the point.
Routing the bridle
The bridle runs along the harness or frame from the container to its attachment, and must not cross the throttle cable, harness straps, speed bar, swing arms, cameras or anything else that could hold it back. Keep it in place with Velcro or a very small cable tie; the book's figure is that it must break free at about 20 pounds (9 kg) of pull. Anything stronger and you have tied your reserve to the machine.
The check the book suggests: hang in a simulator, actually pull the reserve out, then have someone haul on the bridles in the direction the canopy would open until they peel out of their retainers. Watch what they touch. Adjust and repeat.
Hanging under the reserve: reclined or upright
The attachment decides your landing position. The book compares two side-mount setups: bridles going down to low, forward D-rings give a more leaned-back landing; a high attachment lands you more upright. Leaned back, the frame hits first and spares your legs, but the impact goes into the spine. Upright, you can do a proper PLF: less chance of a broken back, more chance of a broken leg. The book's conclusion: with a large enough reserve, upright is better. The way to know is to clip the bridles to a simulator, hang yourself and the motor from those two points, and look.
Kill the engine, then throw
If the propeller is still turning when the reserve deploys, its lines can go into the prop. The book puts killing the engine first in the sequence, holding the switch until it has stopped. Throw direction according to the book: towards clear air, down and to the outside of any turn, away from the wing's lines and the cage. The full sequence is in Paramotor (PPG) basics. If the reserve deploys by accident in flight, the first thing to do, and usually the only one there is time for, is also to shut the engine down.
A few more paramotor-specific points
- Count the whole load. A paramotor's total load is pilot, clothing, helmet, motor, a full tank, the wing and the reserve itself. Dudek's wing manuals point out that pilots often undercount precisely because they forget fuel and the reserve. Size the reserve for that total, not for the figure you are used to in free flight.
- A wet motor means a repack. The book is blunt: getting the motor wet is no big deal; for the reserve it means a repack.
- Fuel, oil and heat. Our own advice, not from a book: on a motor the reserve sits close to the tank and the exhaust. Check the container for oil stains, scorching or stiffened fabric at every repack and whenever you spill fuel.
- Check before every flight. Reserve pins seated in their loops, handle secured, bridle still in its retainers and not across the throttle cable. The full paramotor pre-flight list is in the basics article linked above.
6. Trikes: where the reserve attaches, and why
To be clear up front: public documentation on this is thin. The PPG Bible has a single sentence, that wheels make it easier to carry a reserve because you do not have to lift it. Trike manuals do say where the bridle goes, but often with one photo and a one-line caption, and almost none explain why. We found no manufacturer or association text that argues from centre of gravity or landing attitude for paraglider trikes. So this section is split into two clearly separate parts: what manufacturers say, and our own reasoning.
What manufacturers say
| Source | Where the bridle attaches | Notes |
|---|---|---|
| Fresh Breeze Bullix trike (Super ThoriX manual) | V-line led to the glider's carabiners | Container overhead or behind the seat; the maker notes that overhead can be reached with either hand |
| Fresh Breeze Flyke (German manual) | Bridle looped into both main carabiners | Must run clear of all other parts |
| Fresh Breeze Skip One (German manual) | A dedicated anchor on the trike, shown only in a photo | Container on the seat strut, with the V-line supplied |
| Parajet Maverick Lite Trike (manual) | Both V-bridle ends to 6 mm maillons at the top of the paramotor harness shoulder straps | A back-pack motor fitted to a light trike; the reserve stays on the harness, not on the chassis. Bridle routed outside the harness, motor and trike brace arms |
| Apco Mayday 28 UL reserve and XL container | To the trike frame, through a set of two heavy-duty bridles, 2,000 mm each | A 64 m² reserve, 340 kg maximum load; for the exact point on the frame Apco defers to the trike manual |
| Fresh Breeze X-Light and X-One two-seat trikes | Rocket-deployed system on the side of the trike, firing sideways; V-line routing shown only in a photo | X-Light: the maker recommends the Magnum 250. X-One: takes either a hand-thrown or a ballistic system |
"Attaching the rescue parachute should be done in accordance with the recommendations of the trike manufacturer and reserve parachute manufacturer."
— Apco Aviation, F3Bi wing manual, section 8
In short there are three routes: to the two wing hang points (the main carabiners), to a dedicated point on the trike frame, or, on a light trike carrying a back-pack motor, leaving the reserve on the motor's harness. All three are a manufacturer's design for that particular trike. None transfers to another trike unless its maker says so.
Why: our own reasoning
The points below are ordinary mechanics applied to a trike. They help explain the makers' choices and help you ask the maker the right questions. They are not installation instructions.
- The load must go through something rated for it. When the reserve opens, the whole mass of trike, engine, occupants and fuel is snatched in an instant. The two wing hang points are the one place on the trike that is known to be designed to carry all of it. Another point on the frame is usable only if the maker has calculated and designated it. The cage, its hoop, a footrest or a headrest are not.
- The anchor decides what the trike lands on. A hanging object always rotates until its centre of gravity is straight below the anchor. The wing hang points were placed by the maker so that the trike hangs roughly level in flight, so a reserve attached there brings it down in much the same attitude: wheels, suspension and seat touch first, the very parts built to take a vertical impact. An anchor aft of the centre of gravity tips the nose down, so feet and front wheel arrive first. An anchor too far forward tips it back, with the engine's mass loading the seat back.
- Two legs, left and right. A V-bridle or two separate bridles keep the trike from rotating or hanging lopsided under the reserve. A single off-centre anchor hangs the trike tilted and lands it on one wheel.
- Occupants and trike must come down together. On a trike you are held to the seat by a lap belt, and it is the trike that hangs under the wing. If the reserve is attached only to the pilot's harness on a trike not designed for that, the opening leaves the whole trike hanging from the pilot through the seat belt. The Parajet case is different: there the back-pack motor's harness is what carries both the motor and the light trike, and the maker specifies it. Sanderson makes the same argument for free-flight tandems: a tandem reserve must go to the central attachment so that both people descend at the same level.
- The bridle must clear the cage. Trike bridles are much longer than those of a free-flight harness (Apco sells 2-metre legs). The reason is easy to see: the confluence has to sit above the cage hoop and the propeller, and the bridle has to run outside every brace so that it does not saw against the frame under load.
"In contrast, tandem reserves should be mounted on the central flying attachment, which will bring down both the pilot and the passenger at the same level as each other."
— Jocky Sanderson, Security in Flight II (film transcript), p. 56
Size, two-seaters, hand-thrown or ballistic
- Size for maximum take-off weight. Trike, engine, full tank, wing, occupants and everything carried. Fresh Breeze writes in its manual that the rescue equipment must be selected for the maximum take-off weight. A free-flight reserve will not do for a trike: its maximum load is far lower.
- Heavy loads come down faster. One published example: Apco gives the Mayday 28 UL a sink rate of 6.3 m/s at its 340 kg maximum load. That is higher than the figure solo pilots are used to, so the trike's suspension and seat are part of the rescue system, one more reason for it to land on its wheels.
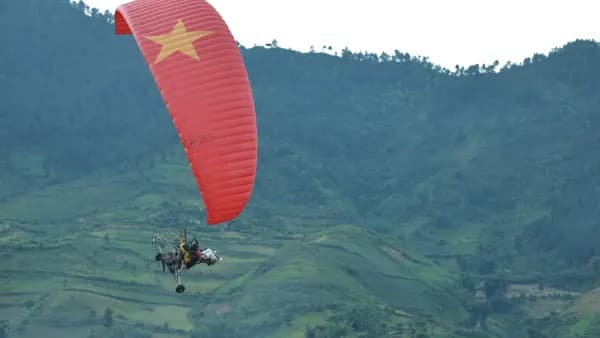
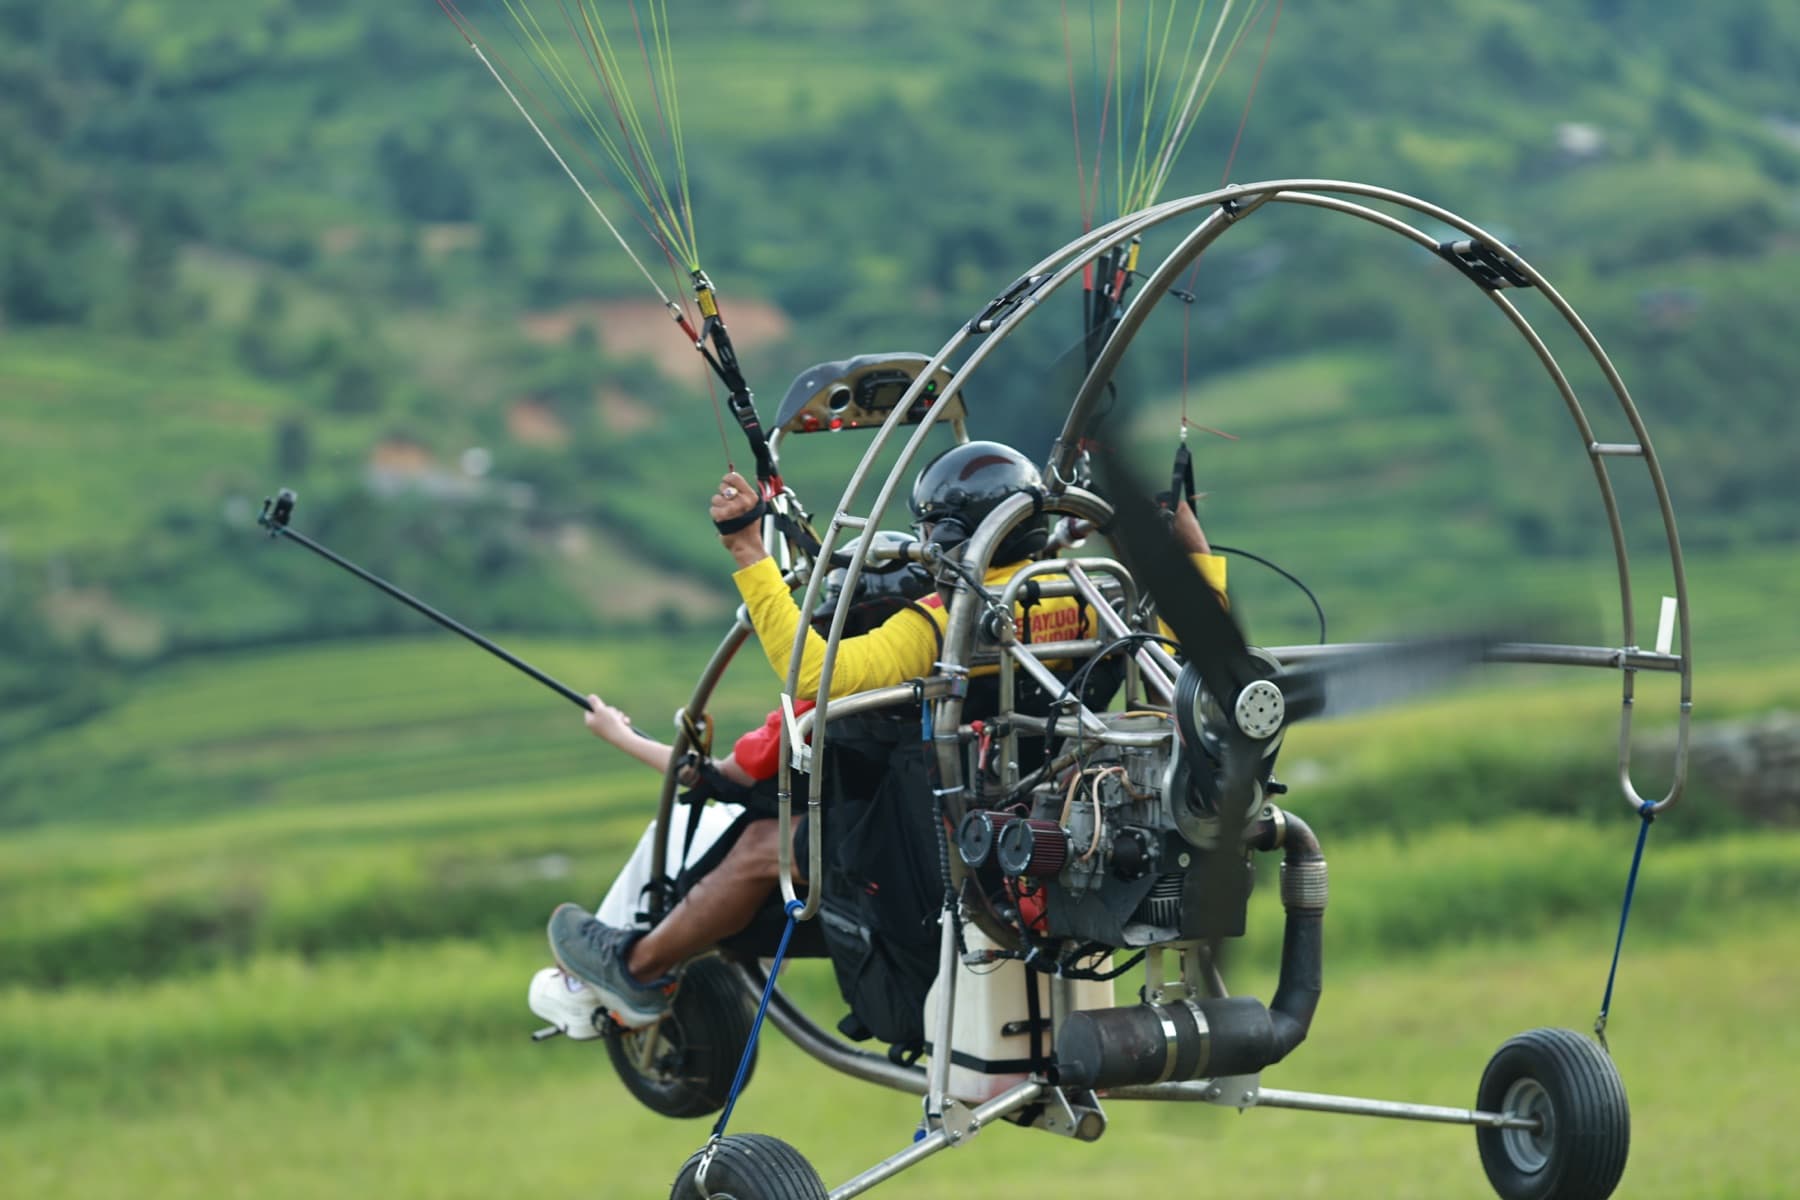
- Two-seaters. Mebayluon operates PPG tandem flights at Quản Bạ (Hà Giang), so for us "how many kilos does this reserve take" is an everyday question. With two people on board every figure sits closer to its limit: weigh each item, do not estimate.
- Hand-thrown or ballistic. On a trike you sit deep in the frame with the cage right behind, and there is little room to swing an arm. A rocket or compressed-air system carries the canopy clear of the trike without arm strength, and the makers fire it sideways, away from the wing above and the propeller behind. In return you carry a device with a propellant charge or pressure bottle, its own service life and its own transport rules. We found no manufacturer-published minimum height for ballistic systems on paraglider trikes; do not borrow figures from fixed-wing ultralights.
- Engine off. The German airworthiness requirements for ultralight trikes demand that the engine is shut down when the rescue system is triggered. We could not confirm that this document governs paraglider trikes, but the principle is the same as for a back-pack unit: the propeller must stop before reserve lines pass it.
7. Common installation mistakes and danger signs
| Mistake | Consequence | How it shows on the ground |
|---|---|---|
| Reserve too big for the container | Cannot be extracted, least of all with G-forces pressing you into the seat | Container bulging, has to be forced shut; needs two hands in the hang test |
| Reserve too small for the container | Moves about, twists with the bridle, may open by itself | Shake the harness and the inner bag shifts inside |
| Handle lanyard too short | Pulls on the bag before the pins are out: jammed | Ease the handle out: the strap goes tight while the pins have not moved |
| Handle lanyard too long | Weak throw; the strap can wrap the lines and keep the bag shut | Longer than the harness manual allows; the DHV calls 30 cm or less the state of the art |
| Pins half-seated or bent, or a Velcro-only closure | Reserve falls out during inflation or in flight | Pin not fully through its loop; frayed loop |
| Loose maillon, no retaining ring, webbing slid to the side | The maillon is loaded across its width at opening, not the way it is rated | Gate nut turns with two fingers; the maillon rotates freely |
| Bridle crossing the speed system, throttle cable, a swing arm or a brace | The canopy opens but the bridle is held back or saws on the frame | Trace the bridle from container to anchor: something lies outside it |
| Bridle tied down too firmly | The reserve opens and the bridle cannot peel free | Thick cable ties or many turns of tape instead of Velcro |
| Paramotor: handle on the throttle side | The arm cannot extend fully to extract and throw | In the hang test the free hand cannot reach the handle |
| Reserve too small for the total load | Sinks faster than the certified figure; injury on landing | Weigh yourself with all gear (and motor, fuel) and compare with the label |
| Overdue repack, or wet and not repacked | Slow opening or none | No date in the logbook; stained container, smell of mould |
Checklist after installation
- Both the reserve manual and the harness manual have been read (and the motor or trike manual, if any).
- Total load weighed and below the reserve's maximum load.
- Repack in date and logged; new rubber bands.
- Reserve volume within the container's range; correct inner bag and handle.
- Handle lanyard: pins out first, bag second; no excess slack.
- Pins fully home, closing loops sound.
- Bridle on the points the maker specifies, symmetrical; connectors of the right size, tightened, with retaining rings.
- Bridle traced end to end: crosses nothing, peels free.
- Hang test done: you pulled and fully extracted the inner bag yourself, with the hand you will use in flight.
- Paramotor and trike: pilot and machine have been hung from the reserve attachment to see the landing attitude; handle on the non-throttle side.
FAQ
How often should a reserve be repacked?
As often as that reserve's own manual says. Among the makers we read, Ozone, Supair and High Adventure say 6 months; Advance and Independence say 12, with Advance recommending 6 if the reserve is tightly compressed. If it gets wet, damp or overheated, repack at once without waiting for the date.
Can I pack my own reserve?
The manuals we read do not forbid it, but all recommend a trained packer. If you want to do it yourself, learn at a supervised repacking session, follow the manual for that model exactly, and have an experienced packer check your work. A Rogallo is best left to a specialist.
Can I use my free-flight reserve on a paramotor?
Only if its maximum load is still above your total load with the motor: body, kit, engine, full tank, wing. For many pilots that total exceeds the reserve they use for free flight. Beyond size, the installation starts again from zero: container position, handle on the non-throttle side, bridle routing, and a hang test with the motor on.
On a trike, can the reserve be attached to the pilot's harness?
Only if the trike's maker specifies it. Parajet does so for its light trike carrying a back-pack motor. The other trikes we found route the bridle to the two main carabiners or to a dedicated anchor on the frame. Without a manual, ask the maker; do not infer from another trike.
Where can I practise throwing a reserve?
On the ground: hang the harness (or the whole motor) in a simulator, ideally one that swings, and pull for real on repack day. In the air: only in an SIV course over water, with a rescue boat and an instructor. For how to rig a simulator for a paramotor, see Paramotor hang check.
What to remember
A reserve can only save you if three jobs were finished on the ground: the right size for your total load, a pack that follows its own manual, and an installation from which your own hand can extract it from that very harness. A paramotor adds two: the handle on the non-throttle side, and engine off before the throw. A trike adds one: the attachment is the one its maker specifies, not one you choose.
This article does not replace a reserve-packing course, the manuals of your reserve, harness, motor and trike, or an instructor at your side. Related reading: Reflex wings explained covers collapses at high speed and low height, when there is no altitude left for a reserve; PPG technique for paraglider pilots covers what changes once a motor is added.