Two pilots buy the same paramotor. One says it "flies like an armchair"; the other says it "twists me the moment I add power and never wants to leave the ground". Often nothing is wrong with the machine. The difference is whether the hang points were balanced for the person wearing it. That balancing is done on the ground, in a hang check (also called a hang test), before the first flight on that unit.
This article is for solo, foot-launch powered paraglider (PPG) pilots. It draws on the Powered Paragliding Bible (Jeff Goin, 7th edition), the owner's manuals of PAP, Parajet, Miniplane and Bailey machines, wing manuals from Dudek, Ozone and BGD, and a few reputable technical pages. These sources give different numbers, and the article says where. It is background knowledge: it does not replace an instructor or the manual of the machine you actually fly. Trikes and tandems are balanced differently and are not covered here.
1. What a hang point is, and the three common layouts
A hang point is where the two carabiners (or their extensions) attach to the harness or frame. Pilot and motor hang under the wing from these two points, and they also swing fore and aft around them. The usual classification is by height: in flight, if the bottom of the carabiner sits above the collarbone it is a high hang point; below it, a low hang point. The basic definitions and comparison table are in Paramotor (PPG) basics; here we look at what each layout means for balancing the machine.
- High hang points with fixed over-shoulder J-bars. The combined centre of gravity sits well below the hang points, so the pilot moves little when the wing moves. In return there is almost no weight shift: the book estimates about an inch of riser travel with great effort. The thrust line is far below the hang points, so adding power tends to tilt the unit further back; according to the book the extra tilt is small, because the centre of gravity sits so far below the pivot. The brake handles sit high.
- Low hang points with pivoting S-arms (gooseneck bars). This is the most common layout today. The arms pivot on the frame, so weight shift is good; the book calls it good when the risers can move more than 6 inches relative to each other. The S-bend raises the pivot point close to the thrust line, so the hang angle barely changes between idle and full power. The pilot feels more of the wing's movement than with J-bars.
- Very low hang points with straight pivoting arms. This design tries to mimic a free-flight harness: the most weight shift, low brake handles, a good match for wings with longer risers. The centre of gravity is closer to the hang points, so the ride is busier in turbulence and feels "loose" at first. If the thrust line passes above the pivot point, strong power tilts the whole unit forward.
Between these three there are many variants: floating or pivoting J-bars (still high hang points, but less stiff and with a little weight shift), underarm bars (the carabiners are still above the collarbone, so still a high hang point), and low-hang-point machines with fixed arms, which weight-shift less than the pivoting kind. The term "mid hang point" means different things to different people. Jeff Goin uses it for underarm-bar machines: they look mid-height on the ground but fly as high hang points. Scout calls gooseneck machines with chest-level carabiners "medium". When you read a manual or shop for a machine, ask where the carabiner sits relative to the collarbone in flight, and do not rely on the label.
Which is safer? According to the book, none clearly is: the hang point does not make the wing more or less collapse-resistant, it only changes what the pilot feels underneath. One rule applies to every machine whose arms can swing sideways: the arms must never swing inward. Risers that come together are what lets torque twist the pilot around them.
"Some instructors feel that high hook-in machines are slightly easier to learn on, but there seems to be no difference in safety."
— Jeff Goin, Powered Paragliding Bible 7, p. 19
2. Why balance matters: hang angle and thrust line
Hang an object from two points and it rotates until its centre of gravity is straight below them. A pilot wearing a motor does the same. The engine is heavy and sits behind the back, so the combined centre of gravity is aft and the whole unit leans back by some angle: the hang angle. The propeller is fixed to the frame, so the thrust line tilts by exactly the same amount. Moving the hang point along the arm changes where the centre of gravity sits relative to it, which changes that angle.
That angle decides much more than whether the seat is comfortable:
- Thrust direction and climb. Thrust always pushes along the propeller axis, which is not necessarily the flight path. The more you recline, the more the propwash blows downward, the less of the thrust pushes you forward, and the climb rate drops slightly.
- The launch run. As the wing starts to lift, the motor settles towards its hang angle. If that angle is large you end up running while being pulled backwards, with your legs working against the thrust. For pilots who "run forever and never lift off", the book advises setting the harness for as little tilt-back as possible.
- Torque and riser twist. With the propeller plane vertical, torque only pushes one riser down and the other up, which a little brake easily counters. The more the propeller plane leans back, the more of the torque acts to yaw the pilot. Once yawed, the thrust pushes off to one side, the wing banks, and holding power makes it worse. The book rates this the strongest torque effect, worst for light pilots on powerful motors.
- Cage, lines and propeller. Upright is not wrong in itself: the book says sitting bolt upright is less comfortable but reduces torque twist and makes launch easier. The trouble starts when the unit hangs more upright than the maker intends, or tips forward. Paramotor Planet notes that the cage then sits close to the risers; the PAP manual warns that in a very upright position you must take care when releasing the brakes, because they can be sucked into the propeller.
- Comfort and reach. With the balance right, no strap, bar or frame part presses on you, and your hands reach the brakes, trimmers, throttle, kill switch and reserve handle. A slightly wrong position is enough for numb legs and a sore back on a one-hour flight.
"More tilt is more comfortable but makes takeoff and landing more difficult."
— Jeff Goin, Powered Paragliding Bible 7, p. 117
Handling torque in flight (reduce power first, then correct the heading) is covered in PPG technique for paraglider pilots. This article deals only with what can be done on the ground: setting the machine up so torque has as little to work with as possible.
3. What angle is right? The sources disagree
There is no single figure for every machine. Here is what each source actually says, so you can see how far apart they are:
| Source | Figure or reference | Notes |
|---|---|---|
| Powered Paragliding Bible 7 (p. 117) | Motor tilted back 5–15° | A general book for many machines; says to follow the maker first |
| PAP user manual | About 20°, written as the angle of the propeller to the ground | The maker calls it indicative; build and preferred posture also count |
| Miniplane (maker's harness page) | Thrust horizontal or a few degrees positive, 10° at most | Comes with hang-point distances by pilot weight and height |
| Had Robinson, Southwest Airsports (note for Miniplane units) | Hang so the propeller is plumb (a level on the prop), then move both hang points about 3/4 inch forward | The extra shift compensates for leg drag in flight |
| Paramotor Planet | No figure: compare with a reference photo; slightly more upright is acceptable, more reclined is not | Hang test done with a half-full tank |
| Parajet Volution 3 and Bailey V5 manuals | No angle: pin or clamp-collar positions on the arm by pilot weight | Both call these starting points; Parajet asks for a hang test with an instructor |
Why so far apart? First, geometry differs between machines: a thrust line above, level with or below the pivot point makes the unit tilt back or stand up under power, so the "right" static hang angle is not the same for each. Second, each source measures a different thing: some the propeller plane, some the thrust line. PAP's "angle to the ground" is reported here as the maker wrote it; this article does not convert it into an angle from vertical. What the sources share is clear: a slight tilt-back or close to upright, never too reclined, and the figure in your own machine's manual is the one that decides. If the machine has no manual, ask the maker or an instructor who knows that model.
4. The hang check on the ground, step by step
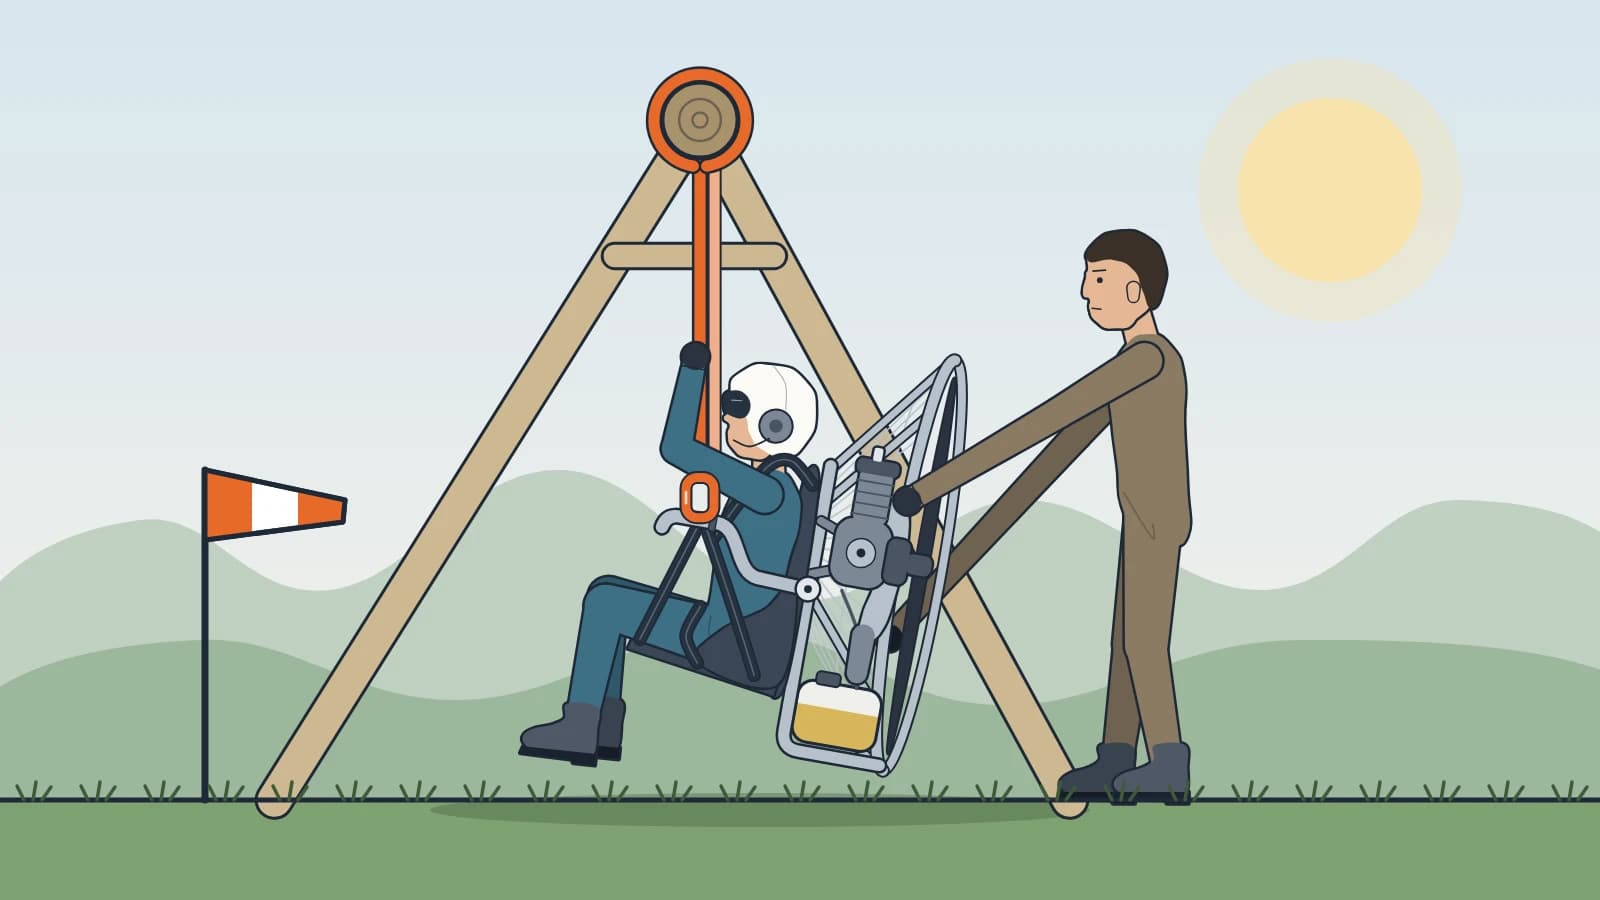
Every hang-point adjustment has to be made while pilot and motor are hanging from the two carabiners, feet off the ground. Standing with the motor on your back and guessing tells you nothing, because the motor is then resting on your shoulders, not hanging. Schools use a simulator with dummy brake lines. For adjustment you do not need that much: a beam, a steel frame or a solid tree branch will do.
- Step 1. The hanging point. Pick a structure that will certainly take pilot plus motor with a generous margin; if in doubt, do not hang from it. Use two separate straps, one per carabiner, and keep them as far apart as real risers. Hang only just high enough for your feet to clear the ground, which is all the book asks for; the lower you hang, the less a slipped strap matters. Always have a helper holding the cage and watching, ideally someone who knows that harness.
- Step 2. Engine off, before you clip in. A hang check for adjustment is done with the engine fully off: switch off before the carabiners go onto the straps, and nobody touches the throttle or starter. A spinning propeller while you dangle, free to rotate, with a helper standing close, is a risk not worth taking.
- Step 3. Dress exactly as you fly, every buckle done up. Helmet, flight suit, boots, reserve mounted where it will fly, bags, radio, camera, and the fuel load you usually take off with (Paramotor Planet hangs with a half-full tank). Fasten leg and chest straps as you would before takeoff, and only then lift your feet. The point is to have the same weight and centre of gravity as in real flight.
- Step 4. Read the angle. Sit in the seat in your flying posture, relaxed, legs as in flight. Have the helper photograph or film you from directly side-on, or put a level or angle gauge on the propeller. Compare with the figure in the machine's manual.
- Step 5. Left, right and the carabiners. Look from the front and from behind: both carabiners at the same height, the motor not sitting off to one side on the harness, both hang points in the same position (unless the maker deliberately offsets them, see section 5). Carabiner spacing: the book gives about 42 cm (17 in) measured at the base of the carabiners, and Dudek's wing manuals say 40–45 cm when describing free-flight harnesses. Narrower makes riser twist easier; too wide affects the wing. The chest strap should be just snug and must not pull the risers together.
- Step 6. Leg straps and seat. The book's method: pull the leg straps fully tight, then let out about two inches. Too tight and running is hard; too loose and getting seated is hard. A few models are designed for completely loose leg loops, so read the manual. Once seated, no strap should press on your chest, belly or thighs.
- Step 7. Practise getting into the seat. Start hanging in the leg straps, as you would be just after liftoff, then get seated. Best is simply lifting your legs and wiggling back. Next best is a kick-in strap; it should hang a little over halfway down to your foot while you are seated, and must not get in the way when you walk backwards. If your machine really needs a hand, rehearse the order too: stow the brake handle in its keeper first, then reach for the seat.
- Step 8. Reach. Seated, touch each in turn: both brake handles in their stowed position, the trimmers, throttle, kill switch, reserve handle, and the speedbar with your feet. Try with both hands. Check that the risers are in front of your arms and that your hands do not hit the cage. If the rig has real or dummy risers and brake lines, also check where a released brake handle ends up relative to the cage and propeller.
On running the engine while hanging: Jeff Goin's book (p. 61) does suggest that when you rehearse getting seated in a simulator, having the engine running makes it more realistic. That is a school exercise, in a well-secured simulator with an instructor standing by, not something to improvise at home. This article takes the cautious line: do not run the engine during a hang check unless the maker's procedure calls for it and a qualified instructor is doing it with you.
Why so much attention on getting seated? Because leg straps are not made to hang in for long. A few minutes hanging in them and your legs start to go numb, longer and you may feel faint, and you still have to land on those legs.
"If you cannot get into the seat easily, without letting go of the brakes, keep climbing, but know that you must land within about 5 minutes."
— Jeff Goin, Powered Paragliding Bible 7, p. 61
5. How to adjust when the angle is wrong
A practical tip to keep things clear (a workshop habit, not taken from the book or any manual): change one thing at a time, change both sides equally, then hang again and look again. The usual adjustment points are:
- Moving the hang point along the arm (low-hang-point machines). The loop or clamp collar that holds the carabiner slides on the arm. Moving it forward (away from the motor) makes the motor tilt back more; moving it aft (towards the motor) makes it hang more upright. According to the book, most units only ever use the two or three aftmost positions. If the retainer has a set screw, re-tighten it after every move.
- Weight-range holes or positions. Many makers drill a row of holes or publish positions by pilot weight: PAP letters them A to F for roughly 50 kg to over 100 kg, Parajet gives a table by pilot weight and engine, Bailey a graph of clamp-collar distance. The general rule: light pilots use the aft positions, heavy pilots the forward ones. The book notes a rare exception: on a few units it is the motor that clips to a bar, and the direction is reversed; one more reason to follow the manual. The makers all describe these as starting points; two pilots of the same weight but different height may still need different positions.
- High-hang-point machines. There are usually two adjustable webbing sections linking the carabiner to the seat and to the frame. Changing their length changes both the hang angle and the height of the attachment. Layouts differ between makers, so follow the drawing in the manual. When it is right you feel little or no harness pressure: the J-bars or underarm bars carry the thrust forward.
- Ground-handling straps and shoulder straps. Ground-handling (carry) straps bear no flight loads. Their job is to keep the motor high and tight on your back while walking and running, so it does not wallow. Cinch them so the motor is hiked up before launch, then loosen them in flight for comfort. Knot or stow the free ends so they cannot find their way to the propeller. Machines without separate carry straps have the main shoulder webbing tightened for launch and loosened once flying.
- Seat and seat lip. Seat-depth straps: according to the Parajet manual, lengthening them makes it easier to slide into the seat after takeoff, shortening them makes it easier to stand up for landing. On machines with a seat-lip strap, leave it loose for launch and landing; pull it while hanging to learn how much is enough, then release it again.
If the carabiner clips to a bar with holes rather than to webbing, make sure it really sits in the hole, and that the backup safety strap from the carabiner to the harness is in place. The book is blunt about a carabiner sitting outside its hole:
"Having it outside the hole will allow a severe tilt-back with likely riser twist and crash."
— Jeff Goin, Powered Paragliding Bible 7, p. 118
Offsets that counter torque
Many machines hang deliberately asymmetric to offset torque. If the two sides of your unit differ slightly, do not rush to "even them out": read the manual first. The methods described in the book and in makers' manuals:
- Reduce the tilt-back. First on the book's list, and the only method that needs no extra parts.
- Offset the thrust line relative to the hang points. Shift the attachment points slightly sideways, or mount the propeller shaft off-centre, so that thrust creates a yaw opposite to torque. The book considers this the most effective method because it adds no drag. Parajet's offset pins on the pivot arms and Bailey's asymmetric hang bars belong here; Parajet stresses that the pins must be on the correct side for the engine.
- One hang point aft, the other forward. The motor then hangs slightly yawed, which angles the thrust a little to compensate. Miniplane specifies the right hang point 1 cm shorter than the left. Had Robinson's note for these units: on gear-drive engines move the right collar back about 10 mm, on belt-drive engines the left one.
- Different carabiner heights. Lower the carabiner on the side opposite to the one torque pulls down. The book says this works best on higher-hang-point machines, and it has a cost: with the power off, the unit turns slightly the other way.
- Anti-torque strap. A diagonal strap on the harness that limits how far the risers shift under power. Set it just snug, without pulling the carabiners together; it reduces weight shift, so many pilots loosen it once established in flight. PAP fits one on engines above 180 cc, together with an anti-torque seat bar that has two mounting positions depending on propeller rotation.
The direction of any offset depends on propeller rotation: according to the book, belt-drive units usually twist the pilot left and bank the wing right, gear-drive units the opposite. So do not copy another machine's offset and do not invent your own. Too much offset causes a turn of its own, and the book notes that at large offsets the machine becomes impossible to fly. This is work to do with the maker or an instructor who knows the model.
6. How pilot weight, fuel, the reserve and accessories shift the balance
The PAP manual compares the suspension to a steelyard balance: the hang point is the sliding weight, with the pilot on one side and the motor on the other. Add or remove mass on either side and the beam tips that way. The same manual points out that a pilot 1.90 m tall weighing 95 kg and one 1.65 m tall weighing 95 kg will not use the same position, because their mass is distributed differently.
- Pilot weight. A heavy pilot pulls the centre of gravity forward and the motor hangs more upright; a light pilot is tilted back by the motor. So a second-hand machine, or one lent by a friend, is almost certainly not in the right position for you.
- Engine and propeller. A heavier engine, or one mounted further from your back, moves the centre of gravity aft. That is why a maker publishes two different position tables for two engines on the same frame.
- Fuel. A litre of petrol weighs about 0.7 kg, so a full tank and a nearly empty one differ by several kilos. Which way that shifts the angle depends on where the tank sits relative to the hang points: with the tank behind you, aft of the plumb line as in the diagram, a full tank tilts the motor back more and it stands up gradually as fuel burns off. The sources consulted give no figure for foot-launch units; Paramotor Planet chooses to hang with a half-full tank. A practical tip, not from any source: to learn how much your machine changes, hang twice, once nearly empty and once full, and only refuel with the motor back on the ground.
- Reserve. A reserve can be mounted on the side, in front, overhead or under the seat. In front it moves the centre of gravity forward; on one side it makes that side heavier, so check that both carabiners are still level. The book mentions one trick: putting a mass such as the reserve on the side whose riser torque lifts, to offset it a little. Wherever it goes, the handle must stay within reach while you are seated.
- Accessories. A front bag, water, a camera on the frame, a strobe, an extra fuel tank, a tool kit: each is small, but together they add several kilos far from the hang points. Dudek's manuals note that pilots routinely underestimate their real take-off weight by forgetting clothing, electronics, fuel and the reserve.
The rule that follows is short: change anything, hang-check again. A new engine, a new propeller, a new harness, an added reserve, a few kilos gained or lost, summer kit swapped for winter kit, or flying someone else's machine. The BHPA paramotor syllabus likewise lists adjustments for different pilots (weight, thrust angle) and the effects of differing hang-point positions among the things a student must understand.
7. What is specific to foot launch
A hang check balances the machine for the seated position, but a foot-launched flight starts and ends standing. Between the two there are three transitions that the hang points affect directly:
- During the run: the motor is on your shoulders. Until the wing lifts, the whole weight of the motor rests on your shoulders through the shoulder and carry straps. A motor hiked up high and tight lets you run steadily; one that sags wallows, and on J-bar machines the bars dig into your shoulders. This is why carry straps are adjusted standing and walking, not hanging.
- As the wing takes the load: from shoulders to carabiners. The wing lifts progressively, the weight moves from your shoulders to the hang points, and the motor settles towards its hang angle while you are still running. With a large hang angle you are pulled backwards, legs swept forward, just when you need your longest strides. Dudek writes in its wing manuals that the lower the hang points, the easier the launch; Jeff Goin records that some instructors find high-hang-point machines easier to learn on. The two are not strictly contradictory, one speaks about the wing and the other about beginners, but they show that no layout is easiest for everyone.
- After liftoff: from the leg straps into the seat. Right after liftoff you hang in the leg straps. The book advises getting seated only once above about 15 m (50 ft) and established in the climb. How easily you get in depends on leg straps, seat depth and hang angle together, which is why it is rehearsed at step 7 of the hang check and not for the first time in the air.
The reverse matters too: before landing you must be able to get out of the seat and stand upright. Too reclined and it is hard to get your body up; the PAP manual notes that a position tipped too far forward also makes it hard to get out of the harness for landing. The technique of the run, "stand up at throttle up" and landing is covered in PPG technique for paraglider pilots.
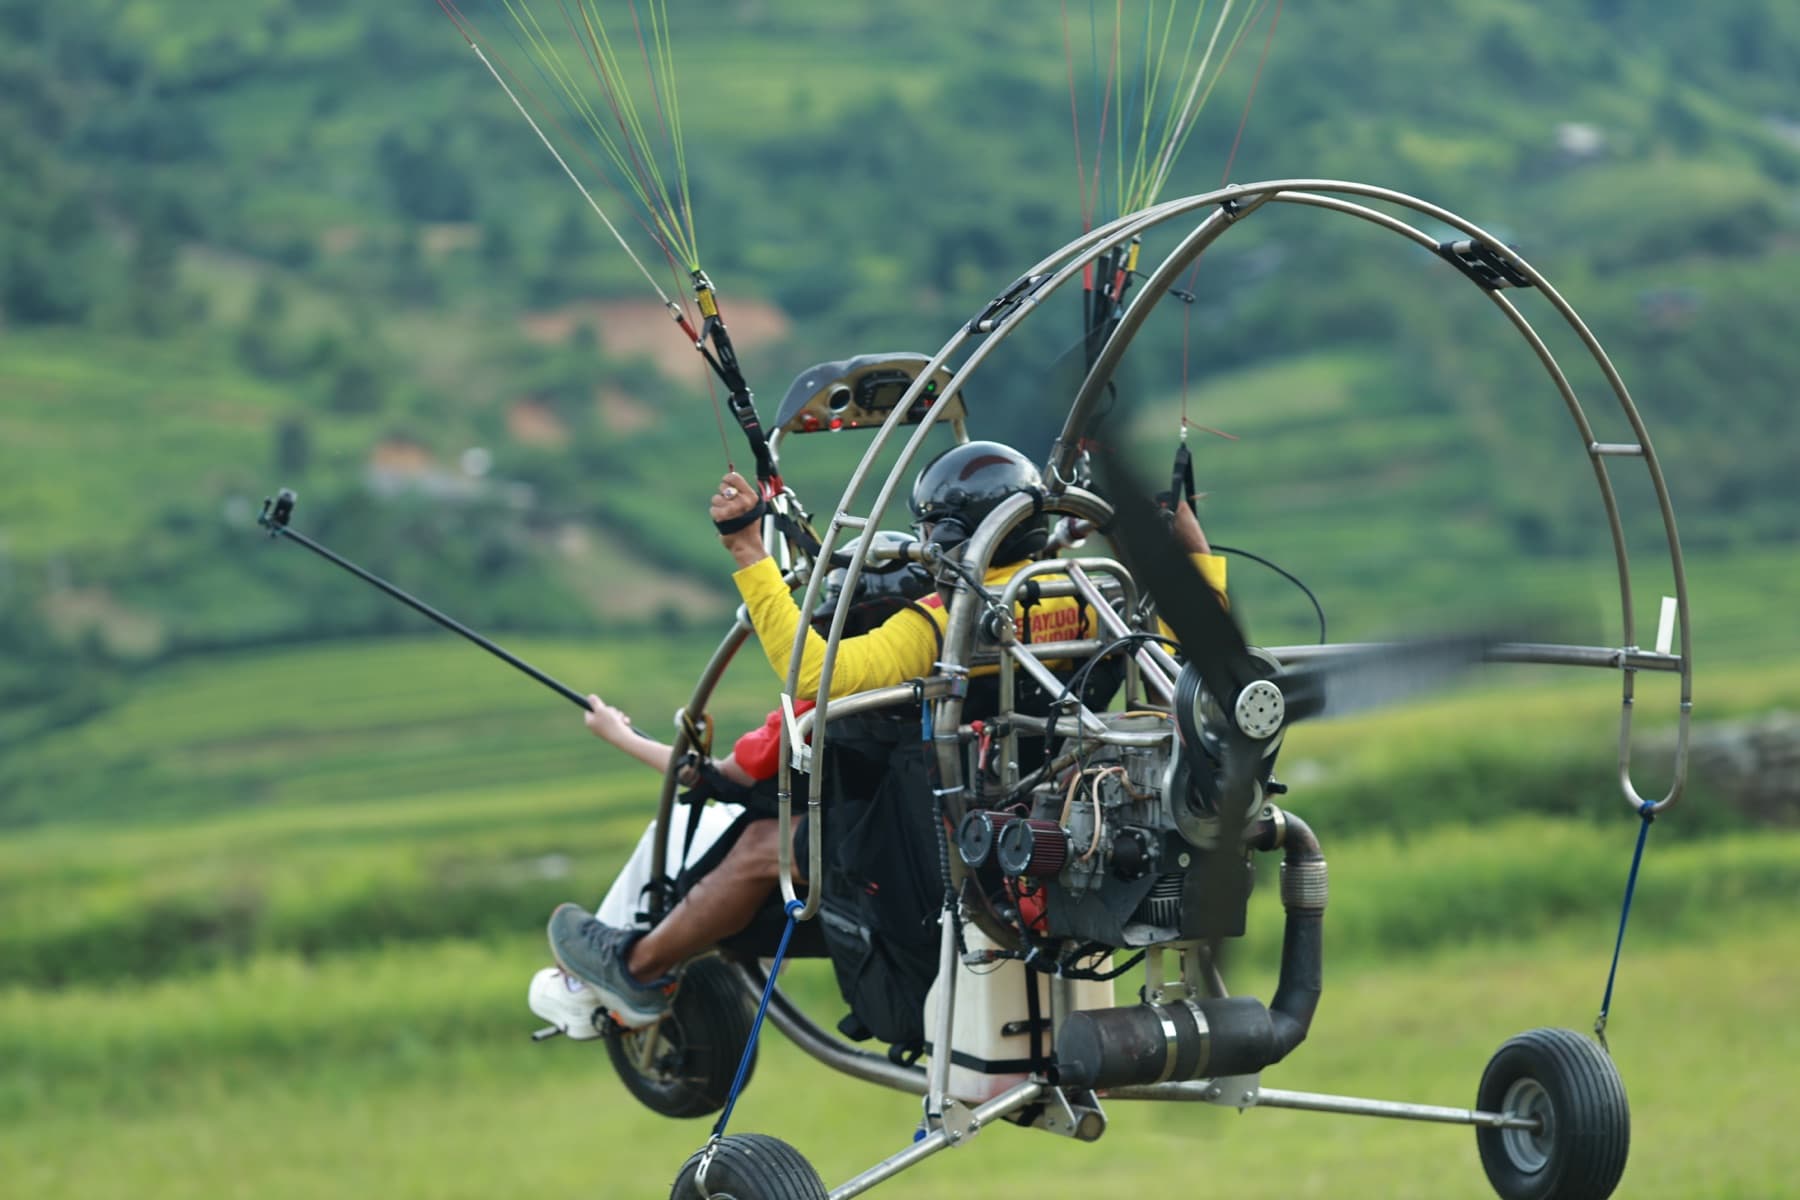
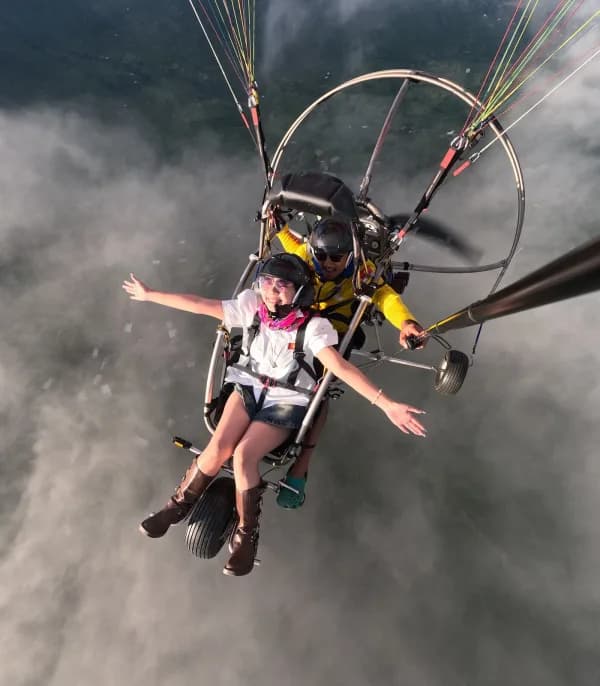
Trikes and tandems are outside this article. On a wheeled unit the hang check is about which wheels leave the ground first and which holes suit the all-up weight; on a tandem the balance changes with every passenger's weight. Mebayluon operates PPG tandem flights at Quản Bạ (Hà Giang); those machines are a different category and are balanced differently from what this article describes. If the area interests you, see Flying technique at Quản Bạ.
8. Change the hang points and the brakes and trimmers move too
Balancing the machine is not the end of it. The risers clip to the carabiners, so the height of the carabiners relative to your shoulders decides where the brake pulleys, brake handles and trimmers end up relative to your hands. The same wing on a high-hang-point machine has everything noticeably higher; Scout describes the A-risers, rear risers and brake handles on high-suspension machines as high enough to be hard to reach. On low hang points it is the opposite, and the hands fly lower.
- PPG risers usually have the adjustment built in. Dudek's manuals describe several positions for the brake pulley with matching marks on the brake line, and give the rule: higher hang points need longer brake lines, lower ones shorter. Ozone describes it from the other end but means the same: the highest pulley setting (the factory one) is for low-hang-point motors, the middle and lower settings for higher hang points, and when the pulley is moved the brake and tip-steering lines must be re-set by the same distance.
- Both brake lines must be the same length, and must not engage when the trimmers are released. BGD says so in the Cyclone manual: brake lines can be adjusted for high or low hang points or a trike, but if they pull on the trailing edge with the trimmers open, the profile is deformed and the wing can collapse. The maker also warns that changing line lengths can invalidate certification, so ask the dealer first.
- Long or short risers. Free-flight wings usually have long risers, which suit very low hang points. Putting long risers on a high-hang-point machine lifts the pulleys and trimmers out of reach. Dudek explains that the risers of its Universal are shorter precisely to ease this problem.
So the most complete hang check is one with the real risers attached: sit in the seat, raise your hands, and see whether you can grasp the stowed brake handles and work the trimmers through their full travel without stretching. Trimmers and how to use them on a reflex wing have their own article: Reflex wings explained.
9. Common mistakes and danger signs
| Sign | Usual cause | What to do |
|---|---|---|
| Too reclined: almost lying back, propeller visibly tilted | Hang points too far forward for your weight; carabiner outside its hole on the bar | Move aft one position at a time and hang again. Check the carabiner and backup strap |
| Tipping forward, or clearly more upright than the manual says | Hang points too far aft; or a thrust line above the pivot, so it only tips under power | Move forward one position. If it only tips under power, that is the machine's geometry: ask the maker |
| One side lower than the other | Unequal positions, one strap set differently, a side-mounted reserve, the motor shifted on the harness | Compare every left/right pair of adjustments. Rule out a deliberate maker's offset before correcting |
| Risers rubbing the cage, cage pressing on the risers | Unit hanging too upright; a bent or badly seated cage | Correct the angle and inspect the cage. If lines or brake handles can get near the propeller, do not fly |
| Cannot reach the pulleys, brake handles or trimmers | Wing set up for low hang points on a high-hang-point machine; long risers | Move the pulleys and re-set the brake lines exactly as the wing manual says, both sides equal |
| At high power the pilot tends to yaw and the wing banks by itself | Too much tilt-back; risers too close together; arms able to swing inward; anti-torque parts fitted on the wrong side | In flight: reduce power at once. On the ground: hang-check again and do not fly until the cause is found |
| Cannot get seated, or only by letting go of both brakes | Leg straps too loose; seat set too shallow; no kick-in strap | In flight: land soon. On the ground: adjust and rehearse again while hanging |
10. Quick checklist before the first flight on a machine
- I have read the harness and hang-point section of the machine's manual and know the figure or position the maker recommends for my weight.
- Hang check done with the engine off, in full flight kit, with my usual fuel load and a helper beside me.
- Hang angle as the manual says; no more reclined than that.
- Both carabiners level, properly in their holes or loops, gates closed; risers not drawn together; arms unable to swing inward.
- Every set screw and bolt I loosened is re-tightened; backup straps are in place.
- Leg straps, chest strap and carry straps adjusted; loose ends stowed, away from the propeller.
- I can get into the seat without letting go of the brakes, and have rehearsed it several times.
- I can reach the brakes, trimmers, throttle, kill switch, reserve handle and speedbar.
- The wing's brake pulleys and line lengths are set for this machine's hang-point type.
- I know which way this machine twists under power, and the first flight is in smooth air with someone who knows the machine watching.
11. Frequently asked questions about hang-point balance
What hang angle is correct?
There is no single figure for every machine. The Powered Paragliding Bible gives 5–15° of tilt-back, the PAP manual about 20°, Miniplane wants the thrust horizontal or up to 10° positive, and some makers give no angle at all, only positions by pilot weight. The right figure for you is the one in your own machine's manual, and when in doubt choose the less reclined side.
Do I need a new hang check when I change wing?
The hang angle does not change, because the wing is not part of the mass hanging below the carabiners. But the risers, brake pulleys, brake-line length and trimmer position differ from wing to wing. So it is still worth hanging again with the new risers to check reach, and to set the pulleys and brake lines as the new wing's manual says for your hang-point type.
Can I do a hang check at home on my own?
The book says it can be done anywhere, a rafter or a tree branch, as long as it is strong enough. But "on my own" should not mean alone: you need at least one person to hold you and read the angle. On a new machine, do the first hang check with an instructor or someone who knows that model; the Parajet manual asks for exactly that. Later checks after a small change can be done by two experienced people.
Are high or low hang points better for a beginner?
On safety the book sees no difference. Some instructors find high-hang-point machines slightly easier to learn on (the book gives no reason; over-shoulder J-bars do pass less of the wing's movement to the pilot); in return the brake handles are high and there is almost no weight shift. Low-hang-point machines with S-arms are the most common layout today and weight-shift well. For a beginner, more important than the layout is learning on the type your instructor knows well, set up for you.
Should the engine run during a hang check?
No. A hang check to set the angle, the straps and your reach is done with the engine off. The static hang angle is what you measure and adjust; whether the unit tilts back or tips forward under power is a matter of its geometry (where the thrust line passes relative to the pivot, see section 1). To learn how your machine behaves, ask the maker or an instructor who knows the model; do not look for the answer by running the engine while hanging. The only exception: the maker's procedure calls for it and a qualified instructor is doing it with you in a securely anchored rig.
Sources: Jeff Goin, Powered Paragliding Bible, 7th edition (2022), pages 19–20, 41, 58, 61, 117–120, 182, 194, 239–242, 275–276; Jeff Goin, footflyer.com, Harness Adjusting: Hang Angle & Thrust Line, Understanding Harness (Suspension) Systems and Understanding Paramotor Torque & Twist; PAP, paramotor user manual; Parajet, Volution 3 manual; Miniplane, harness adjustment page; Had Robinson (Southwest Airsports), Miniplane hang point & harness adjustment; Bailey Aviation, V5 manual; Scout Aviation, Paramotor Geometry Classroom; Paramotor Planet, Paramotor hang test; wing manuals from Dudek (Universal 1.1, Solo), Ozone (Freeride) and BGD (Cyclone); BHPA, paramotor training syllabus. This article does not replace training; where the manual of your machine or wing says otherwise, follow the manual.