Landing in paragliding is generally safer than taking off, where the pilot has to jump into an invisible and unknown air mass. When the time for landing comes, the pilot has already had time to "taste" the air and understand the wind characteristics. However, landing is still the cause of many paragliding accidents because: 📉 First, when landing, we get closer and closer to the hard ground, reducing the recovery height in case of a sudden collapse, stall, or sink. 🌪️ Second, the objects and terrain around the landing zone create turbulence, vortexes, and wind gradient effects. There can be lift, sink, or sudden changes in wind speed and direction. ⏳ Third, we can choose the time to take off, but we cannot choose the time to land. The more altitude we lose, the more freedom we lose, the fewer choices we have, and the less time we have to react. 💥 Most paragliding landing accidents occur due to: Hitting the ground or obstacles with too much vertical or horizontal speed (e.g., downwind landing); falling hard to the ground due to a stall, collapse, strong sink, or dust devil; landing while in a sharp turn or pitching/rolling. Colliding with another paraglider in a tight or crowded landing field. Post-landing incidents – being dragged by strong wind, falling into water, falling from a tree/building/cliff, electrocution due to power lines, etc. 🛠️ The paragliding landing process includes the following steps: 🔺General assessment of wind and weather. 🔺Choosing a suitable landing field. 🔺Continuously evaluating the characteristics and hazards of the field. 🔺Approaching and evaluating the field's characteristics and risks in more detail. 🔺Commitment to land at that field. 🔺Executing the landing approach to fit into the field, avoiding obstacles and turbulence. 🔺Final glide to stabilize the canopy and recover airspeed after the final turns and control inputs. 🔺Flaring and touchdown. 🔺Stopping the body's forward motion. 🔺Deactivating (killing the lift of) the canopy after touchdown.
📖 BASIC TERMS
🎯 Landing field: A surface on the ground used for landing, clear and free of obstacles. 🌐 Landing zone (LZ): The landing field plus the surrounding airspace used for landing approach flights. Landing spot: A small area where the pilot usually touches down. For accuracy landing competitors, the "landing spot" is a target they must step on with a margin of error measured in centimeters. 🛬 Landing approach: A specific flight trajectory used by the pilot to lose altitude and enter the landing field. ✈️ Final glide: The final segment of the flight, meant for the canopy to stabilize its airspeed, pitch, roll, and yaw after previous turns, corrections, braking, turbulence, or wind gradient effects. 🛑 Flaring: The action of pulling the brakes deeply and decisively right before touchdown to reduce airspeed and convert it into momentary lift, helping to reduce the sink rate and create a soft touchdown. 🦶 Touchdown: The point where the pilot actually steps on the ground. 🪢 Post-landing control: Stalling, collapsing the canopy, or disconnecting the glider from the harness via a quick-release. When the glider falls to the ground, the canopy needs to be deflated and the leading edge must be deactivated (usually by pulling the brakes or rear risers) to prevent it from re-inflating and avoid being dragged if the wind is strong. 📉 Wind gradient effect: A sudden decrease in wind speed close to the ground due to friction and turbulence from obstacles surrounding the field. It can cause a sudden drop in airspeed, lift, and maneuverability (brake efficiency) during the approach, final glide, and flaring.
🔍 CHOOSING A LANDING FIELD
Popular flying sites usually have an "official" landing field familiar to local pilots, with its own specifics and risks. Every launch and landing field has its limits. Politely talk to local pilots to gather information about hazards, landing approach patterns, and local regulations. At crowded landing fields, some pilots are obsessed with hitting a specific spot, perhaps to show off their accuracy landing skills. You cannot consistently maintain soft touchdowns if you only stare at a single spot. Smooth landings require you to look around and fit yourself into the big picture. Aim for a soft, safe, and controlled landing, not aiming at a static point in constantly changing natural conditions. Cross-country (XC) flying is the ultimate test of a pilot's landing skills. Accuracy landing competitions usually take place in stable air conditions at proven landing fields. They teach you how to master the final part of the landing, playing with the stall and glide path, but real-world safe landing involves much more. It requires not only good canopy control skills but also the ability to assess weather, terrain, and obstacles. Safe landing is an integral part of decision-making and XC success. Throughout an XC flight, an experienced pilot constantly scans and selects potential landing spots kilometers ahead, based on the following assessments: 🌬️ Wind: Average and momentary strength, direction, changes, and wind characteristics. 🟩 Clear areas: Size, slope, shape, and the length of the upwind edge. 🔄 Backup fields: Alternative landing spaces nearby. 🚧 Obstacles: Type, shape, size, location (e.g., tall trees blocking the approach; power lines crossing the field). 🌪️ Complex air zones: Areas with risk of turbulence, lift, or sink (turbulence created by buildings, tree lines, or hills upwind of the field). ⚠️ Hazardous surfaces/elements: Rough landing surfaces, thorny vegetation, animals, or people (rocky areas, thorn bushes, dogs, bulls, angry landowners). 🚪 Escape routes after landing: Are they difficult or dangerous? (e.g., crossing a river, fences, locked gates, crops, cliffs). The combination of the above factors will determine whether a clear area can be used for landing. 🚫 Do not choose a small, risky field (e.g., with power lines, turbulence) just because it is close to a road. It is better to choose a larger and safer field, even if you have to walk further. Laziness is a common cause of accidents. If strong wind is an issue, choose a landing field in front of large obstacles (like a hill) as it will block/deflect the airflow and reduce wind strength in front of it. If the wind is turbulent, it's best to land on a slightly upslope terrain (so the wind glides up, canceling out sink). ⚠️ Beware of "terrain traps" where wind accelerates (hilltops, gorges, narrow valleys) or where sink converges (deep valley bottoms, depressions). If you are stuck in a valley, landing high on rocky, bushy slopes with steady wind is better than landing at the valley bottom where the wind is often strong, with severe sink and turbulence. Furthermore, at the valley bottom, plants have to compete for light, so trees usually grow very tall. ✌️ Golden rule: We should ALWAYS HAVE at least two potential landing fields within gliding range. Usually, one field is ahead and another is behind or sideways; so if suddenly hit by strong wind, we can still reach at least one field. There will be a certain amount of time when you have the right to choose between two or more landing options, but as you continue flying in one direction, you will lose old options and have to find new ones. Each thermal circle for altitude gives you access to new landing fields, or at least gives you more time to better evaluate the existing ones. The more altitude you lose, the quicker you have to make a decision. Moving in one direction can increase or decrease options, but sooner or later, you have to choose a field. 👁️ Experienced pilots can accurately estimate where their current glide path will take them, which fields are reachable, and which are not. This is an automatic visual habit based on comparing two or more snapshots along the flight direction. The core idea is to identify objects and observe their changes: 🔺The closer an object is, the faster it grows and the faster it moves relative to objects behind/around it. 🔺The further away an object is, the longer it retains its small size. 🔺Objects ahead that we will fly over tend to sink downwards in our field of vision; objects that cannot be reached tend to rise upwards, moving closer to the horizon. 🔺When there are two objects aligned vertically, if the front object grows and covers the rear object, we cannot reach the rear one. If the front object sinks and reveals more of the rear object, we will fly over the front one. 🎯 Experienced pilots can very accurately estimate the "Stationary spot" – where their current trajectory will take them. The Stationary spot is the area in the consecutive visual images ahead where objects appear not to move relative to surrounding objects. This phenomenon is similar to riding a motorcycle at high speed: the stationary spot narrows down and becomes clear while peripheral objects are motion-blurred. Although paragliders fly slowly and are far from ground objects (thus lacking the tunnel vision effect of motorcycling), the stationary spot still exists, and experienced pilots always keep their eyes glued to it. This is a subconscious process that allows the pilot to make conscious adjustments, aiming to fit the Stationary spot into the Target landing spot. The Stationary spot works not only on a large scale (showing which field is reachable) but also on a small scale, telling us the exact touchdown point once we enter the field.
🔒 LANDING FIELD COMMITMENT
When there are no other backup options left, you are forced to "commit" to the only remaining field and focus entirely on it. ❌ A common mistake: Keep flying until the altitude is only enough to make one upwind turn and land. This makes you a victim of potential hazards like sudden sink, lift, power lines, or wind direction changes. Choose the field early and arrive with plenty of altitude, giving yourself enough time to assess the wind and details, visualizing possible landing approaches, corrections, and emergency plans. 📈 If there is lift near the landing field, use it to buy time to observe the wind and avoid turbulent cycles. Time is an effective tool. Luck favors the prepared. Once you have committed to a field, you get closer and may discover new details that threaten safety. Since there is no engine to fly to another field or circle back for a second approach, you must accept reality and deal with it the best way possible. You should have a list of Safety priorities and choose the least harmful option: 1️⃣ Your life and health are the number one priority; expensive equipment is secondary. 2️⃣⚡ Power lines are the worst; landing on treetops is almost always harmless. 3️⃣A high-speed downwind landing on a grassy field might still be safer than a slow, soft touchdown in water (risk of drowning). 4️⃣ Landing in strong wind on rough rocks is worse than crashing into bushes – bushes will help kill the canopy's lift, preventing you from being dragged and hitting other obstacles. 5️⃣ Pine/cedar trees are naturally designed to shed snow, so their branches break easily; meanwhile, a thorny acacia tree can "embrace" you and prevent a hard fall to the ground.
🌍 LANDING ZONE CHARACTERISTICS
No other aviation sport uses such a diverse set of landing fields as paragliding. They come in all sizes, shapes, and characteristics. However, they all share common factors that determine their suitability for landing: 🌬️ Wind: Strength, direction, and characteristics. 🚧 Surrounding obstacles: Their height, shape, size, location, and configuration. 🌪️ Turbulent zones: Source, size, intensity, impact, and location. 📏 Size, shape, and slope of the field: Some fields are limited by tall surrounding obstacles; others are as vast as steppes. The field's size dictates the maneuvering space inside it. The size and shape of the field in relation to the wind direction will determine how large the longest upwind edge of the field is. Can a nil-wind final glide fit into the field, considering the height of the last obstacle before entering? Do not forget to add safety margins for sudden sink, lift, or wind shifts. It is great to have extra clear strips on the sides in case of wind shifts. Strong wind, sink, or low obstacles on the downwind side will shorten the final glide, allowing us to land in a smaller field. Conversely, strong wind combined with tall, solid obstacles on the upwind side will create significant turbulence, making part of the landing field unsafe, thus requiring a larger field. Solid obstacles on the upwind side usually create lift in front of them and compensatory sink behind them, which also affects the length of the final glide. Terrain slope can also lengthen or shorten this glide. 🧠 Experienced pilots are very good at imagining various approach trajectories, identifying risks, and knowing what is feasible and what is not. When exploring a new launch in complex terrain, they often visit potential landing fields first, feel the wind, and decide if it is safe to land or too risky. Beginners should go and inspect different fields, imagine how they would land, and compare it with how other pilots do it. Walk around the field, feel and study the wind to find smooth and turbulent areas. Observe surrounding trees to get the big picture.
🛬 LANDING APPROACHES
There are two main landing approach patterns: S-turns and the Box.
📦 Box Landing Approach
Used in general aviation, it includes: Descending zone, Downwind leg, Cross wind leg (Base leg), and Final glide. Popular landing fields often mandate a left-hand or right-hand box pattern, depending on local specifics, obstacles, terrain, slope, wind direction, etc. ⏬ Descending zone: Usually located on the upwind side and slightly offset to one side of the field, allowing the pilot to "cut corners" and dive straight into the field if suddenly encountering sink or wind shifts. ➡️ Downwind leg: Located close to the field and flying parallel to the longest upwind edge of the field. ⬇️ Base leg (Cross wind leg): After flying past the downwind edge of the field, the pilot makes a 90⁰ turn to start the base leg at the bottom of the field. ⬅️ Final glide: Right before reaching the central axis of the field, the pilot makes another 90⁰ turn, facing directly into the wind for the final glide. 🎯 Target touchdown spot: Usually aimed at the end of the first 1/3 of the field, because overshooting is generally more common and dangerous than undershooting. Overshooting often happens when the terrain slopes downwards along the flight path. Another common reason is the wind gradient effect, which reduces wind speed near the ground. Trees and bushes on the upwind side strongly increase this effect. The larger the upwind obstacle, the wider the turbulence zone behind it, so it is best to land before that turbulent zone.
The box approach pattern is usually used at crowded fields because it allows multiple paragliders to join the approach from different directions and land sequentially. If a pilot only uses S-turns, they will unintentionally block the downwind area of the field, hindering other pilots. ⚠️ Note: The box pattern should not be used in strong winds, because flying along the downwind leg can push you too far away from the field, making it impossible to crab back upwind. In moderate wind, remember the downwind leg has a very fast ground speed and good glide ratio, while the final glide will be slower with a poorer glide ratio. In light or nil wind conditions, the glide ratio of all 3 legs (downwind, base, final) is similar. Then, the box pattern can be designed so that throughout the approach, the pilot always sees the touchdown spot at a constant angle. This Constant aspect landing approach is very helpful for beginners who are not yet good at estimating when to start the approach and when to turn between legs. 🚫 Beginners often rush straight to the touchdown spot, only to realize they are too high, and the canopy still needs space to burn off altitude. Inexperienced pilots might panic, freeze, and crash into obstacles, or turn too sharply and land at high speed, or accidentally pull a full stall and hit the ground hard. Therefore, throughout the approach, always keep an eye on the touchdown spot as a reference frame, but at the same time, look at what space you have to swing and lose altitude before committing upwind for the final glide. Paragliding landing is one of the slowest and easiest landings in aviation, but things can still happen too fast and overwhelm a beginner. The entire approach process consists of sequential segments. Focus on each segment; correct deviations; use it as a reference base when it's time to move to the next segment. In windy conditions, burning altitude in the holding area requires continuous adjustments (sometimes inching forward upwind) to compensate for drift after each 360-degree turn. Judge well when to end the holding and start the downwind leg. Do not forget that turning maneuvers consume both time and altitude. Try to imagine where and when your current maneuver will end. Will you be too high, too low, or too far for the next step? The box approach may look rigid at first glance, but in reality, there are many adjustable variables: 1️⃣ Timing, altitude, and position when you start the downwind leg. 2️⃣ Length of the downwind leg. If you enter low or hit sudden sink, you can shorten the downwind leg and turn to base early. If high or in lift, you can extend the downwind leg by flying a wider arc further away from the field instead of a straight line. 3️⃣ Cutting corners or Widening turns between downwind, base, and final glide. 4️⃣ Length of the base leg. Stretch it out if you are still high, or cut the corner straight to final if you are low. 5️⃣ Doing S-turns along the base leg to burn extra altitude if you entered too high. 6️⃣ Mini S-turns at the beginning of the final glide, turning a maximum of 45⁰ from the main axis. 7️⃣ Slowing down by applying brakes during base leg and final glide to degrade the glide ratio if you are still high. 8️⃣ Utilizing terrain slope: Forcing the touchdown spot to shift forward or backward by aiming at higher or lower ground during final glide. Fields are rarely perfectly flat; reading and using the terrain is part of landing skills. 9️⃣ Playing with the stall during final glide – This technique is strictly for experts!
🔴 If you still arrive at the touchdown spot with excessive altitude: 🟩 If the wind is not too strong and the field is large enough, just fly circles inside the field and land in any direction. If the field is surrounded by dense tall trees, the strong wind above will be blocked below the treetops, so a downwind landing might not be too fast. 🟩 In strong wind with obstacles/trees upwind, watch out for the wind gradient effect. Absolutely avoid sharp turns or "playing" near the stall point as the glider can easily spin or full stall. 🟩 If overshooting is inevitable and the field is not wide enough to land in another direction, accept landing/crashing into surrounding obstacles (trees, fences, roofs, cars), but actively choose the smallest and safest object located UPWIND. Crashing at slow speed (because you are flying upwind) allows you to use your limbs more effectively to swing on branches, bounce off, etc. Even if your body is completely inside the tree canopy, the glider might still be flying, and you can still utilize its aerodynamic forces. Be careful because a flying canopy can yank you out of your cozy "nest" in the tree and slam you to the hard ground. If the wingtip clips a tree, you will be spun around, which is okay if you are low, but it will ultimately deform the canopy and cause a stall, a big problem if you are high up. Crashing head-on into the middle of the tree crown might be a safer solution. 🌬️ In case of strong winds, we modify the box approach by skipping the downwind leg (as it will blow us too far away to return to the field). Instead, we crab sideways, letting the wind drift us towards the touchdown point, then turn directly into the wind to land slowly.
Holding and burning altitude in strong wind is usually done by S-turns because full 360-degree circles will drift us very far. It is crucial to stay in the upwind holding area, so if a strong gust hits, we can still fly backward and land safely in the open space behind.
🐍 S-turns Landing Approach
In XC flights, pilots predominantly use the S-turn pattern due to its simplicity and accuracy for small fields. The pilot needs to identify the wind direction, fly to the downwind edge of the field, and wait there making S-turns until low enough to enter the final glide. S-turns require practice. The pilot needs the ability to hover on an invisible axis, or be able to inch forward/backward if necessary. Beginners often lack confidence in turns; they hesitate to turn sharply because they are unfamiliar with the pendulum swing after the turn. They often fail to realize they are slowly drifting forward, resulting in being too high when entering the field. A good S-turn requires disciplined and precise turns. Then, the whole trajectory looks like a helicopter skillfully hovering over the edge of the field, regardless of strong or gusty winds. Again, reading and studying the wind is paramount. On the way to the field, invest heavily in observing wind signs and reading your groundspeed. Arrive at the field high to have enough time to "taste" the wind while doing S-turns. Being completely surprised by the wind is entirely your fault and your problem. 🔶 If the wind direction varies, take the average wind direction between the drift amplitudes, and establish the average S-turn axis perpendicular to it, ready to make corrections during the final glide. 🔶 If the field is not heavily obstructed, the S-turn axis can be built so that there are two entry points into the field for different wind scenarios. If the wind changes direction after entering the field, you can still rotate your landing direction before and during final glide. Of course, the closer to the ground, the narrower the margin for correction. Last-minute corrections during final glide in narrow fields are usually max 45⁰.
💡 Tips for adjusting S-turns:
🔶 If you hit lift while doing S-turns or the wind weakens: To avoid overshooting, turn sharper (tighten the turn) and shift the average S-turn axis backward. 🔶 If you hit sink while doing S-turns or the wind strengthens: To avoid undershooting, loosen the turns and shift the S-turn axis forward, ready to enter the field earlier.
Tightening or loosening the S-turns and utilizing the wind is an extremely effective way to control the average glide path. You can sink vertically or even sink backwards without excessively strong wind. 🔶 On a very narrow field, the main focus during S-turns is how to squeeze your body and the wingtips really close to the final obstacles, to enter the field as low as possible. 🔶 Some fields have obstacles that do not allow burning S-turns at the downwind edge. In that case, S-turns must be performed in a nearby area (sideways or further away), but the pilot will be much more at the mercy of the wind. They need extreme focus on the timing and location of ending the S-turn to make this long glide into the field.
🤹 Playing with the Stall (Advanced)
Some fields are brutal, no matter how perfect your approach is. The field might be too small, steep, surrounded by tall obstacles, or have freakish winds. A classic problem after entering the field is realizing you are still TOO HIGH and the final glide will carry you right past the limited remaining space of the field. And the problem is not just the glide path; an effective flare for a soft touchdown requires the canopy to have prior speed. 📉 There are 4 ways to degrade and shorten the glide ratio during final glide: 1️⃣ Mini S-turns: Just small priming S-turns, swinging off the axis a maximum of 45⁰ from straight flight. 2️⃣ Increasing pilot drag: Using a drag parachute or standing upright out of the harness. 3️⃣ Slowing the canopy down: Pulling the brakes slower than trim speed but still above the stall point. 4️⃣ Playing with the stall technique. 🦋 Playing with the stall (also known as pumping of the brakes, flapping, butterfly flare) is the art of landing in narrow fields under extreme conditions. It requires profound understanding, experience, keen observation, sensitivity, and even intuition about the paraglider's stall behavior, wind characteristics, and the surrounding air mass. Accuracy landing competitions are ideal training grounds. However, competitions usually happen on large fields, while real-life narrow landings demand more aggressive and prolonged "pumping" in complex conditions. Furthermore, practical narrow landings are often performed on high-performance gliders – which are much easier to stall and much harder to recover. The core idea of this technique is: Forcing the canopy to stall, letting it drop, and using this very drop for the glider to recover itself thanks to its Inductive ability (acceleration). The initial vertical drop caused by the stall can be held a bit, but must never be allowed to develop into a Full stall. In a full stall, the canopy violently jerks backward due to inductive acceleration from the trailing edge curvature. A full stall is extremely dangerous as it can throw the pilot straight to the ground, breaking their back or neck. Recovering from a full stall also eats up a lot of time and altitude, generating countless chaotic vortexes, making it unpredictable and out of control. "Playing with the stall" is like controlling the initial drop without letting the glider lose its power to recover lift and forward kinetic energy. The focus must be on breaking the airflow, stripping the airflow from the profile, and its readiness to auto-recover. Feeling the brake pressure and hand position as feedback from the canopy should not be mechanical, as the stall point can happen at different hand positions under different conditions. The "feel" of the canopy comes from the brake pull, but mostly from the acceleration felt through the harness (the sensitive buttocks) and the airflow hitting your face/ears. While "pumping," the pilot focuses on the canopy and its readiness to "glue" and "unglue" to the airflow. ⚠️ While performing this maneuver, ABSOLUTELY NEVER let the canopy shoot forward too aggressively, risking a massive collapse or slamming the pilot face-first into the ground due to the pendulum effect. 🌬️ In windy conditions: The pumping maneuver looks like a vertical descent path with a series of drops (vertical acceleration) and pauses (deceleration). The pilot is pumping the brakes in a very specific rhythm. Everything is important and interconnected: pull force, duration of holding the drop, release speed, and timing for the next pull. The canopy will undergo aerodynamic profile deformation, making rustling noises due to constant pressure intake/exhaust from stall vortexes running along the top surface of the wing.
🍃 In light wind conditions: The same braking action will create a stair-step trajectory. The horizontal segment is when the canopy recovers its forward flying energy thanks to inductive acceleration, without letting the wing shoot too far forward. During the release phase, a "secondary micro pull" might be needed to prevent the wing from over-shooting. 🔴 The biggest challenge of this technique is performing it in gusty and shifting winds. Any change in the angle of attack or sideslip can make the stall point arrive earlier and recover slower, even developing into a full stall. THEREFORE: Never "play with the stall" when a gust hits or when in a sink zone. Another classic trouble when applying this technique is the Wind gradient – the change in wind direction and speed with altitude. This phenomenon is very pronounced near the ground, especially when the field is surrounded by trees. The most extreme scenario is landing in a small clearing surrounded by a dense forest of tall trees, with very strong wind blowing above. Usually, there will be no wind at all below the treetop line, so the transition zone is extremely distinct. Inside that gap, there might even be sink or a swirling back wind, so the pilot must be prepared for a sudden loss of airspeed and a subsequent stall. The landing hole in that forest can be full of "dead air" – a mixture of random vortexes like bubbling water in a Jacuzzi. They make the air "mushy," strongly dampening the canopy's ability to recover airspeed and lift. Depending on the wind characteristics, size, density, and shape of the obstacles ahead, the pilot needs to project and estimate the plane where the strongest gradient change occurs; the boundary between "healthy" airflow and the "dead air" zone below. Playing with the stall is ONLY ALLOWED in the "healthy" airflow zone. Below the treetops, it might still work, but be prepared for much longer drops/stalls. This technique requires extreme sensitivity to the canopy's stall point in various conditions (this point will differ in open space, in terrain lift, over flat ground, in turbulence, or in a wind gradient). You must practice it on the ground first (via Ground handling), then apply it on a gentle training slope, less than 1 meter above soft ground (thick grass or sand, no rocks), preferably under instructor supervision. The harness must be equipped with a very thick foam protector. An airbag is not enough as it mostly protects against vertical drops. Learning slowly and progressively is the key to safety. Master one element, one exercise, or one specific environment before trying new things. Do not play with the stall if you are not proficient in Ground handling (you must be able to kite the glider around a car while the canopy remains stable overhead). 🔶 The simplest amplitude of this technique is: Smoothly applying brakes to slow the glider close to minimum airspeed, just before the stall point, then releasing smoothly to let the glider regain trim speed. That is usually enough to degrade the final glide and drop you into the field. 🔶 The most extreme version of this technique is: Actively putting the glider into a stall for most of the time, combined with extremely short brake releases to let the glider reach minimum airspeed, solely to recover canopy pressure, shape, and the vital airspeed.
🦅 FINAL GLIDE AND FLARING
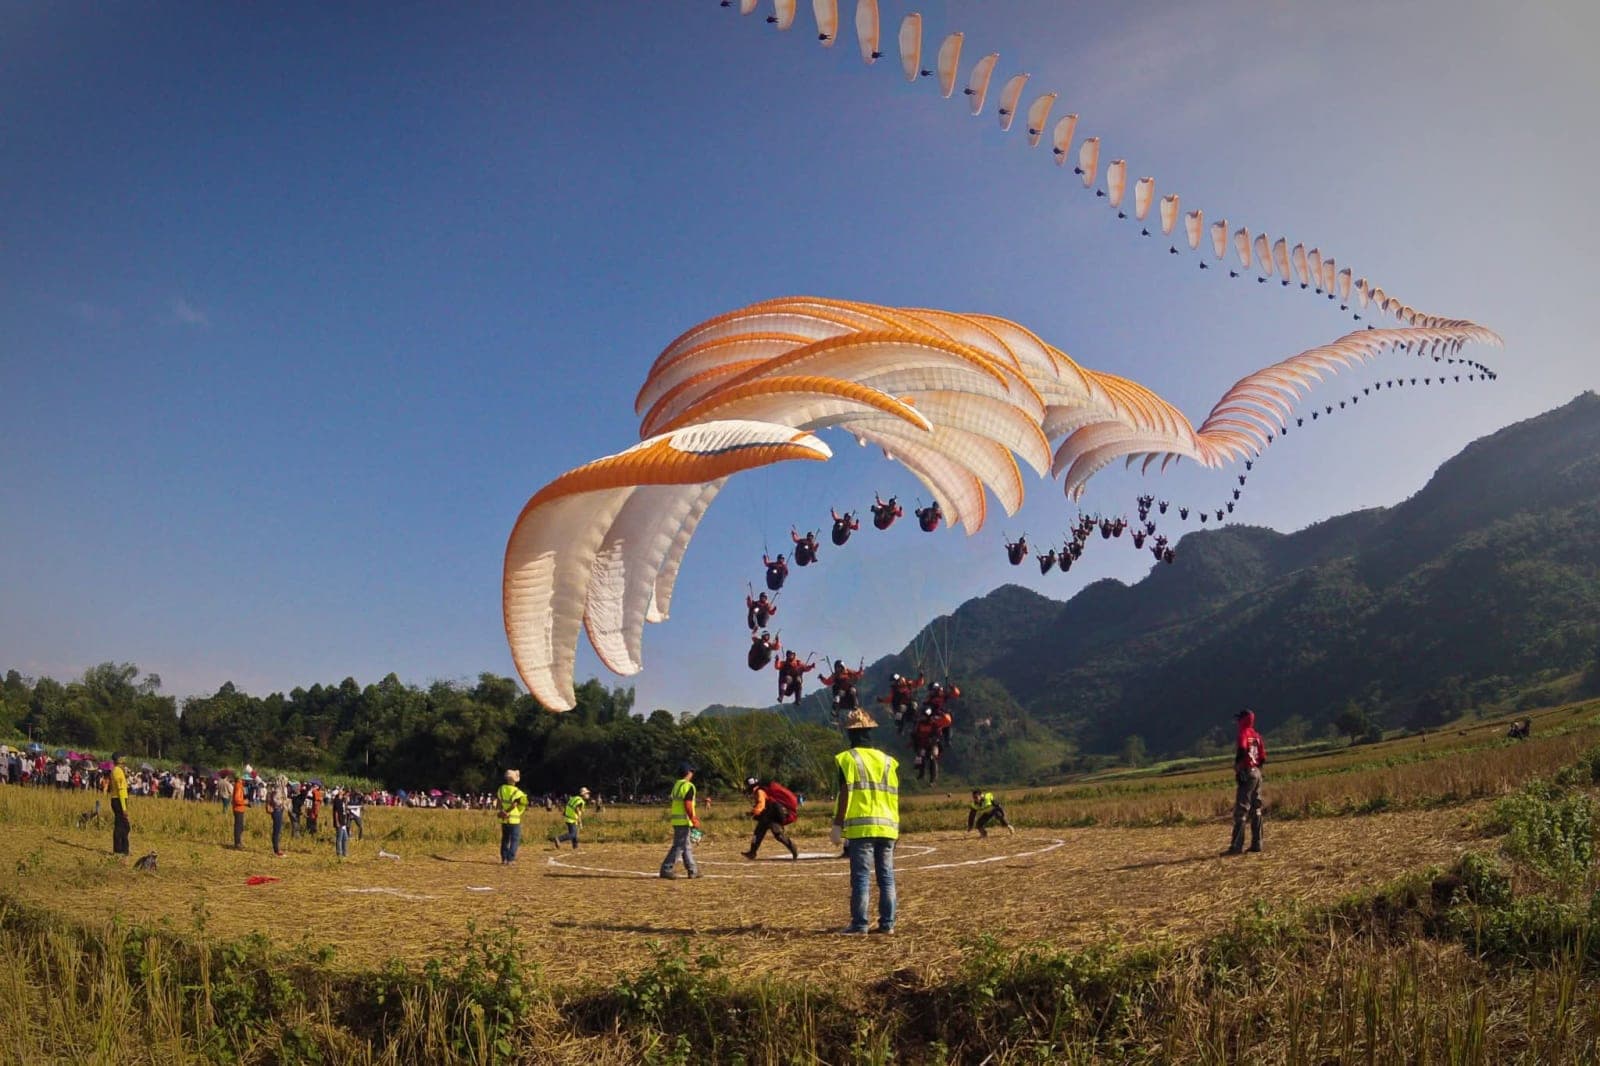
At large fields and in easy conditions, the final glide is just the end of the approach cycle, where the paraglider turns into the wind, slows down its groundspeed, enters the field, and glides smoothly down to the ground. In more extreme conditions, the end of the approach cycle includes techniques like mini S-turns and playing with the stall. Their purpose is to squeeze the canopy into a specific spot, burn off excess altitude, and make last-minute adjustments. After those maneuvers, the glider finally enters the final glide. ✨ The purpose of the final glide is for the canopy to recover from previous control inputs in order to regain Airspeed and Lift force. During the approach, some tandem pilots will release the trimmers halfway, allowing the canopy to fly faster. This reduces the impact of the wind gradient effect, reducing the risk of losing speed and stalling when entering the field. It also helps the glider recover airspeed and lift faster for the final glide. This healthy airspeed is absolutely essential for the final phase of the flight – Flaring. 🛑 Flaring is essentially a controlled and prolonged stall maneuver; its purpose is to bring the pilot's body to touchdown with the lowest possible horizontal and vertical speeds – creating a soft landing. The flaring is done by pulling the brakes. The efficiency of brakes as aerodynamic type of controls depends on the square of airspeed V^2 which is the reason we need to restore airspeed during the final glide. Good flaring requires good judgment as to when to start pulling the brakes, what rate of pulling to use and how deep to pull. The pull on the brakes should be smart and sensitive, because flaring involves a specific transformation of air speed into lift force. The pull of brakes is doing two things at the same time – reducing horizontal speed and increasing lift force, which reduces the vertical descent. The pull of brakes also causes a pendulum swing, when the wing slows down and the pilot’s body continues forward by inertia. So, for soft landings, the pilot should also take into account this pitch swing motion. Roughly, the pilot’s reactions take 1 second; the glider response is also 1 second, so if the paraglider descends with 1 m/s, then the pilot should start the flaring at 2 meters over the ground. Of course, the start moment of brake pull depends on different things like wind, slope, current airspeed and mostly on the descent rate – how quickly ground comes to us. The faster we descend, the higher we should start the pulling. The flaring can start at 3 meters, 2, 1, even at 50 cm above the ground. The end of complete brake pull should match the moment of touching down, which is a sign of a full and efficient flaring process. In slow descent or strong wind the brakes may not be pulled hard to the end to achieve a soft landing. 🔰 For inexperienced beginner paragliding pilots, it is recommended to start the flaring slightly higher and do it slightly slower, because this widens the margins of touchdown moment. 🚫 Some pilots commonly use the brakes as a body support to stand up in their harness. This compromises the work with brakes. You should stand up in the harness earlier, in the beginning of the final glide, focus and use brakes entirely for flaring and soft landings. 🪂 Some tandem pilots go into final glide with slightly pulled brakes and then, about 4–6 m above the ground (depending on how hard they want to swing), release them sharply — the pendulum or speed-landing technique —, letting the wing accelerate forward. The pilot’s body follows the wing and swings forward with high speed, brushing the grass. Then it loses speed and just at the beginning of the backward swing the pilot stands up and softly touches the ground. This cool landing technique is very attractive to entertain the crowd around. Especially, if you misjudge the swing and hit the ground hard during the high-speed forward body motion. If you’re lucky and miss the ground during this forward high-speed body swing, then you will gain height, lose airspeed, stall the wing and fall down hard like a sack of potatoes. ⚠️ Using paraglider’s pendulum swing for soft landings is not a good idea because your luck won’t last enough in long term. This technique requires too much precision and it’s too sensitive from wind, gusts, gradients, lift, sink, vortexes, and slope. ✨ A better version of pendulum swing landing technique is still slowing down the wing but speeding it up controllably by gradual step-like release of brakes, leveling out to keep it parallel to the ground and holding off, avoiding going up or touching down prematurely. This high-speed, long, close and parallel to the ground stage is similar to glider’s landings except for the lack of ground effect, because the paraglider’s wing is too high above the ground. You may need to touch and release the brakes several times to “bleed out” speed, taking out small portions of lift, bringing your body closer and closer to the ground. And then, just before the touchdown comes, flare by pulling the brakes sharply completely down, killing the remaining airspeed.
🌬️ Pendulum swing or Leveling out (swoop flare) landing techniques are used for light winds, nil winds and even for fast backwind landings. Despite the high groundspeed, the additional speeding up and increase of airspeed is needed for efficient work with brakes, and when needed – for an explosive and powerful flare. An extreme version of these techniques is upslope light-backwind landing where the speed system can be used for additionally accelerating the wing. The mastery and the timing goal of these techniques are to match the backward body swing with the touchdown moment, using this short slower-speed landing moment during the overall high-speed motion.
🛑 STOPPING BODY MOTION AFTER TOUCHDOWN
There are situations and conditions where even the perfect landing technique brings the pilot to the ground with significant speed. For example, a sudden change of wind direction or a wind gradient effect may cause a high-speed landing. At the beginning of the final glide, the pilot should stand upright in the harness with his/her body slightly tilted forward, as this is the natural position for running fast forward. The work with brakes shouldn’t affect the ready-to-run body position. Most paragliding landings require 2-3 steps to kill the body motion speed to zero. Faster landings may require 5-10 steps. Before touchdown, the pilot may warm up knees and ankles and prepare legs with running-like motions, which may continue into a real running as it might be difficult to predict the exact touchdown moment. Legs muscles should be fit and fast like springs. 🤸 Still, above a certain speed, the pilot may lose balance and fall forward. The best way to fall is the forward roll used in aikido martial art, where the pilot makes an arc with one arm forward and rolls over it, its shoulder and back, landing on legs or even making a second roll. Each arm and leg works like an individual shock absorber. The harness’s protector adds some roundness to the pilot’s back, helps the roll and softens the impact with ground.
The aikido forward roll technique requires some practice. During falls or high-speed landings, the pilot should suppress his natural instinct to protect his body with his arms as they can break easily by its weight and speed. Stretching an arm for protection is pretty useless; it’s better to bend it close to the body and meet the ground with bigger surface. Concentrated impacts do more damage. 🪂 The same logic is valid for vertical falls, where pilots use a parachute landing fall (PLF). The legs are slightly bent, just enough to unlock the knee joints. The muscles are pre-tensioned like springs. The legs are the main shock absorbers. The upper body is slightly bent and twisted, which adds asymmetry to the fall. Arms are bent next to the body. When the legs finish their initial shock-absorbing job, the body continues falling downwards and sideways, hitting the ground sideways, with a bent arm and then with its shoulder. Paragliding falls are rarely strictly vertical, so the pilot tries to use the sideways motion to transform the fall into roll, distributing the energy of the fall into bigger contact surface and longer lasting impact.
🛷 If the pilot feels unfit for rock ‘n roll, or if the landing speed seems too high for safe running, then he can lift up his legs and skid on the ground, using the bottom part of harness’ protector. Legs shouldn’t be lifted too high as this makes the pelvis and the back more vulnerable to injuries. Legs are great crash absorbers and it’s better to break a leg than a vertebrae. During skid landing, the pilot can control friction by putting more or less leg pressure upon the ground. Legs are parallel to each other and slightly bent to unlock knee joints. They are tense like springs, ready to absorb impacts. Body should be slightly tilted and bent sideways – ready to roll if the legs strike onto an obstacle. This also keeps the pilot’s back further away from uneven ground surface.
❌ Avoid skid landing on stony terrain as impacts are quite unpredictable and there are hidden dangers.
🪢 POST LANDING CANOPY CONTROL
A soft landing is not the end of the flight. There are serious accidents after landing, including fatalities. The paragliding pilot might be: ⚠️ Lifted up again by a strong wind gust, even from flat ground; ⚠️ Thrashed around by a dust devil; ⚠️ Dragged fast over stony terrain, hitting rocks, walls, obstacles; ⚠️ Pulled from a cliff, buildings, trees, power lines; ⚠️ Tangled in the glider’s lines after water landing and drown. The classic problem is landing in strong winds, perhaps landing backwards. After touchdown, the wing is no longer loaded by the pilot’s body weight; it stops flying forward and becomes a source of enormous drag force, which suddenly accelerates the pilot’s body. There are all kinds of stories and techniques how pilots deal with their wings after landing: 👉 Stalling the wing with energetic series of pulling brakes and wrapping them around pilot’s hands. Pulling, wrapping, pulling, wrapping…; 👉 Stalling the wing with rear risers. They’re more efficient than brakes, because they work with a bigger surface area from the back part of the wing. Beware that paragliders with shorter risers have a limited range of pull of the risers; 👉 Before stalling with brakes or rear risers, the pilot should concentrate on the touchdown moment, when he needs to turn around very fast with his back to the wind. This allows him to run forward while stalling and being pulled by the wing. If he doesn’t do so, he cannot run fast backward and the wing will pull and throw him on his back or neck. If you don’t manage to turn around or turn around partially when the wing pulls you, then prepare to roll over your shoulder to soften the fall; 👉 Collapsing the wing during touchdown by a sharp deep pull of frontal “A” risers. And hoping that the wing will not reopen as it falls down; 👉 Using quick-release carabiner for disconnecting the paraglider from the harness. One quick-release is enough as two may not open at the same moment and require more attention. A quick-release carabiner is highly recommended for tandem paragliders operating in strong winds as they are very difficult to stall by pulling brakes or rear risers. Tandem landings are especially vulnerable to strong winds, because the pilot and the passenger cannot turn around quickly after touchdown and cannot run with the wing while stalling and deactivating the canopy; 👉 Assistance of helpers who chase the landing pilot who gives them the brake handles, which they grab and pull them massively by running 4-5 steps backward. This technique is common for tandem pilots in windy places; 👉 Assistance of helpers who jump and grab the canopy to prevent it further dragging the pilot. Catching and grabbing the wing tip is enough; 👉 Landing in front of a tree, which will stop a long dragging of pilot by the wing. Landing in thorny bushes can be also lifesaving as they easily catch the brake lines; 👉 Cutting the lines or risers with a hook knife in case of being dragged; 👉 Beware that when a pilot is being dragged he may get confused and disoriented. Should he protect himself from ground objects during the dragging, or should he work with brakes and risers to deactivate the wing?; 👉 Exiting the harness by prior disconnecting leg and chest strap before touchdown. This is a recommended technique for water landings, because the back protector floats up and turns and pushes pilot’s body and head under the water. The prior disconnecting from harness technique shouldn’t be done in turbulent air! Pod harnesses are more suitable than sitting harnesses as there is no tension in risers and the pilot’s body is supported by a bigger surface area; 👉 Landing downwind in case of water landing, so the wing continues forward after touchdown, further away from pilot’s body and thus reducing the chance of being tangled in its lines. When the wing falls forward on its cells, this traps air inside the canopy and delays water intake, giving more survival time for the pilot. In strong wind conditions water landing should be with cross wind as downwind landings make the wing work like a sail. Its enormous pulling force combined with the back protector floating force will dip the pilot’s head under the water. Even the canopy pulling force alone is enough to make the pilot busy with swimming, distracting him from disconnecting from harness and going away from the canopy and lines; 👉 Inevitable sea water landings should be done further away from the wave swelling and breaking zone, because this greatly increases chances of being tangled. If, despite all, you’re still close to lines, then use minimal kicking for swimming, swim mostly with your arms to reduce tangling of your legs. Once you’re free from the harness and lines, abandon your paragliding gear and swim away to save your life! Part of wing or harness might be still floating and you may be tempted to save your equipment but the canopy is extremely heavy with tons of water inside, its big surface is easily driven by water currents and the octopus of lines is still there. Paragliding pilots are very innovative when it’s a matter of life and death, so probably more techniques will evolve. 🚫 Don’t relax once you kill the wing. The beast might be still alive. Few open cells or a gust from a different direction may reanimate it again. The flight is over after the wing goes in the bag! ✍️ By Nikolay Yotov, February 2023
Soft landings!
✍️ By Nikolay Yotov