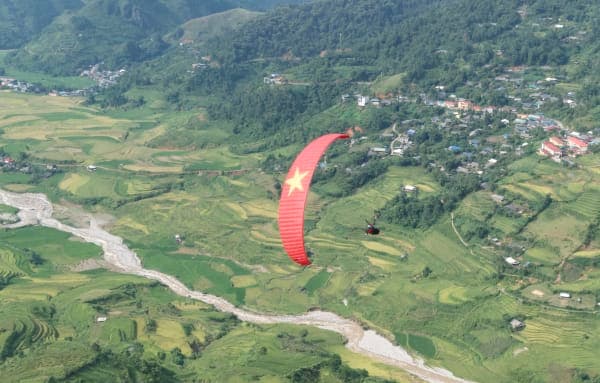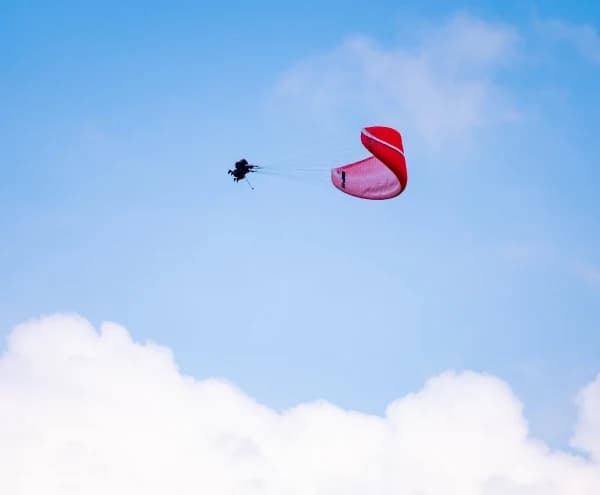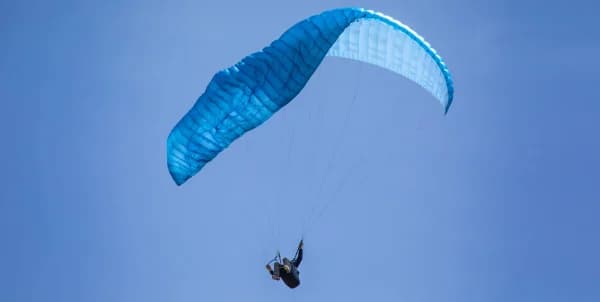
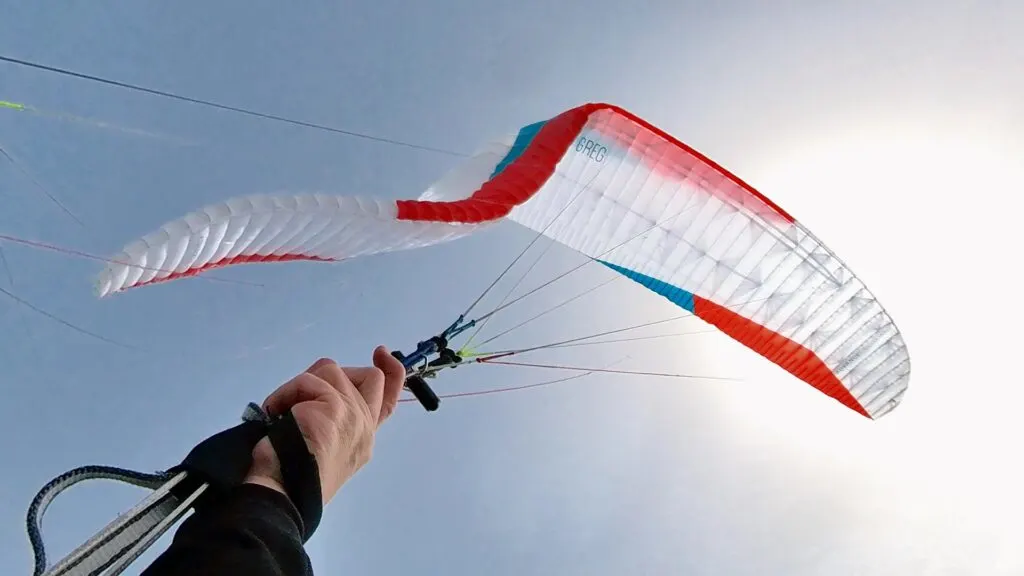
A canopy collapses when the airflow pushes it from above, meaning when the glider experiences a negative angle of attack. A collapse is different from a stall – which is when the canopy reaches an angle of attack that is too high, breaking the airflow over the top and causing it to become turbulent and detached. A collapse is a phenomenon where the leading edge rapidly folds downwards and backwards. 🔹 If it affects the entire leading edge, it is a frontal collapse or tuck. 🔹 If only a part of the leading edge folds and deforms, it is an asymmetric collapse. Depending on how much of the leading edge is folded, it can be a 30-50-80% collapse.
This part covers the causes, mechanics and complications of collapses. For a condensed list of the reactions to review quickly, see How to Deal With a Paraglider Collapse: Step-by-Step Reactions in the Air.
🌪️ There are two main causes of paragliding collapses:
📍 The glider suddenly enters sinking air or a rotor zone. There is no way to prevent this, it simply happens; 📍 The glider sharply accelerates itself, surges forward, and reaches a negative angle of attack. This self-acceleration is caused by an increase in the canopy's inductive ability, due to external turbulence such as thermals, rotors, wind gusts, and wind gradients, or due to poor piloting or aerobatic technique.
⚠️ Collapses are dangerous because:
⚡ They happen suddenly and usually without warning; 📉 The deformed canopy will stop flying and begin to drop very fast; 🔄 They can develop into violent pendulum swings or aggressive spirals; 🪢 Complications can arise, such as line twists or cravats, when the lines get tangled in the canopy. 🔴 The most dangerous thing for any paraglider pilot, whether a beginner or experienced, is a collapse close to the ground, because the swing or spiral whips the pilot into the ground. Even if the collapse does not lead to a severe swing or spiral, but just a vertical drop, a speed of 7-8 m/s is still too high for a safe landing. Another issue is that in most emergency situations, the pilot does not have much leverage and it is difficult to control their body posture as well as how they impact the ground. 🛫 Most paragliding accidents occur due to collapses right after takeoff. It is very difficult to "see" the invisible air around you and decide when it is safe to launch. When landing, the pilot has had time in the air to better understand its characteristics, so they are better prepared for the unexpected and can choose a safer landing zone if needed. Nevertheless, despite their chaotic and risky nature, collapses can still be studied and practiced to prepare newcomers for the real flying environment.
🌓 ASYMMETRIC COLLAPSE
An asymmetric collapse occurs when a portion of the leading edge collapses and folds down, caused by airflow pushing it from above. The collapsed side creates massive drag and slows down, while the remaining flying half of the canopy continues moving forward. This is why an asymmetric collapse causes the glider to turn toward the collapsed side. 📉 A collapse also causes a loss of lift and a sudden drop in altitude. The bigger the collapse, the more lift is lost, and the deeper the sink rate. This altitude drop creates an upward airflow, which helps to pop open the collapsed section and recover the glider. This upward airflow is crucial for any collapse recovery process. All collapses are different depending on the surrounding atmosphere. If the glider collapses in sinking air, the recovery time will be longer because the canopy needs extra time to start dropping faster than the surrounding sink before it can generate the upward recovery airflow. If the collapse occurs in turbulent or agitated air, it can take a surprisingly long time until the airflow becomes dense and organized enough to restore flight. 🚀 During a big collapse, the altitude drop will significantly affect the remaining part of the canopy. The strong airflow from below acts on a smaller surface area, creating an incredibly powerful inductive ability condition. The uncollapsed side of the wing will surge forward very aggressively. This, combined with the drag from the collapsed side, can throw the paraglider into a violent pendulum swing and wind it into a spiral. These spirals can reach speeds of 100 km/h and easily cause injury or death if the ground is near. In extreme cases, the surge of the flying wing can be so fast that it causes the canopy to spin, resulting in twisted risers, neutralizing the brakes and any pilot control inputs.
🪢 Another issue with collapses is when the collapsed part of the canopy gets caught in the lines – called a cravat. A cravat slows down the collapse recovery process and can sometimes become completely unrecoverable. Collapses may seem quite dangerous, but they are an unavoidable "companion" of paragliding, so pilots should get used to them. For beginners, collapses can be terrifying to the point of panic, but for experienced pilots, they are merely an annoyance and a waste of time, like having to go to the bathroom in the middle of a delicious meal. Large and frequent collapses can also be a warning sign that you are flying in overly risky conditions.
🛡️ Prevention and Actions
Study more about micrometeorology and avoid turbulent areas early on. A classic example is when flying thermals, experienced pilots will stay deep inside the core, while beginners fail to recognize its edges and constantly fly in and out, crossing the turbulent shear layer, the sink, and the eddies surrounding the thermal. Experienced pilots also recognize sources and areas of turbulence very early. They avoid them with a reasonable safety margin, properly evaluating and utilizing the glider's gliding capabilities. It takes a lot of practice time for beginner pilots to learn the glide range of their canopy, and they often fall into various traps of the terrain or weather conditions. 🥊 Experienced pilots are very good at "catching" collapses the moment they form and stopping their development. They can feel when one side of the canopy surges forward or gets soft, and they immediately punch the brake on that side down, without even needing to look at the glider:
It is very difficult to move the pilot's body mass quickly without using external forces or leverage, but it is very easy to throw your body to one side while punching the brake on the other. The body is heavier, but the arms are faster. There is a similar application of the law of conservation of momentum in martial arts like kung fu and karate, while sports like boxing rely purely on brute muscular strength and friction with the ring floor. 🛑 If counter weight-shifting to the flying side and pumping the brake on the collapsed side still allows the collapse to persist, the pilot must COUNTER-STEER by pulling a little outside brake (on the uncollapsed wing), while maintaining the weight-shift towards the flying wing. Collapses happen so fast that we cannot predict how big they will be. Will it develop into a violent swing or a spiral? Or will it just be a small 30% collapse, like saying "hello, I'm here"? We don't know, but in any case, we must immediately shift our body to the opposite side – towards the wing that is still flying. At the same time, we can "pump" the brake on the collapsed side but then quickly switch to applying more brake on the uncollapsed side. Throughout this process, we will decide how long and how deep to continue pulling the brake. If the collapse does not cause the glider to significantly change direction, swing, or spiral, we release the brakes but maintain the counter weight-shift posture. ⚠️ OVERREACTING with the brakes is a common mistake that can make the situation worse, causing a stall and spin, creating a chain reaction. Over-braking is worse than braking too little or not braking at all. You cannot over-weight-shift, but you CAN over-brake. That is why, during a collapse, we first need to force our body to the opposite side and only then manage it with the brakes. If you observe the body of an experienced pilot flying in turbulent air, you will see how energetically it moves. There are all kinds of counter weight-shifts; large and small, fast and slow. It is like the elastic body of a boxer, skillfully dodging punches from an opponent. It is like a dance with your canopy and the surrounding turbulence. ⚖️ About 50% of pilot control is weight-shifting and 50% is braking, and they are closely linked together! 🏋️ DURING A COLLAPSE, we immediately weight-shift to the open half of the canopy. This doubles the wing loading and creates an even stronger inductive ability. This is another reason to always stay alert and ready to pull the opposite brake to stop any aggressive surge. There can be two brake pulls – an immediate, cautious, and short one to take up the slack and check the brake pressure, and a second pull, deeper and longer, to stop the glider's surge. Depending on the nature of the collapse, the braking can be a combination – first a shallow input, followed by a pause to see if there is a massive surge and how powerful it is, and then continuing with a deep pull as needed. Whether it’s one or two brake inputs, ALWAYS RELEASE THE BRAKES after the job is done; do not hold them for even half a second, otherwise, the glider might stall or spiral. Of course, if the collapse winds you into a deep spiral, it will take quite a bit of time and brake force to dampen it out, but at that point, there is no risk of a stall or spin because the rotation is accompanied by plenty of airspeed. 🦅 Experienced pilots quickly recognize which collapse is violent and which is manageable, so they don't bother stopping an easy collapse too quickly. Instead, they let it turn the glider slightly, perhaps about 45⁰, in order to regain airspeed. Remember that airspeed equals higher maneuverability and braking efficiency, as they are aerodynamic controls, which depend on the square of the velocity (V²). Good airspeed also means higher internal pressure in the canopy, leading to a faster collapse recovery. After controlling the glider's heading and ensuring it has enough airspeed and the situation is stable, only then do we proceed with recovering the canopy. Normally, a collapse self-recovers – as the airflow from below pops it open. If the collapse remains, 1-2 sharp brake pumps on the collapsed side will usually help pop it open quickly. Again, make sure you have enough airspeed first before making any braking maneuvers. 🔄 IF THE COLLAPSE IS BIG, counter weight-shifting might not be enough to prevent a sharp turn, requiring additional intervention with the opposite brake (the uncollapsed side). In this case, the pilot should release the outside brake and let the wing turn momentarily while pumping the inner brake 2-3 times to clear the collapse. If the glider turns too sharply, the pilot aborts the recovery with the inner brake and stops the turn from deepening using the outside brake. Through a sequence of inner and outside brake inputs, the pilot tries to recover the collapse, preventing airspeed from increasing or decreasing too much, while always keeping an eye on the remaining altitude above the ground.
🪢 If you get a CRAVAT – the canopy caught in the lines. The pilot then needs to locate the STABILO LINE (wingtip line), which starts from the outermost wing edge, ends at the "B" or "C" riser, and has a distinct color. Do not confuse it with the outermost "A" line used for "Big Ears". During an asymmetric collapse, the wingtip folds first and dives between the lines. Therefore, pulling the stabilo line is an effective way to clear a cravat. Some more complex cravats may require pulling other adjacent lines. Once again, make sure you have enough airspeed first before performing any maneuvers with the canopy. Some cravats can be quite stubborn to clear; the thin lines can get snagged on the plastic rods at the leading edge. The last resort to clear a stubborn cravat is to stall the glider. It acts like a "reset" button, generating airflow from below as well as violent movement of the wingtips. Of course, stalling the glider to clear a cravat should only be done at high altitude and by experts. Fortunately, nasty collapses and stubborn cravats mostly occur on high "aspect ratio" "Sport class" wings and are very rare on beginner or intermediate canopies. 🪂 If a collapse and its resulting cravat are too large and about half the wing remains collapsed, this can be an unstable situation with a very thin line between a spin and a spiral. Throwing the reserve parachute is the best solution. Especially if the surrounding air is not calm enough for further recovery attempts. Do not forget to monitor your altitude while you are busy managing the canopy. Give yourself enough time, speed, and space to deploy the reserve parachute: to find the handle, pull it out, and throw the reserve into clear airspace, wait for it to open, disable the main canopy so it doesn't tangle with the reserve, and prepare your body posture for a Parachute Landing Fall (PLF).
🎓 Practice and Simulation (SIV)
Sounds scary, right? That is why pilots should practice collapses and be prepared. In the basic paragliding course at Mebayluon, students learn how to execute "Big Ears", which is essentially a 30% collapse on each wingtip. An essential part of the EN certification test for paragliders is simulating a 50% collapse. For example, an EN-A canopy self-recovers completely, turning no more than 90⁰ without significant altitude loss. In Mebayluon’s "Active Flying" course, we do the same – simulating a 50% collapse by pulling down the "A" riser on one side. This is done with an EN-A glider, at an altitude of 500 meters over a forest, in calm air, under radio supervision by an instructor on the ground. ⚙️ When the student flies over the designated area, they grab all the "A" lines on one side and pull them down decisively and forcefully. Half of the glider will collapse and turn no more than 90⁰; it will self-recover just like in the certification test. The action of grabbing the "A" lines, say on the right, includes the "A" line used for "Big Ears", which is usually a separate "A" line on most beginner gliders. Reach as high as possible; the right brake handle remains in the right hand. The pilot visually checks to ensure they are actually holding all the "A" lines connected to the leading edge of the right half of the glider. Grip firmly. Pull down decisively and hard, like a hammer strike. Most of the glider's load is concentrated around the "A" lines, so it requires a hard pull to overcome the 20 kg of aerodynamic force there. At the end of the pull, at the lowest possible hand position, the pilot releases all the "A" lines and brings their hand back to the normal position, still holding the right brake. The collapsed wing will turn about 45⁰ to the right, lose about 50 meters of altitude, and self-recover. 🏋️ The next exercise is simulating a 50% collapse but counter-steering with weight-shift, to see how it works. The subsequent exercise is simulating a 50% collapse and counter-steering by pulling just enough outside brake, combined with a neutral body posture. Applying the outside brake must be cautious, just enough to counter the turn. If the glider turns in the opposite direction of the collapse, it means you are braking too much. The easiest exercise is exactly what we do in real flying – stopping the turn by combining both counter weight-shifting and applying the brakes. ⚠️ The next sequence of exercises is simulating a 50% collapse and holding the "A" riser down after the initial decisive pull. Counter weight-shift in the opposite direction to prevent the glider from turning due to the collapse. This mimics a 50% cravat situation where the glider remains collapsed. Return your body to a neutral position to observe what happens next. Also try the "wrong" weight-shift towards the collapsed side, but be ready to release the collapse and stop the turn with the outside brake if the canopy enters a spiral. There have been fatal accidents caused by inexperienced pilots flying large seated harnesses, where a sudden one-sided collapse pulled the pilot's body weight onto the collapsed side of the harness. This "wrong" weight-shift aggravated the collapse and locked the glider into an aggressive spiral, freezing the pilot in panic and potentially causing unconsciousness due to high G-forces. 🏎️ Simulated collapse exercises using the decisive pull and release of the "A" riser at the lowest hand position can be made more realistic by flying faster using the speed bar. This reduces the angle of attack and pushes the glider into a negative angle of attack when it collapses. The high speed also makes the collapse more aggressive. Collapses on speed bar are part of the EN certification and real-world flying. Asymmetric collapse simulations should be performed at a safe altitude, a minimum of 200 meters above the ground for the safest exercises and higher for riskier ones. It is best to perform them over water, but over a dense forest is also fine as it can be softer than water upon impact. Pilots are recommended to repeat these exercises with every new wing they own. 🏎️ Some older competition wings have very aggressive reactions, especially to large 70-80% collapses. The uncollapsed side can surge and turn astonishingly fast, spinning the glider, twisting the risers several times, and completely locking the brakes and weight-shifting, or locking them in the wrong position. The pilot's biggest dilemma in these cases is whether to pull the outside brake extremely fast to stop the flying side's surge, or to grab and push the two risers apart in an attempt to prevent line twists. In any case, the pilot should tuck their body and legs in, especially if they are flying a pod harness. An upright body posture has a smaller moment of inertia than a supine position and it helps the body follow the spinning motion of the glider, minimizing the risk of line twists. If the line twists occur at a low altitude and if combined with a cravat or spiral, the reserve parachute might be the only solution. If the twists happen at a higher altitude but the glider continues to fly relatively normally, the pilot can grab the risers tightly and pry them apart. Though slow, this can untwist the lines. Line twists also occur during reverse launches in strong, gusty wind conditions. 🛡️ Newer glider models with less over-reactive profiles, like the "shark nose" design, are less sensitive to inductive ability and generally do not surge forward as aggressively, nor do they cause such violent swings, spirals, or twists. After a collapse, they may sink longer with a greater loss of altitude and may take more time to recover. There are many cases where a pilot suffers a 50% collapse that pushes them into a violent swing, spiral, line twist, or cravat. They rush to throw the reserve and then, surprisingly, the canopy self-recovers before, during, or after the reserve opens. This does not mean they made the wrong decision. Sometimes the self-recovery is thanks to the stabilizing effect of the reserve, as its drag counteracts and neutralizes any rapid movement or rotation. But sometimes, the situation wasn't as bad as it initially seemed. Usually, it gets bad to a certain point and maintains a bad but stable state, giving the pilot a chance to intervene. Paragliding is full of miraculous self-recoveries right before hitting the ground. But do not rely on them, and do not panic, especially if you have the time to try one method or another.
🛡️ FRONTAL COLLAPSE / TUCK
A frontal collapse, also known as a tuck, is a symmetrical collapse of the entire leading edge. Like an asymmetric collapse, it occurs when the glider suddenly enters a massive area of sinking air, or when the canopy surges forward sharply, reaching negative angles of attack that meet a downward airflow. The self-acceleration generated by inductive ability can be caused by external conditions or poor piloting skills. The idea of simulating a frontal collapse seems scarier to beginner pilots, who think that collapsing the entire canopy is worse than a half-wing collapse. However, a frontal collapse is safer than an asymmetric collapse, which can throw the pilot into a violent swing or a deep spiral. A frontal collapse self-recovers completely, whereas a 50% asymmetric collapse often requires intervention through counter weight-shifting and braking. 📋 The frontal collapse is part of the EN certification, where the test pilot pulls all the "A" risers down decisively and forcefully, then releases them at the lowest hand position to check how fast the glider self-recovers, how much altitude it loses, if there are any side effects or complications, etc. Regardless of whether a frontal collapse is simulated by the pilot or caused by external turbulence, it goes through the following processes: 1️⃣ The leading edge folds down due to a downward airflow or due to an "A" riser pull from below; 2️⃣ Since the paraglider is still flying at a speed of 38 km/h, the collapsed leading edge hits this airflow and folds backward; 3️⃣ The collapse creates massive drag and the entire canopy falls back, while the pilot's body continues moving forward due to inertia; 4️⃣ The pendulum effect underneath swings the pilot back directly below the canopy; 5️⃣ Right from the onset of the collapse, the deformed wing profile completely stops generating lift and the glider drops; 6️⃣ The deformed canopy still acts like a drag parachute, slowing down the fall; 7️⃣ The airflow from below blows and pushes open the folded leading edge, eventually popping it out; 8️⃣ The drag-parachute-like fall still generates a lot of airflow from below, and when the leading edge opens, it suddenly triggers its inductive ability, making the canopy surge forward; 9️⃣ After a few dampening oscillations, the pendulum effect underneath will completely restore normal forward gliding flight.
🛑 Like an asymmetric collapse, the development of a frontal collapse can be mitigated by an immediate brake pull. This deforms the trailing edge, pushing the air inside it towards the leading edge, increasing the pressure there. If the frontal collapse is caused by suddenly entering sinking air, the collapse happens extremely fast, like a striking cobra, so the pilot's reaction must also be fast. Reaction speed is more important than brake force. If the collapse is caused by a massive forward surge, the pilot will have more time to react and they can adjust the amount of brake more precisely. Too little brake lets the collapse get bigger; too much brake stalls the glider, and both result in more altitude loss. Just the right amount of brake will minimize altitude loss, ensuring the fastest recovery and fewest side effects.
⚠️ A frontal collapse can be accompanied by certain complications
🛑 A classic complication is the horseshoe frontal collapse. The central part of the canopy is designed with a lower angle of attack than the wingtips, which generate lateral force to keep the canopy spread across its wingspan. When a frontal collapse occurs, the wingtips might remain intact, still flying at a positive angle of attack, while the center section collapses heavily and folds back, forming a horseshoe shape. The glider drops rapidly and the airflow from below feeds the inductive ability of the wingtips, causing them to surge forward. Because this rarely happens symmetrically, the more active wingtip might turn inward and mess up the rest of the canopy. A quick pull on both brakes usually stops the wingtips from surging. If the wingtips surge and turn inward symmetrically, they will slap together in front of the center of the glider, creating the classic horseshoe shape. Horseshoe frontal collapses look harmless, even funny, but they should not be underestimated as they can lead to massive cravats, especially on high aspect ratio sport wings in turbulent conditions. 🚬 Some frontal collapses may not just collapse and fold the leading edge, but even roll it backward like a cigarette. A timely brake pull will stop this and help unroll the leading edge. ⚖️ Another variation is when the leading edge folds back and stays there, pinned by the very airflow from below that is supposed to be helpful. Once again, a decisive jab on the brakes will break the equilibrium, allowing the airflow to separate the folded leading edge from the bottom surface of the canopy. 🛑 The recovery process of a frontal collapse goes through a temporary stall phase, which can turn into a deep stall (parachute stall), with the canopy perfectly open right above the pilot's head. This has happened even with EN-A beginner wings, but it is more likely to happen with sport gliders featuring thin leading edges and modern shark nose designs. Other contributing factors include: a wet canopy surface from flying in the rain, surrounding sinking air, an old porous canopy (permeable) with out-of-tune lines. Pushing the speed bar or pulling the "A" risers by hand often helps the canopy "bite" into the wind again, but these still take time and cost a significant amount of altitude. Another method to handle the canopy entering a deep stall is to forcefully yank both brakes. This maneuver pulls the canopy backward, like in a full stall, and also swings the pilot's body backward. Then, the pilot uses this pendulum swing and quickly releases both brakes, just like in a pitching exercise, to let the glider dive forward aggressively. At that point, hopefully, the glider regains its operational angle of attack range, "bites" the wind, and starts flying again. A paraglider's inductive ability starts working when it exceeds a certain angle of attack, and it also has a specific angle of attack range where it performs best. 💥 Some frontal collapse recoveries can be quite aggressive, due to strong inductive ability, causing a secondary frontal collapse if the initial surge is not stopped in time with the brakes. Such strong inductive conditions usually happen when entering a thermal and immediately exiting it. The strong upward airflow fully charges the inductive ability and makes the canopy surge forward, rotating it around the pilot. If this surge coincides with exiting the thermal, the sinking air on the other side, the wind gradient, or perhaps a rotor will accelerate the surge. It can go fast and far, exceeding the normal movements we practice in pitching exercises. The canopy can surge forward, even diving below the horizon, demanding full brakes, which can stall the canopy in the classic reverse horseshoe shape. If the pulling and releasing of the brakes is timed well, the pilot will swing back under the canopy, while the glider starts flying again as if nothing happened. ⚖️ Sometimes, these massive surges can be slightly asymmetrical and require corresponding asymmetrical braking inputs to restore the symmetry of the movement. For example, the left brake should be pulled 90% and held for 1.5 seconds, while the right brake is pulled 70% and held for 1 second. The pitching control exercise with continuous oscillations while performing a 360⁰ turn is particularly useful for this scenario.